Understanding Heurist 2026 Vsn 7
End-user manual for the Heurist academic knowledge management platform. 2026 (version 7).
PLEASE NOTE, THIS IS A WORK IN PROGRESS and is still being actively developed.
- Ch 01: Overview
- Ch 02: Getting started with Heurist
- Ch 03: Basic structuring concepts
- Ch 04: Data entry
- Ch 05: Modifying record structure & connections
- Ch 06 : Populating the database (import, lookup & synchronisation)
- Ch 06: Populating the database
- Ch 06a: Importing and matching references (worked example)
- Ch 06b: IIIF Manifests, Canvases and Annotations
- Ch 06c: Omeka-S to Heurist
- Ch 07: Using the database (find, filter & view
- Ch 08 : Result sets, manipulation, custom reports and visualisation
- Ch 8: Result Views and Export
- 8a: Getting started with custom reports
- 8b: Custom reports - Advanced functions
- 8c : Mapping & Visualisation
- 8d: Summary : Mapping and visualisation
- 8e: Using IIIF - manifests, canvases and annotations
- 8a bis: Custom reports OLD VERSION
- Ch 09: Publishing, websites, URLS, PIDs and archiving
- 09a: Publishing websites and database archiving
- 09b: Domains, URLs, PIDs and custom website templates
- Ch 10: Adminstration of databases
- Ch 11: Basic server management
- Ch 07a : Recoding and verification
Ch 01: Overview
Commenced: 12 Jan 2024 Documentation rédigée le 07/11/2025 par Barbara Bonazzi mise à jour le 03/03/2026 par Barbara Bonazzi relu le 09/03/2025 par Maxine
Assisted by: Pierre-Yves Saunier
1. What is Heurist ?
Heurist website : https://heurist.huma-num.fr/heurist/startup/
Specific reasons for using Heurist:
- Developed by and for Humanities research in collaboration with hundreds of research projects
- Not tied to any specific project or type of data, handles a broad range of Humanities projects*
- Entrusts development and management of databases to the user rather than the IT priesthood
- Quick set up of complex interlinked databases typical of the Humanities, without programming
- Iterative changes to database structure without corrupting or rebuilding existing data
- Wide range of data import, export and analysis/visualisation functions
- Stable CMS web sites generated and stored as an integral part of the database
- Free and Open Source on GitHub, all data rely on MySQL in a comprehensively documented format
- Generates instant archive packages in XML and standard SQL with internal documentation
- Designed for low cost centralized maintenance shared by many projects
- Humanities-knowledgeable core team and community of users
* No one system can do everything. Heurist is a generic system designed around the needs of a broad cohort of Humanities projects needing rich interlinked data and metadata databases. It cannot be expected to provide all the domain-specific features of tools such as text analysis, on-site archaeological recording or spatial analysis, but it may still provide a means of collecting and managing data which is later fed into specific analysis tools such as R, QGis, Gephi, TAPOR etc. *
2. Learning Resources
This document aims to give a reasonably concise but comprehensive narrative of Heurist functionality in an order that corresponds as far as possible with a typical engagement with Heurist. It cross-references to the project website, training materials and pages in the online Help system, all of which give more detailed information and are organised in menu order.
2.1 Website
There are a range of learning resources, FAQs and links to exemplar projects on the Heurist Network website:

2.2 Online help
Our main online help, delivered from a Heurist database via the Heurist CMS, is available here.

2.3 Tutorial videos
A series of 8 (as at Jan 2024) tutorial videos have been created by Dr Michael Falk. These are available in the Learn section of the Heurist Network website here.
The videos are accompanied by a text and annotated images which describes the steps to follow through using training data. These texts and images have been used as a basis for some sections of the current document.

2.4 Exemplary websites
Annotated examples of Heurist-generated websites are on the Featured Projects page.

Additional projects can be accessed through the Projects Search page (Exemplar Projects)
2.5 FAQ
The FAQ gathers a set of answers to commonly asked questions. It was created pre 2020, and would no longer cover all the frequently asked questions, but the answers are generally still valid.
Ch 02: Getting started with Heurist
Documentation rédigée le 07/11/2025 par Barbara Bonazzi, mise à jour le 03/03/2026 par Barbara Bonazzi, relecture le 26/03/2026 par Bruno Morandière
1. Steps to using Heurist
The following is a typical workflow for a new user managing their own database:

1.1 Register as a user
Register via Heurist website.

New users should click on the Register button and fill in the registration form:

Note 1: Server administrators may require registration to be approved by them, in which case they receive an email requiring them to approve your registration and there may be a delay. Otherwise it is immediate.
Note 2: Registration is specific to a server; you will need separate registrations if you have databases on more than one server. Although your credentials (user name and password) are generally copied to each new database, the databases are independent, so you can edit them and have different credentials for different databases.
1.2 Create database
1.2.1 Tutorial
Please see the video tutorial: https://www.youtube.com/watch?v=-lRjmkpQh4g
1.2.2 After user registration: naming the database
Once you have filled in the registration form above you will be offered the opportunity to create a new database using the login information entered in the registration form.

The prefix (editable) identifies the owner but may be changed. We recommend retaining this prefix and using it for all your databases, so they appear together in the list of databases. Please keep database names concise and informative about the contents. Spaces, apostrophes and other special characters are not permitted in the database name. For spaces use underscores ( _ ). Database names are case sensitive. ‘Lit_study’ and ‘lit_study’ are different databases. When you click on “Create Database”, you will become the owner of this database (user # 2) and the administrator of the Database Owners group (Group # 1), with all rights on the database and content.
1.2.3 From within a Heurist database
If you already have a Heurist database, you can create a new database with Admin > New.

For the naming conventions, see above.
When you click “Create Database”, you will be the owner of the new database (user # 2) and the administrator of the Database Owners group (Group # 1), with all rights on the database and content, even if you were not the owner of the database you are using to do this. Your login will be the same as on that database.
1.2.4 Enter the database

Click on Get Started to open the new database and login with the user name / password you entered .
Some databases may show additional fuctions such as institutional logins and the ability to request a login (which can be set in Admin > Properties).

We suggest bookmarking the database so you can open it again easily (otherwise you need to search for it on the server through https://heuristref.net or https://heurist.huma-num.fr).
2. Heurist database: structure and interface
When you first open your database, you will see the Database Overview (it will not of course include your logo and description of the database - we encourage you to enter these later so that your database is well documented).
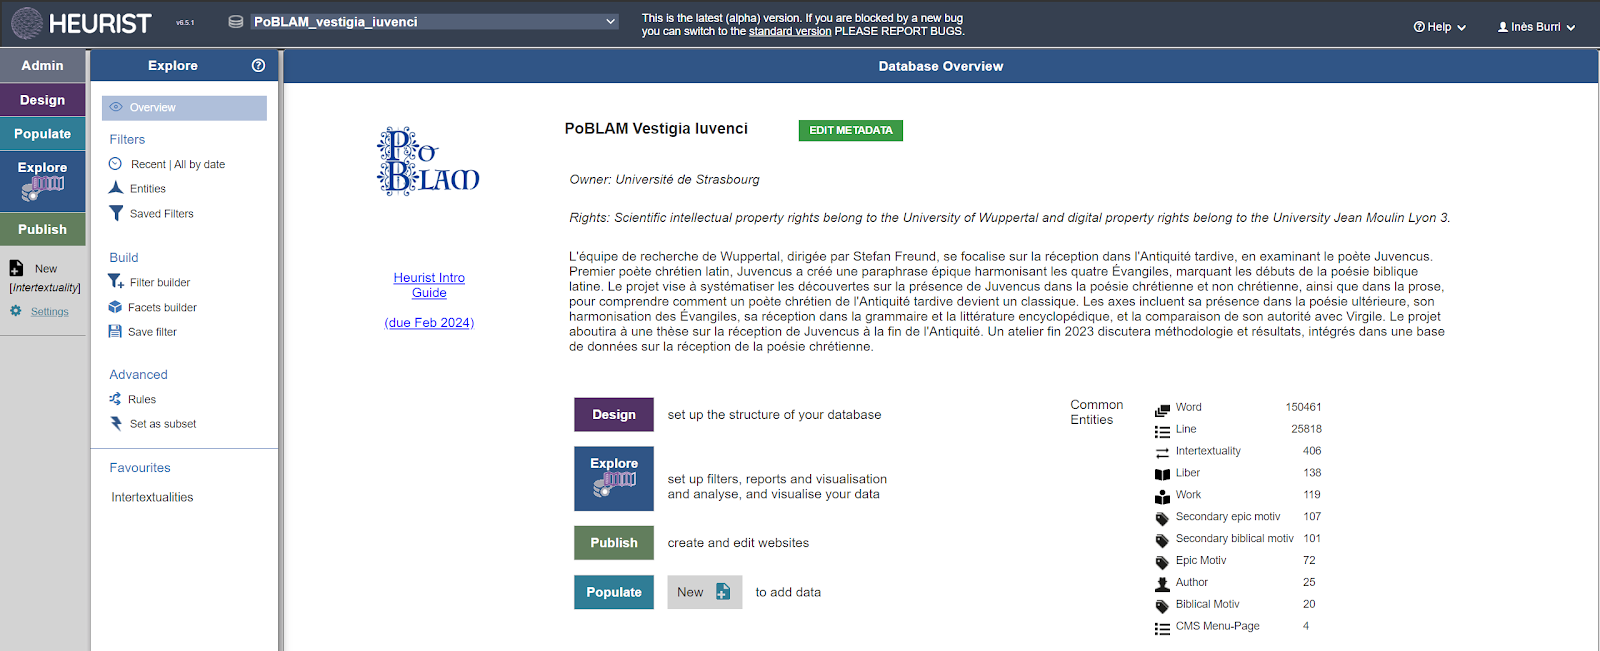
It can be closed by selecting any of the menu options and reopened via Explore > Overview.
----------------------
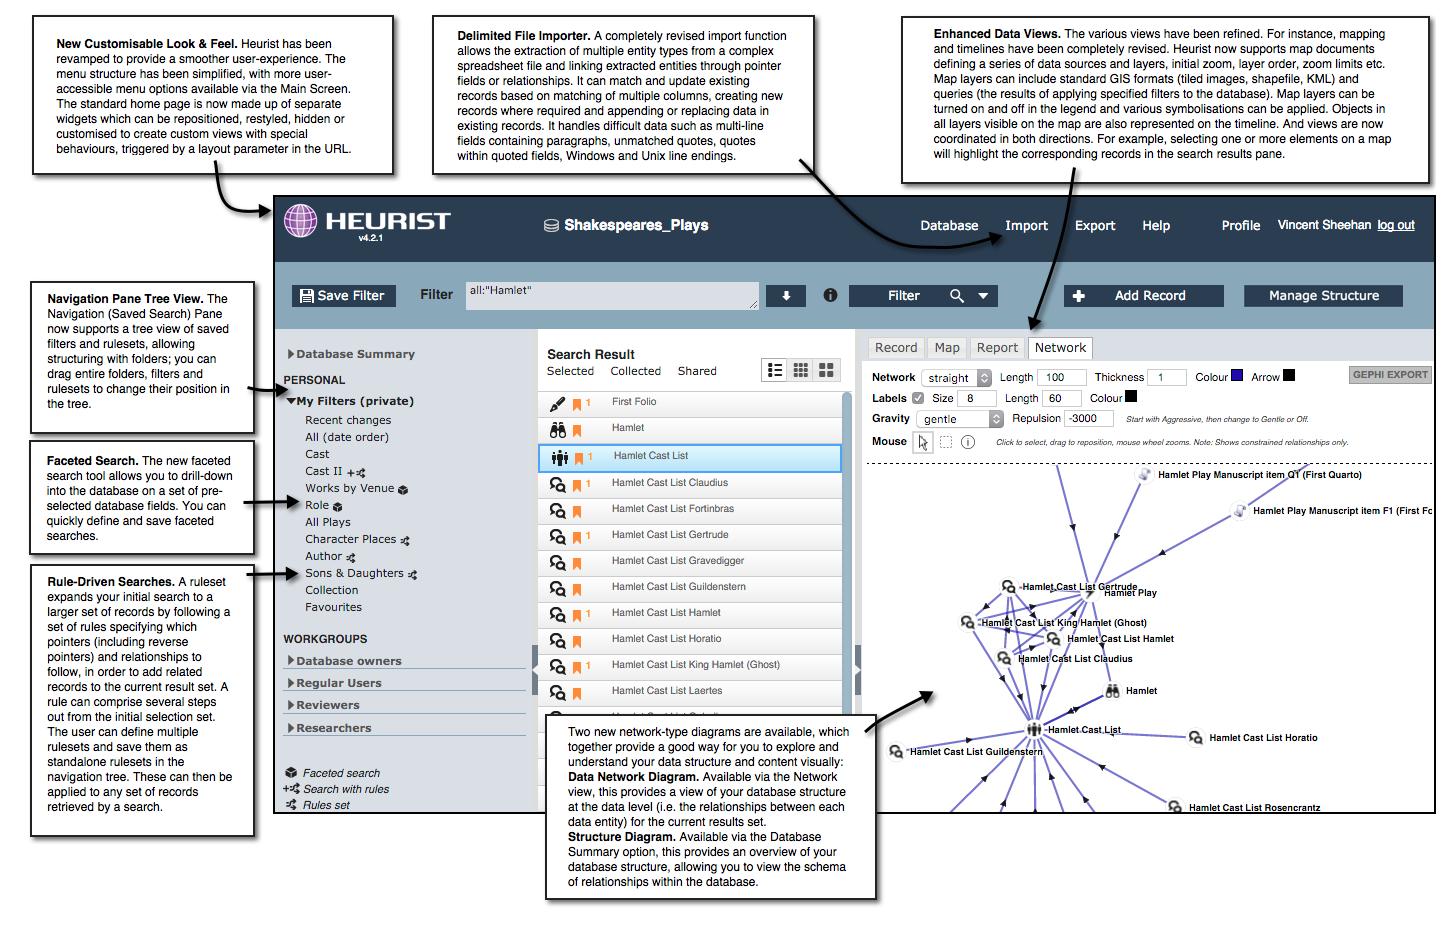
Heurist Version 4 (from ~2016) Explore page showing the functionality of different parts of the page
Although outdated, this is still a useful summary of functions
@todo: redo this diagram with Vsn 6 interface
2.1 Predefined Structures (Record types)
All new databases contain by default predefined structures so that you can enjoy an initial fully-functional and significantly useful database in minutes (rather than days to months). We will show how this works later.
Nearly all the pre-defined structures can be freely modified at any time. You can remove things you don't want, add new elements and change existing ones, directly while editing the data. Heurist is immensely flexible and "iterative" - you don't have to take all the decisions at the start, database structure can grow organically as you start to understand your data or publication needs, or extend your project.
The elements defined include:
- 45 well-structured entity types which are either used in many databases eg. Person, Organisation, Place, Site, Structure, Document, Interview, Event, Life event, Story element, Media, or have specific functions eg. mapping and timeline functions and the creation of websites.
- 25 correctly structured bibliographic entity types which can be used to create a bibliography but are more usefully used for synchronisation with the Zotero bibliography manager.
- 300 'base fields' which can be adapted for a wide variety of uses from names to categorisation, handling media and geographic data, fuzzy dates and connections between records.
- 75 populated vocabularies with several thousand terms, including standard vocabularies such as BIBO, BIO, DCMI-TERMS, DCMI-TYPES, DOAP, FOAF, MUSIC, RDF AND SKOS including semantic references.
To see the existing structures, click on the Design menu (purple), then Record types and select, eg., the second group People and Organisations (the first group is an empty group as a convenience to hold the types you plan to use most often).

DON'T PANIC! Some people panic because their database is already full of things they (think they) don't want. To simplify the database you may drag the things you don't want into the Trash (they will still be there if you later decide you need them, and they have little or no effect on the performance of the system).
2.2 Tip: Multiple tabs
It's perfectly OK to open more than one tab on the same database, or more than one database in different tabs. This can be particularly useful when one wants to carry out modifications while doing searches in another window or to lookup information in another database. It's also useful for modifying a website design while fixing errors spotted in the database.
Note however that there is no automatic update of database structure between separate tabs, so it may be necessary to reload one or other of the tabs if structural modifications have been made eg. adding new fields or terms.
3. Main Menus overview
The principal features of Heurist are accessed through a standard menu/sub-menu layout on the left, and one or two panels on the right in which the menu functions are performed. Each of the menu entries on the left opens a sub-menu of functions. We will explore these in the order Admin – Design – Populate – Explore – Publish as this represents a logical workflow (even though most users will go to and from between them).


3.1 Design
Use this to manage your database, including access to Standard Administration tools (depending on your access privileges), such as creating databases, managing users and groups, etc. @todo link to documentation for Design.

3.2 Explore

Explore: Use these tools to create queries, filters, and faceted searches, to gain the most out of your data.
@todo link to documentation for Explore
3.3 Populate
Use these to import data from various formats and export data to various formats. @todo link to documentation for Populate

3.4 Publish
This allows you to publish your data in a variety of formats, including a fully interactive website, as well as a variety of raw data formats such as CSV, JSon, KML, and GEPHI. @todo link to documentation for Publish

3.5 Admin
The Admin > Database menu offers a first set of advanced functionalities and allows you to:

- Open another database
- Create a new database, as explained above.
- Clone the current database
- Rename the current database
- Clear the data in the current database
- Delete the current database (be careful, the deletion is irrevocable!)
- Restore
@todo link to 10. Admin.
The Admin > Manage users menu provides functionalities to organise the collaborative work - see § Collaborative work (Workgroups, Users, roles and permissions below)
4. Collaborative work
4.1 Workgroups and Users
Heurist databases provide support for group work and collaborative projects. There can be several users, organised in different workgroups. Each record is owned by one or several workgroup(s), or by one or several individual user(s), and only these groups and individuals can edit the data within the record.
Individuals are effectively a workgroup of one. They are numbered in sequence with workgroups. Workgroup 2 is the database owner (the person who created the database - the owner can be changed by the owner to another user, see Administration, chapter 10).
Heurist's security model for database access allows you to manage groups and users and their access permissions in a controlled and centralised manner.
A workgroup is any set of users (e.g. department, research unit, project group, discipline group etc.), who need to share resources. Users can be members of several workgroups. In order to share the ability to edit a particular record you and your colleagues must be members of the workgroup which owns the record.
You become a member of a workgroup if you create a new workgroup or if you are added as a member to the workgroup (by an Administrator of the workgroup). Workgroups/users can be added, edited and deleted (except workgroup 1 = Database Managers and User 2 = database owner). Two types of access roles “administrator” or “member” are available in each workgroup. New users can also be added or imported from other existing databases. The person creating a workgroup becomes an Admin of that workgroup and cannot be removed from it.
Database structure can only be modified by administrators in the Database Managers workgroup, although other users can add terms to term fields (dropdowns) during data entry. The following table describes each group and the permissions for each role by group.
Group 1: Database Managers : The Database Managers Group is created by default for all new databases. The database creator is given the unique role of Owner. A database can have only one Owner.
- Administrator
- Add/edit/delete records and field definitions.
- Clone, clear and delete the database.
- Run all database administration utilities.
- Carry out any tasks that the Administrators of individual groups can do (whether or not they are a member of that group).
- For example:
Add, edit and view records specific to any group.
Allocate users to any group (as Administrators or members).
Change record Ownership to any workgroup.
Register the database (only available to the database owner, user #2) - Member
- Being a member of the Database Managers Group confers no special rights; they have the same rights as members of any other group.
As well as having administration rights over this group, Administrators in this group are DBAdmins 'SuperUsers' for any database that uses a particular control table and therefore have DBAdmin rights over Group 0 and all other workgroups.
Group >=2: Workgroups : Any number of additional workgroups can be created. The first of these has ID 2 (the owner of the database), another has ID 3 for all “Other users” and subsequent groups have ID 4+.
- Administrator
- Add or remove members from that workgroup
- Define or remove group tags.
- Carry out other tasks (if any) specific to the group.
- Member
- Make, edit and view all records owned by the workgroup.
- Change workgroup Ownership of a record to another workgroup of which they are a member.
- Find, add and delete workgroup tags to/from records.
- Log into a database that has been restricted to a workgroup of which they are a member.
- Enter records in the workgroup blog.
- Manage Workgroups, such as viewing details for other members of the workgroup, but not adding or removing members.
Group 0: All Users : A notional group consisting of all activated Heurist users in the control table (and by extension everyone who might have access to a Heurist database that references that control table).
- Edit records which do not belong to a specific workgroup (the normal default for new records).
- View data in workgroup-owned records that are marked as viewable outside the workgroup (the normal default for new records).
- Bookmark visible records and create personal data such as tags, comments, reminders and notes, as well as saved searches and publication output.
- Create a database.
- Create a workgroup.
- Run some database administration utilities.
- Export database definitions.
Non-logged-in: The Heurist publication mechanism, designed for rendering Heurist data within public websites, bypasses the need to log in to view certain types of data. To be rendered in published output, the data must not be marked as belonging to a particular workgroup and/or must be marked as viewable outside the workgroup which owns the record. Personal data created by a logged-in user is never viewable through this mechanism, and it does not allow any modification whatsoever of the database.
For advanced functionalities, adding new users, assigning workgroup memberships, importing new users, see Chapter 10 Administration.
4.2 Roles and Permissions
Access to a record is determined by:
- Ownership. This determines who can edit a record. The shared information may only be edited by members of that workgroup.
- View Permissions. This determines who outside the Owner can view a record (i.e. record visibility).
“Access”: the access status of records in the database can be defined:
- at the database level for all new records
- by Record Type
- for each individual Record.
- for specific fields within records of specified Record Types
You can set the Ownership and visibility of a record individually. The default is all database users are Owners (can edit) and any logged in user can view. Ownership and view permissions should only be restricted for records which are private to a workgroup.
@todo-link Ownership and visibility
Viewability (Record is viewable by) can be set to:
Any records you want others to see can be made Viewable. They will not be editable by anyone who is not part of the Owner group - because records are never editable except by their owner(s).
The default access of all new records can be set in the Database properties : Menu Design > Properties, section Behaviour.


5. Useful Functions
If following through the workflow for setting up a database for the first time
you may wish to skip this section and return to it later
- Database Properties
- User preferences
- Visualise the structure of your database
- Help and personal profile menus
- Bugs, suggestions and feature request
5.1 Overview and database properties
Explore > Overview takes you to a summary of your database. This is also shown when you first open the database. The buttons and the list of the commonest entities on this page are clickable.

Design > Properties (or the EDIT METADATA button above) takes you to the Database Properties form.
Basic description The basic information section describes the database, owner and access right

Additional settings
“Synchronisation and indexing”, “Behaviour”, and “Incoming / Outgoing email” on this form allow the setting of a range of behaviours which apply to all users.
Chapter. 3 Basic structuring concepts Two concepts should be mentioned here:
- Access
- Default Access
TO BE CONTINUED @TODO
This determines whether anyone outside your workgroup can see records by default when imported. This can be:
Hidden. Not viewable.
Viewable. Viewable.
Pending. Viewable only if Status is 'Pending'.
Public. Viewable only if Status is 'Public'. :::
5.2 User preferences
5.2.1 Design > My preferences
This function allows one to set up a range of settings which apply to your use of Heurist; they do not affect other users.
*@todo: verify the veracity of the following tip:
As user preferences are stored in your session variables on your web browser, it is important to check the “Keep me logged in for a month” (which is extended each time you log in from the same computer within one month) so that they are remembered.

Most of these settings are fairly self-explanatory, but we will thus explain some of the more obscure settings.
@todo: NEED TO rewrite these
Bookmarklet
This function still exists but we do not recommend using it as it does not pick up highlighted text on https:// pages.
- You can drag the bookmarklet to your browser toolbar.
- It lets you capture the information you highlight in any http:// web page displayed in the browser
(including a bookmarks file and search list, such as Google) and analyse it for bibliographic information.
Mapping
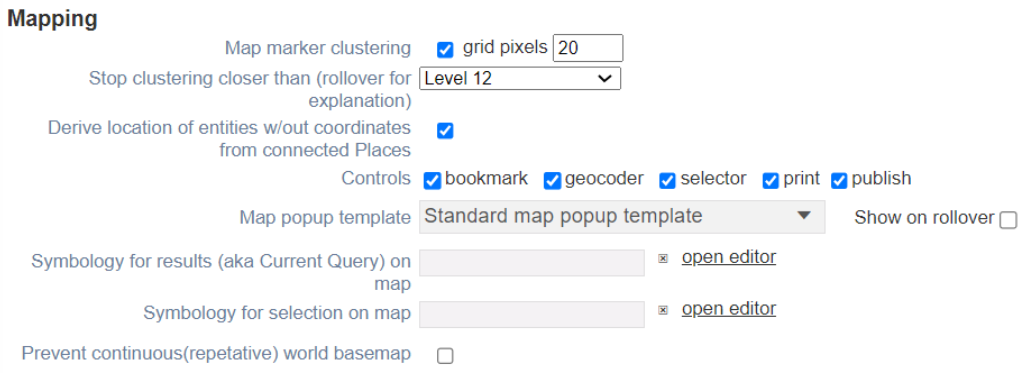
@TODO
Filter
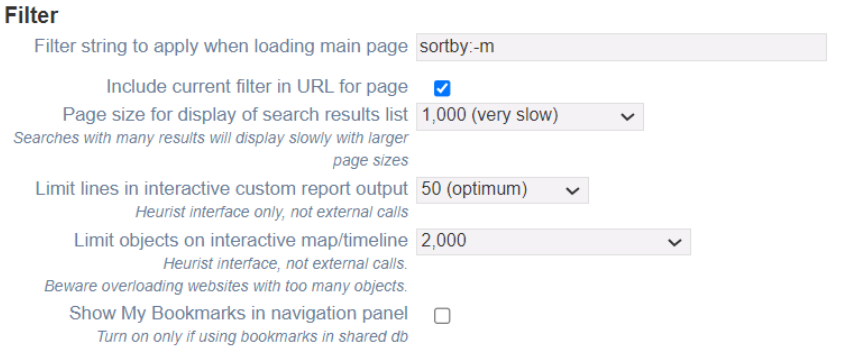
- Heurist filter string to execute when loading the search page.
Add any filter expression to execute when you navigate to the Home Page (you can run a search and copy the syntax here if you wish). The default is to show all records edited within the last week. For example, to show all 'favourite' (or 'favorite') tagged records, use the following syntax: Tag:favourite,favorite - Include current filter in URL for page.
Adds the current search string to the end of the database URL in the browser. - Limits
These settings determine how many records are shown when you run a search, test a report and when you view maps (smaller limits will load quicker). These do not affect published report output. - Prompt for tags when saving records.
Select if you wish to be prompted to add one or more tags to a record when you exit the record and no tags have been set. We recommend that this be selected. - Default to recent records search when editing pointer fields.
When selected, you are shown your most recent record search when entering pointers (rather than all records). - Check for similar records on creation.
Scans your current records for any that are similar to the one you are creating and presents these with a dialog. You can choose one of the presented records or continue to create a new one.
Other
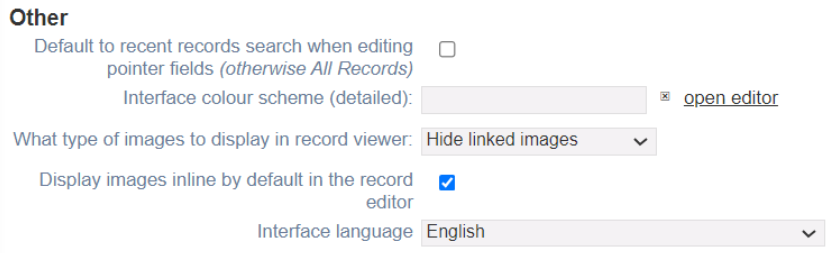
- User interface style / level of user.
Determines the level of help and functionality that is provided based on your expertise. - Interface language.
Select an alternative language for screen UI elements. - Theme.
Select an alternative theme for the Heurist interface. - Show Help text.
Select to show Help prompts on-screen (these affect UI help text only, not field-help). - Show help text for fields.
Select to show Help prompts on data entry forms. - Show My Bookmarks.
Select to show your private bookmarks in the Saved Filters Pane. - Map Marker Clusters.
Where you have a lot of records appearing on a map/location, this option lets you show them as clusters (with record count) instead. Settings are: Grid pixels - the higher the number the greater the separation between clusters. Min count - the minimum number of record needed at a location to form a cluster. For example:
5.3 Visualise database structure
You can view the structure of your database as an interactive network graph. This view is especially useful if you want to understand how different record types in your database are related to one another.
Click ‘Visualise’ in the Design menu to access the network visualisation. To generate the graph, you need to choose which record types to display.
Generally, it is best just to visualise a few record types at a time—the graph can get very busy if you show too many types. To choose which record types to display, click the dropdown at the top left of the visualisation:

Click the ‘show’ checkbox next to each of the record types you are interested in.

To move the visualisation around, click in the whitespace and drag with your mouse. You can also click and drag the displayed record types. Click the ℹ️ icon to view more information about each record. Click the ✏️ icon to modify the record type. If you hover over a connection between two records, you will see information about how these records are connected to one another. For example, in this database a ‘Person’ can be related to a ‘Place’ in three different ways: the Place might be the Person’s place of birth, the Person’s place of death, or it might be a Place where the Person held a political office. Each of these relationships—place of birth, place of death and political office(s)—is a field in the ‘Person’ type, and can be seen in the data entry form for a ‘Person’.

5.3.1 The Explore Overview Screen**
When you log in to or reopen a Heurist database, you are taken to the Explore menu and presented with the overview screen. To edit the database title, description and other information, click ‘edit metadata’.
@todo: The metadata editing has been greatly improved as of late July 2026 and will require re-documenting

5.4 Simple Filters
Heurist comes with some simple filters pre-configured, so that you can do some basic data exploration at the click of a button:
5.4.1 See Recent Changes
You can filter out older records, and just show records that have been entered or edited in the last fortnight. To do this, click ‘recent’ at the top of the Explore menu. This can be useful while you are in the data entry phase of your project, when you want to see the records you’re currently working with.

5.4.2 See All Records
To view all the records in your database in one long list, click ‘All records'

5.4.3 Filter by record type/entity
To see all the records of a particular type, hover over ‘Entities’. This will bring up a list of all the record types currently used by your database (e.g. Place, Person). Click on the record type you are interested in to see all the records of that type.

5.4.4 Finding records quickly
There are several options to quickly find useful sets of records (entities).
- Entities gives immediate access to a search by each of the record types in the database.
- Saved filters has, by default,
- Recent changes (within the last week)
- All (data order).
- Whatever filters you have created and saved.
These are also accessible at all times through the small *Navigate *menu under the top level coloured menus.
Click on Recent changes and edit the string in the filter box (behind the eye symbol) to change week to hours, days, months, years or for more than one and then save as an additional filter.
All (date order) shows the most recently modified records at the top.
5.5 Help menu
Situated at top right of the screen:


HELP (web links, open in new tab)
- Documentation takes you to the online help, which is a searchable version of this user manual.
- Understanding Heurist takes you to this user manual.
- Heurist Network website: the Heurist project website
- Roadmap: a guide to our plans for Heurist development over the next 12 months or so. It is generally updated annually.
- Feature history: a compact list of all the changes made to Heurist month-by-month since 2016. It is generally updated once every 6 – 12 months
CONTACT (popup or email links)
- Bug report / feature request: sends the development team an email with the user’s message and information about the browser in use, the database, the software version and the user’s email address.
- Heurist team: compose an email to the Heurist team (management and support)
- System administrator: compose an email to the administrator of the server running this database
- Acknowledgements: acknowledgements of people, software and graphics used in this project
- About: information about the current version and licencing of this software
5.6 Personal profile menu
Situated at top right of the screen:


- My preferences displays the User preferences form to manage your Heurist environment.
- Manage tags: The Manage Tags option lets you edit and remove all of your tags in one place. Tags are personalised terms created by a Heurist user and can be added when creating or editing a record (one you own or have bookmarked).
To change the tag names, edit them as required and click Update Tags. For example, if you change 'History' to 'Historical Studies', all the bookmarks tagged 'History' will now be tagged 'Historical Studies'.
To replace a tag, click the replace option for that tag, select an alternative tag and click Replace.
To delete a single tag, click the Delete icon for the tag.
To delete multiple tags: select the checkbox for each tag you wish to delete and click Delete Selected Tags.
Remember to click Save Edits when complete
- Manage reminders: The Manage Reminders option lets you view, edit and remove any reminders you have set via the Reminders section in the righthand panel of the data entry form.
To remove a reminder, click the Delete icon next to it.
To edit a reminder, click on the reminder record title.
This opens the Reminder form, where you can change the reminder details.
Remember to click Save Edits when complete
- My user info: displays your user profile for editing, described in detail under Manage Users @todo:link
- Workgroups: displays the workgroups editing form (for workgroups of which you are an administrator), described in detail under Manage Workgroups @todo:link
- Users: displays the form for editing users (if you are a database administrator), described in detail under Manage Users @todo:link
- Import user: allows database administrators to browse to another database and add user profiles from that database to the current database.
- Log out: logs you out of the database and changes to Log in, allowing someone else to log in on this browser.
5.7 Ticket system
Heurist is the product of working with a very large number of projects over a period of two decades. We greatly value feedback about possible improvements, bug reports or just things which annoy you. Please do not hesitate to send us bug reports and feature requests using the ticket system which is available in the top bar of the Heurist interface and in the Help menu.

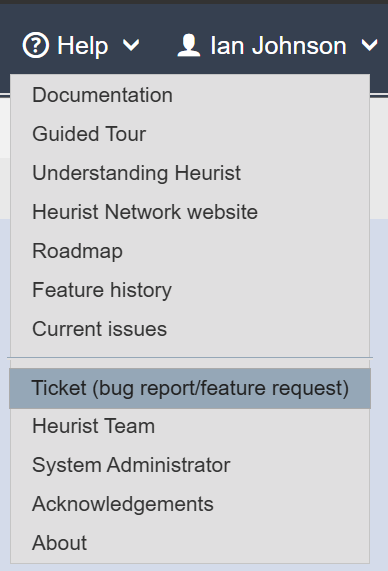

Help > Ticket (bug report / feature request) allows users to report bugs or issues encountered when using Heurist, or send comments, feature requests and enhancements to the Heurist development team (general queries can be sent to the team via the page on Heurist Network Association). There is also a link to report bugs or requests a the top of the data entry form.
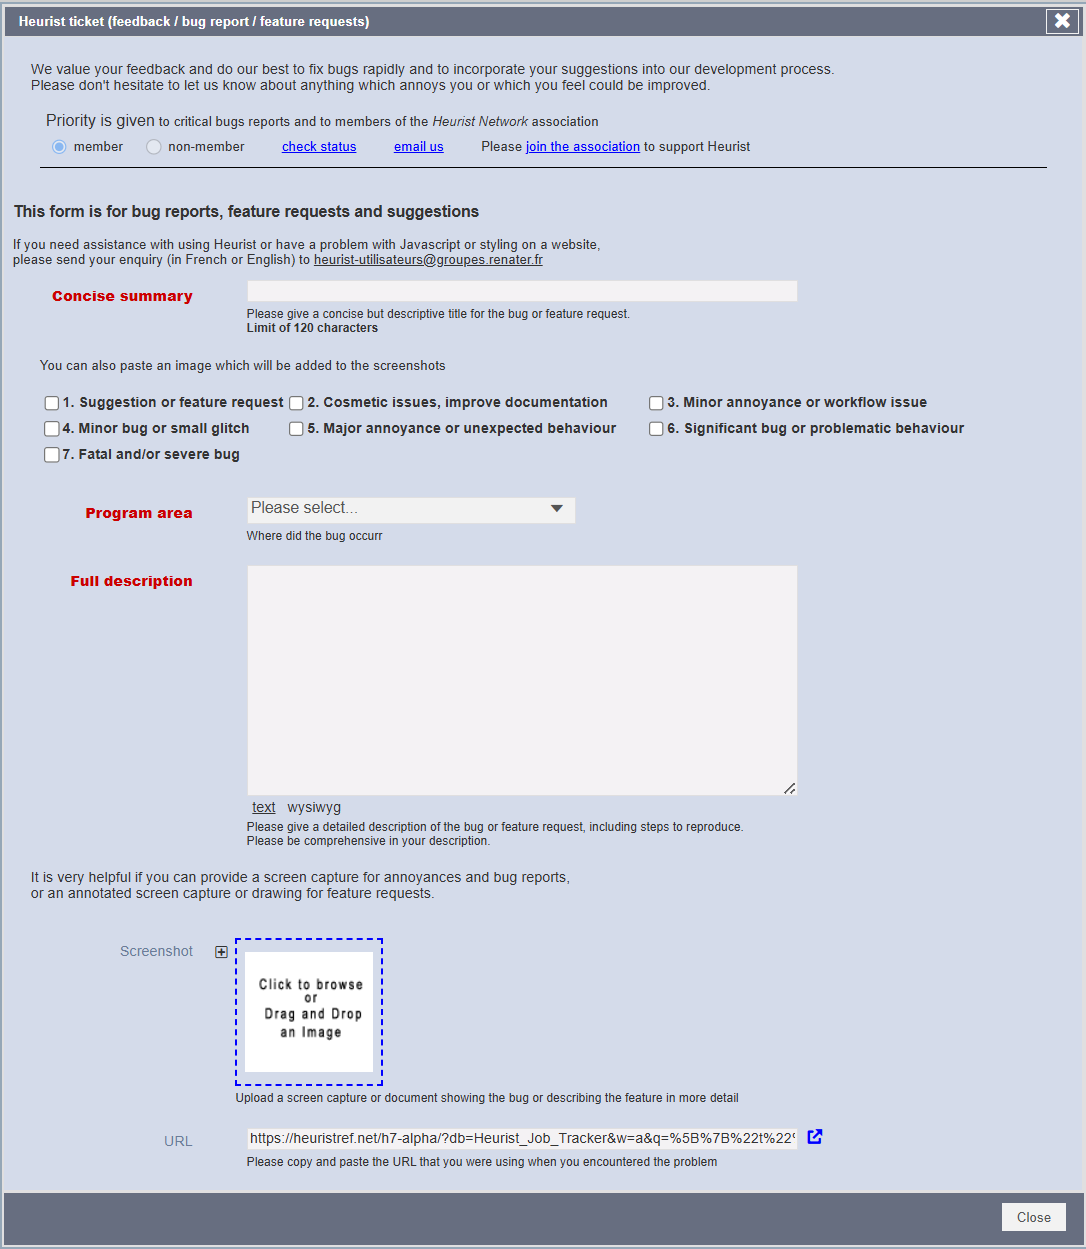
Please provide a screenshot (you can insert two in this form) as this is very helpful in understanding the source of bugs. The function automatically reports the server and database in use, the web browser version and your email address.
You can insert screenshots from the clipboard while editing the text fields with Ctrl-V or Cmd-V (you do not need to click on the image box). To insert a second screenshot, click on the + sign to get a second image box before inserting
6. Modelling your Data
There are several different kinds of database, but the most widely used is the relational database. You will be familiar with relational databases if you have ever worked with Microsoft Access, FileMaker, MySQL or Postgres.
In a relational database, the data is organised into tables. In a table, each row represents one record, and each column represents an attribute. Every row of the table has exactly the same structure, which any Humanist will immediately recognise as somewhat out-of-sync with the nature of Humanities data! Here is an example of such a table, to represent a CD Collection:
ID | Artist | CD |
|---|---|---|
1 | The Beatles | Abbey Road |
2 | Oumou Sangaré | Mogoya |
3 | Hariprasad Chaurasia | Jugalbandi |
This way of representing data is ideal for data that is tightly structured, highly standardised, voluminous and constantly changing, such as transaction records in a bank. But it is difficult to use in Humanities research. To use a relational database, you need to carefully design each table in advance. If you are trying to represent a complex entity such as a person, artwork, or historical event, it may be necessary to create many tables just to describe individuals. If you want to change the database, you need to edit the 'schema' that defines all the tables. Such technology is not suited to Humanities research, where data is loosely structured, typically low-volume, has many missing values and is characterised by many connections between entities. For this reason, Heurist has elements of both a relational database and a 'graph’ database, and broadly speaking is what is called a NoSQL database (although it is built on top of the world’s most widely used Open Source relational database, MySQL).
You don't need to worry about tables and columns in a Heurist database. Instead, you decide what kinds of entities or record types you need, what properties or fields they need, and what record pointers or relationships should exist between them.
A Heurist database is best understood by a diagram which identifies the different entities in the database, and shows how they are related. You can actually generate such a diagram of your database using the Visualise tool.

Diagram of a Graph Database (Wikimedia Commons)
6.1 Iterative modelling
Heurist makes it easy to model your data in this way. Unlike most database systems which require extensive advance analysis to set up a data model and work out all the connections, lookups, fields etc. (since everything must be defined in advance to avoid expensive and delaying reworking of the structure and programming), we strongly encourage a highly iterative approach in which one only sketches the broad outline and the detail is filled in as you go along. A simple high-level overview model can often be set up in a matter of hours, or even minutes. Let's take the case of a study of travel and trade (by ship) between Mexico and the USA in the 19th century.
6.1.1 Break your problem domain up into distinct entities
Start by identifying all the entities which make up your domain: people, organisations, cultural groups, places, events, documents, images, albums, series, compositions/movements, plays/acts/scenes.
Pay particular attention to defining component parts or variants which may need a specific set of descriptors (attributes) such as instances of education or service (described by institution, degree, unit, rank, dates etc.) or variant attributes for different types of structure, object or event. These will typically be modelled using a child record pointer @todo:link.
Entities First we make a list of the entities we are likely to need
Note that Heurist typically refers to these as Record types for historical reasons - when first designed we thought that this term was more familiar to researchers used to MS Access and other databases than the term Entities.
For example you migth make a list like this:
- Ships
- Ports / places
- end (per voyage)
- start,
- port-of-call,
- Voyages
- People
- Organisations
- Roles of people
- passenger
- crewman,
- engineer,
- captain,
- purser,
- navigator,
- pilot,
- Roles of organisations
- receiver
- charterer,
- owner,
- insurer,
- shipper,
- Units of cargo
- Illnesses (events of illness applying to an individual)
- Outbreaks (events of the same illness applying to many individuals on a voyage)
- Epidemics (events of an illness at large in a broader community)
This will take a few minutes, but it is time worth spending. We can add more later if needed.
6.1.2 Define the connections that you expect to see between entities
Heurist makes it very easy to define connections between entities through simple connection fields (Record pointers and Relationship markers) in the data entry forms.
Connections
Then we can think about how these connect
Note that there may be 'edge-cases which are not covered, such as change of ship within one voyage, but one should never make a 'perfect' model; some 'reasonable case' assumptions should be applied which are acceptable because there is noise in the data in any case.
- A voyage is connected to a specific ship
- Voyages are connected from a start port to an end port with a series of intermediate ports
- Voyages are connected to people who have a role over a specified time period (or voyage/voyage segment). Connecting people to the voyage/segment is better than connecting them to the ship, because the ship may participate in many voyages but roles can change.
- Cargo is loaded at one port and unloaded at another
- Illnesses are connected to people with dates of illness
- Outbreaks are connected to a voyage (or segment) with dates and to people who became ill
6.1.3 Define the fields (attributes) that you wish to describe for each entity type
Heurist provides all the normal field types plus some less common ones, such as fuzzy dates, geographic objects, file/image fields (local, remote, media streams and IIIF) and the previously mentioned connection fields.
Attributes
Finally we can consider the basic attributes of these entities (the may be others which apply to specific projects and can be added later):
- Ships have
- tonnage, etc.
- name,
- type,
- Voyages have
- possibly a name.
- start date
- end date,
- Ports have
- location
- name
- People have
- Some may vary across time/voyage/segement.
- gender,
- name,
- profession etc.
- Illnesses have
- outcome and other possible information eg. treatments
- name,
- start and end date,
- Outbreaks have
- other info such as notes.
- name of illness,
- start and end dates,
- Ships have
We can now start creating our database with no further work. It is probably a good idea to draw up a simple entity-relation diagram such as the one below, but it is not even necessary. Once the database has been created you can get Heurist to show an entity=relationship diagram with Design > Record types > Visualise.
@todo: Insert the voyaging entity-relationship type
6.2 General pointers for good database design
We recommend re-using generic (base) field types (e.g. Name/Title, Primary/preferred image, Short Summary, Start date, end date etc.) and to reuse the same base field type for similar purposes in different record types. This reduces complexity since you are using one field definition for several record types in place of one for each. It also promotes equivalence between similar fields in different record types.
For example, the title of a book, a chapter, a journal article or a painting, the name of a building, a historical site, a person or an organisation, can all use the same field definition and are generally used as a main component of the record’s constructed title @todo link.
Similarly, primary image, short textual summaries, geographic locations, attached files, URLs and dates typically use the same field definition for which special handling has been developed (e.g. the display of primary images in record views, dates in timelines, geographic locations on maps). Even if you do need to create a new field definition, try as far as possible to reuse this between record types, for the same reasons as above.
6.2.1 Iterative design
If you decide to change your data model later you can update the record/field types, without having to rebuild the database or re-enter data. In this way the database can grow as your research progresses. Changing database definitions does not invalidate existing data. There are, however, a few restrictions on changes to your record structures:
- If you remove a field, then the data will no longer be visible in certain views. However the data is never lost (unless you check an additional box asking to have the data removed), and reinstating the base field (which cannot be deleted if there is data associated with it) will reinstate the data.
- Only certain changes of field type are possible. For instance, you cannot convert text fields directly to term fields (controlled lists). To do so you will need to export a CSV file, create a new (terms) field and reimport the data into the terms field; the values read will create new terms in the vocabulary attached to the field. Overlapping terms may then be combined in the Vocabularies editor.
6.3 Populating the database
Once your database has been created, data can be entered manually through the standard date entry form. They can also be entered in bulk by importing data sets such as spreadsheets (exported as a CSV file), Json or XML (transformed from another data system) or KML (geographic data typically from a GIS or mapping system), from structured or semi-structured data collections, and by harvesting data (e.g. web links, text and emails). Zotero bibliographies can be synchronised into a Heurist database and external databases can be searched to bring in data.
The process of manual data entry will be discussed at the same time as the setup of data structures, since the two can be done together so that you can test out and evolve the structure with real data rather than having to plan everything on paper in advance.
Bulk import of data from spreadsheets and other sources is discussed in chapter 6 - Populating the database.
Ch 03: Basic structuring concepts
Documentation rédigée le 07/11/2025 par Barbara Bonazzi, mise à jour le 03/03/2026 par Barbara Bonazzi
1. Structuring your Database
New databases are pre-populated with a range of useful record (entity) types, fields and vocabularies which shortcuts basic setup.
The existing entity types can be modified to fit your needs, including adding, deleting or modifying fields.
You can add entirely new record types, or import suitable record types from any database that has been registered with the Heurist service.
Functions for modifying the structure of the database and various settings.
Modify
- Record types - add/edit the record (entity) types making up the database
- Vocabularies - add/edit vocabularies and the terms which comprise them
- Base fields - add/edit shared fields which can be reused in many record types
- Browse templates - borrow structural elements from other Heurist databases
- Visualise – visualise record types and relationships between them as a spider diagram
Setup
- My Preferences – set personal preferences relating to the way this database operates
- Properties – set various parameters relating to how this database operates
- Workflow stages– set rules which are applied when a record changes workflow stage.
- External lookups– lookup of external resources already defined or imported by the user
- External repositories – storage and retrieve of external media from an external repository
- Register– register the database with a central index to make it findable
- Shortcuts bar– create a shortcut bar and choose to display below the page header bar
Download
- Structure (XML) - export the complete structure of the database as XML
- Structure (Text) - export structure as an SQL-like dump, primarily for internal use
- Refresh memory - cleans up browser memory; may help fix minor interface problems
1.1. Record types
Record (entity) types are the core of designing an effective database. Each new database comes pre-populated with a lot of record types which crop up in most databases, eg. Person, and record types which need to be structured in a particular way for specific functions, eg. map documents, layers and data sources.
- Record types are divided into groups to reduce mental overload, and the groups can be reordered by dragging.
- Record types you use all the time should be dragged over into a group near the top so that they appear at the top of dropdown lists.
- You can create new groups to organise your concepts.
- You do not need to get rid of record types you don't require, just drag them over into a group towards the end of the list.
Before creating a brand new record type, look to see if you can find something suitable using Browse Templates or consider if you can re-use an existing one already defined in your database. However, don't change the general intent of an existing record. For instance, don't change a Media item record into a Document, even if most of your media items represent documents or a Person into an Animal, even though they may have a name, date of birth, sex etc.
1.2. Vocabularies
Vocabularies organise a set of terms which can be used in the dropdown list for one or many term list fields. Vocabularies can contain links to terms in other vocabularies to allow the construction of new vocabularies without repeating terms - for example, a vocabulary containing a few countries being studied from the full set of world countries which are pre-configured as a vocabulary in all new databases.
Vocabularies can contain hierarchies of terms allowing broader/narrower definition of categories.
Like record types, vocabularies are organised into groups, which can be reordered, and vocabularies can be moved into a different group by drag and drop.
Terms can also be moved between vocabularies with drag and drop, or can be nested below other terms or merged with other terms (in which case all records using the term will be re-assigned to the term with which it has been combined).
Terms are defined by six fields:
- a label (the term itself);
- a description (multi-line text);
- a standard code (for example Munsell Colour code, international country codes);
- a semantic URI (for use in linked data);
- a status (of the term within the database, generally this should be left as Open*);
- an image (allowing illustration of the terms for use by people less familiar with their meaning).
- Status (this field is little used except for lockign some pre-defined terms required by the system)
- Open_ indicates that the record type can be modified or deleted.
- Approved_ indicates a record type which has been carefully developed for general use.
- Reserved-Locked_ indicates a record type which is required by the system and cannot be deleted (this value cannot be selected by users other than the Heurist team).
1.3. Base fields
Base fields are fields which can be reused in many different record types. They are available when adding fields to a record type; the base field type, name, help text, vocabulary and target record types (where applicable) are automatically applied to the field in the record type, but name, help text, requirement and repeatability may be overidden with customised versions for the specific record type.
A new base field is created automatically if one creates a field from scratch rather than using an existing base field.
One will not normally need to edit base fields directly, but this menu item allows direct access when required, for example if one wishes to change the default name or description.
1.4. Browse templates
Heurist has a sophisticated system to allow databases to import structure selectively from any registered database (databases are registered with Design > Setup > Register). This is a powerful way of sharing modeling work and promoting standardisation by encouragement rather than obligation.
The function browses and selects a registered database, opens up a list of any record types not currently in the target database, displays the fields within a record type if required (base fields already in the target are shown in grey), and can then download the record type along with all connected record types, fields, vocabularies and terms required to create a coherent set of data structures for import.
1.5. Visualise
The relationships between record (entity) types in the database can be visualised in the form of a spider diagram. The diagram also shows the number of records for each node (size of circular shaded area around node) and the number of connections (thickness of connecting lines). The connections include record pointer fields and relationship markers, but not free-floating relationships created by creating Relationship records directly (the creation of Relationship records directly is not recommended).
As a diagram of all record types would be far too complex, the record types to be represented are selected from a dropdown list. Gravity can be switched on to create a self-organising diagram, then switched off to allow dragging of nodes to clarify the diagram. Links can also be built between record types by dragging the link icon.
1.6. My Preferences
Personal preferences for this database can be set in the Preferences dialogue. These include startup search, number of records to display per page, the use of clustering on maps and complexity of the map controls. Personal preferences are specific to each database.
The Preferences dialogue also provides a bookmarklet which can be dragged to the browser toolbar and used to grab infromation from a web page and create a web bookmark record in the database. The information which can be grabbed from secure https pages is limited to URL and title, but highlighted text will also be grabbed from non-secure http pages.
1.7. Properties
@todo-link to chapter 10 Admin > Properties
General behavioural parameters of the database can be set through the Properties function. This allows metadata for the database including a description, rights and a representative icon to display in lists, configuration of connections to Zotero libraries, Nakala and mail servers, configuration of lookups to external reference sources, file types to be indexed and specific behaviours relating to place records, user registration and others.
1.8. Workflow stages
When a record changes its workflow stage, the defined rules are applied. This rules apply to changing access restriction, ownership, record visibility or sending an e-mail notification.
1.9. External lookup
Connect with services enabling the lookup of external resources (gazeeter, thesaurus, library catalogue...) from within a data entry form and insert of one or more fields derived from the external resource into the data. They can also be used to provide specialised processing such as predictive setting of keywords based on frequency of usage and matching with external resources.
Some services are already defined (AGHP, BnF Library, ESTC, GeoNames, LRC18C, MPCE, Nakala, Nomisma, and Opentheso). It is also possible to import new services using the template and guidelines provided in the source code. If your developments are likely to be of use to other people, please contribute them to the GitHub repository.
1.10. External repositories
Store and retrieve external resources such as images, documents, video on/from the already defined external repositories.
Planned repositories include DSpace, Flikr, Isidore, MediHAL, Nakala and Zenodo, although only Nakala has been fully developed as of 2026 (contact the Heurist team if you require another repository) . It is also possible to define who can access these resources, e.g. logged-in user, current user or database managers.
1.11. Register
@todo-link
Register the database with the central Heurist index database. This has several functions:
- it allows elements of the structure of the database to be imported into a new database promoting re-use and standardisation;
- it allows XML files exported from any registered database to be imported into any other database by reference to the structure of the source database.
- Last but not least, it attributes a unique ID to the database and thence a unique ID (known as a 'concept code') to every record type, field, vocabulary and term which has been defined within the database. This is particularly useful in defining special behaviours which can operate across databases, in linking data across databases, and in providing a PID redirection system which can reference any element of any database.
1.12. Shortcuts bar
The shortcuts bar appears (optionally) below the page header bar, and can be used to provide quick access to frequently used functions. The dialogue allows addition of functions from a list of common functions, with a user-defined label and icon, and allows the bar to be displayed or hidden (hidden by default for new databases). The bar can also be modified from the gearwheel icon on the left of the bar itself.
1.13. Download > Structure (XML)
The complete structure of the database is downloaded in well documented XML. Record types, fields, vocabularies and terms are identified both by their names and by their concept codes. It is recommended to first register the database (Design > Setup > Register), as this means that the concept codes are unique across all databases and will be carried with the structural elements wherever the data is imported, even if re-exported and imported further down the chain.
1.14. Download > Structure (Text)
This is a specialised legacy format based on SQL insert statements, used for transferring structure between databases. It is unlikely to be useful beyond this application.
2. Defining Record Types
The first task is to organise the entity types (record types) that you wish to use through Design > Record types. The browser serves to organise record types into groups and create new groups and record types. It also allows you to get an overview of the record types available.

2.1 Record type groups
Record types are organised into groups (the third column above). The groups are purely an organising mechanism to help you find your way around a long list of record types. Changing the order or membership will have absolutely no effect on the data in the database. In addition to the standard groups supplied by default, you can create your own groups by clicking on the Add button.

After clicking on the Add button, you can fill in the title and description of the new record type group :

You can also add new record types in a group and move records types between groups simply by dragging them to the group where you want them located. The groups can also be reordered simply by dragging them up and down. They can be renamed and described by clicking the ✏️ icon which appears next to the group name on rollover.
They can be deleted, only if they are empty. You can also drag record types into the Trash group at the bottom if you don’t want to see them. They do not affect performance and can be recovered later by dragging them back out of trash.
IMPORTANT TIP Always organise the record types you use frequently into the first couple of groups of record types. In this way they will appear at the top of any dropdown lists which saves hunting for them further down. A small investment in well-organised groups will make it much easier to pick from lists or find record types when you need to make changes. The same applies to fields and vocabularies.

2.2. Columns in the form
The columns in the image above are generally self-explanatory.
- Count is the number of records of that type.
- Clicking on the magnifying glass in the Filter column will trigger a new browser tab with a search result for the selected record type.
- The plus icon in the Add column will add a new record of the selected type and open the data entry form for it.
- The Show checkbox determines whether the record type is shown in lists in the interface. This may be useful for hiding types you never wish to add individually or search on so that the dropdowns are not cluttered.
- The icon in the Dup (duplicate) column will create a copy of the record type with the same fields – this can be useful where one needs to create several similar record types.
- You can delete record types by dragging them into the Trash group (from which they can later be recovered) or using the dustbin icon in the Del column (permanent deletion). Some record types are protected from permanent deletion (shown by a lock symbol in the Del column) as they have special functions within the system e.g. Place, Person and Organisation and all the Mapping record types. Any record type referenced by another record type is also protected from deletion (shown by a grey dustbin icon), as is any record type for which records exist. Any of these record types may however be dragged into the Trash group (where they continue to exist and from which they can be recovered later).
- ID and ConceptID @todo-link: these are an important feature of Heurist’s design - please see separate explanation below.
- Description: record type description, completed in the description field of the record type. You can configure the interface, choosing which columns you want to display, from the bottom right gear.
2.3. Define new record types
Before defining a new record type definition, check whether a similar record type already exists in the database structure, which can be reused or tailored. We strongly recommend using an existing record type where one exists which is broadly what you need, for example such standard types as Person, Organisation, Place, Media, Structure, Site, Document etc., as well as the existing Bibliographic types which are required for synchronisation with Zotero.
The use of existing record types will save you an awful lot of time and are some guarantee of a coherent structure.
It is important NOT to radically deform the meaning of existing record types, fields and terms. Adding, removing or renamign fields to adapt them to a specific need is OK. But completely changing the sense of a record type, eg. changing a Person record into an Animal record, or a Place into a Building, is coutnerproductuve - it is better to make a new record type if there is not an obvious existing type.
Also consider whether a record structure can be imported from another database located through the Heurist Master Index using the Browse templates function @todo-link. The reuse of database types can save time and add to the overall consistency of databases.
3. Add record types
You may add new record types as required. Some databases will require very few new types, others will require many new types, but always re-use existing types that more or less fit your needs (with some changes to the list of fields recorded).
Tip: if you need to create several similar record types, we recommend creating one type with all required fields then using the Duplicate function (Dup column) to create copies which can be renamed and adapted.
Don’t change an existing record type into something completely different, e.g. changing a Document into a Museum or a Place into an Event, as this will make your database incompatible with other databases which have retained the original meaning, and some record types, e.g. Place and Event, have special behaviours associated with them (display on maps or timelines for example).
Select the group in which you would like the record type created and click the Add button:

You will be encouraged to find an existing record type:

Click Continue and you will first be asked to choose a new icon for the record type. This is a limited list of default icons (which we plan to improve with some more Humanities-appropriate icons) – you may find nothing particularly suitable for a medieval scroll, Greek pottery, wall paintings, a writer or a brutalist structure. Go ahead and choose a reasonable icon (use a different icon for each record type as this will allow you to distinguish them quickly) and then later replace it with an icon from an icon library or one that you create yourself:
These icons provide a starting point. We STRONGLY encourage you to find more suitable icons, or create new ones, for your key item types, and replace the icon you have added from this list.

After choosing an icon, you can fill in the basic attributes of the new record type:

- Record type name may contain: alphanumeric characters, $, <, >, /, _, – (en dash) or — (em dash). {, }, [, ], *, ‘, and - symbols are not allowed as they are used extensively in SQL queries which underly Heurist. You may also use basic html tag such as <br>, <p>, <b>, <i> and <a href>.
- Description should be a concise but informative description of the record type, both for your own use and to assist other users of the database (this displays when the user hovers the cursor over the record). It is important to include a clear description, not just a repetition of the record type name, for long-term documentation of the content of the database, as it is part of the archive package.
- Semantic reference URI for the entity concept is optional but highly recommended if you plan to export Linked Open Data. Multiple URIs may be separated by semi-colons.
- Show Record URL checkbox is used to display a special URL field at the top of the record editing form. This URL is attached to the record in result list displays allowing Heurist to be used as a bookmarking tool. In general we recommend not checking this box unless each record will have a specific canonical URL associated with it. Other URLs can be recorded in standard single-line text fields, which will be recognised as a hyperlink if they start with http://, https://,
- The thumbnail and icon can be chosen from the library, but if uploaded from another source should generally be of the order of 16x16 and 75x75 pixels. They will rescaled to these sizes. The icons are used in result lists, at the top of the data entry form and record view panel, as the default icon on maps, and anywhere else the record type needs to be quickly visually identified.
- Additional information is a normally-closed section of the form which shows which group the record type will be assigned to, its status (generally this should be left as Open*), whether the record type should appear in lists and dropdowns (the Show checkbox on the record types browser), whether the description of the record type should be shown on the data entry form when help is switched on and the number of records of that type.
- Status
- Open_ indicates that the record type can be modified or deleted.
- Approved_ indicates a record type which has been carefully developed for general use.
- Reserved-Locked_ indicates a record type which is required by the system and cannot be deleted (this value cannot be selected by users other than the Heurist team)
3.1. Defining fields
You will note that there is no ability to define the fields when you first create a new record type (this capability is however available if you click on the edit icon next to the new record type in the screen below and then on the edit field button).

It will open a data editing form for your record type.

You can access to the field editing panel by clicking on the gear next to the field name. It allows you to edit the field information or add a field below the selected field, for more information see @todo-link to chap 5.
Rather than adding fields in vacuo, we strongly recommend immediately adding a new record of this type by editing the fields, setting up both the attributes (fields) and the connections (also set up through fields) directly from the data editing form and saving your record type (save button at the right bottom of the windows) so that you can work iteratively and see how it will actually be presented.
3.2. Importing new record types
Heurist can import a list of new record types from a CSV file, or manually entered data in this form, using
Design > Record types > Import from CSV. This allows for rapid basic setup of new record types.

After uploading a CSV or manually entered data in the form, you need to choose the field separator (comma, tab, semicolon or space), indicate if the first line contains the labels of the field of the record type and click on the analyse button. Finally, you need to select the record type group and field assignment (at least name and description).

The allocation of headings, fields, labelling and behaviours within each record type is, however, too complicated to be set up as an external file (although it is handled automatically in the case of XML import between Heurist databases) and as noted above is best handled through modifying the record structure iteratively while entering real data.
3.3. Browsing templates
Heurist has a powerful mechanism for finding and importing database structure (entity/record types, fields and vocabularies/terms) from another database, which is covered in detail in a separate section Browsing templates @todo-link.
This is very useful where either the Heurist team has set up a template for a particular type of use (which we may have borrowed, with acknowledgement, from a Heurist user) or where colleagues have developed a useful database structure you would like to re-use, or use as a basis for developing your own. This re-use of structure can be an enormous time-saver and also encourages data compatibility and _de facto _standards.
3.4. Change Record Type
First of all, check that the record type you want to change to already exists, and if not, create it. You can change your record type from the Explore tab. Select the item(s) whose record type you wish to change. Click on the Recode>Change record types drop-down menu.

It will open a windows in which you can change the record type by selecting another record type in “Convert to record type”. The record scope define the item(s) on which you want to apply the change.

After validation, the following warning appears. Before validating, make sure that the fields in your record match those in the new one, otherwise you risk losing information and invalidating your data.

If you check “tag affected records (auto-generated tag)”, a tag will be associated with the modified record type. It will be visible in the admin panel of the data editing form on the right.

3.5. New Record : permission settings
The access permissions to all the data entry of a specific record type can be changed by selecting Permission settings at the top of the list (right-hand panel below) which pops up on rollover of New, or by clicking on **Settings **below New. It allows to have additional control over the new record parameters:

By default, records in a new database will be visible only to logged in users. Settings / Permission settings brings up a dialogue allowing you to control the type and permission settings for future additions (cf. tab that explain database management permission explicated @todo-link chapter 2 / chapter 10.)
This can be used not only to determine the future record type and permissions which will be created when you click on New, but also provides a URL which can be bookmarked or added to a web page to create new records with those permissions. The use of a tag or tags can be used to flag new records added, for example, by guests, that can be retrieved for editorial vetting. Other values can also be set with suitable parameters in the URL.

4. Heurist Identifiers (H-IDs)
Heurist attributes a new sequential identifier (known as an H-ID) to every record in the database when it is created, regardless of type, and these identifiers never change and are never re-used Unlike conventional relational databases, the sequential numbering of records is across the whole database and not across individual tables. This may encourage users to create additional sequential identifiers in specific tables using the field increment function, but we strongly discourage this. H-IDs are unique identifiers which can drill down to a specific record anywhere in the Heurist domain of registered databases.
Their invariant nature is ideal for sustainable identification of items. Once something is recorded as H-ID 3456 it will always remain 3456. In fact, if you accidentally record something twice (or more) and later merge the records, the identifier of the merged records will point to the remaining record, so any of the H-IDs used will reference the actual record for the item.
Note that a field Original ID is defined in all new databases. We encourage the use of this field (which may be renamed) to record the identifier or identifier history of any records imported from another system. This field may be marked as non-visible in the Base fields definition on older databases; if you can't find it, go to Design > Base fields, click on the Show all checkbox (top right), scroll down to Original ID and check the Show checkbox.
4.1. Registering a database
The creator and owner of a database, user #2, can register the database with the Heurist Master Index (the system administrator can also do this with an override password defined in the system configuration). To do so, go to Design > Register, enter a description of your database and then click on the register button. The URL will be automatically created with the name of your database after “db=”.

In the Database Registration Screen enter a description of this database (for public consumption). This must be 40 characters or more before you can select Register. If successful, your registration details are shown:

4.2. Heurist Master Index
This is a publicly accessible list of Heurist databases, which makes all Heurist core databases, curated database templates and all registered end-user generated databases available for reference.
Only the database structure is available by default; data is only accessible where individually authorised within the database (there is no central control of this).
Curated templates are well-developed schemas developed by the Heurist team or members of the Heurist community.
Optionally registering your database with the Heurist Index provides a number of advantages:
- Gives access to certain advanced features; if you have not registered and select such a feature, you will be notified to register first.
- Gives your database a globally unique code, named ConceptID @todo-link . The code is the next available sequence number in the Heurist index, which is unique and permanently identifies that database, even if it no longer exists.
- Makes your database available to other Heurist users. Registration of the database publishes the structure (but not the data) of your database to the Heurist Index Page, for use by other Heurist users. This allows other database users to import structural elements of your database (record types, field types and terms) but does NOT confer any form of access to data in this database.
- Any data you export will be interpretable by other systems with the help of Heurist's central index, allowing any Json or XML file exported from your database to be immediately imported into any other Heurist database even if the target does not (yet) have the record types, fields and vocabularies required to hold this data (they are imported automatically).
4.3. Collection Metadata
After registering the database you should edit the database's collection metadata in the Heurist Master Index. If you are asked to login, use your email address and the same login password as your current database (or the first database you registered, if different).

Please fill in as much detail as possible to help people find your dataset/collection if it is relevant to them. You can later edit this record as any other record. You can unregister your database by deleting the record (you own it). The database will still have a registration number but it will not appear in the database.
5. IDs and Concept IDs
In Design > Record types, you will find frames of your records types and in these frame, two identifiers associated to the record types (respectively in the columns ID and ConceptID).
The ID column of the record type frame shows the internal ID of the record type in this database.
The ConceptID column shows a very important piece of information – the unique ID assigned to every record type defined within the entire Heurist system when the database had been registered.
The Concept ID is made up of:
- A 4 digit number which uniquely identifies the database and is assigned when a database is registered with the Heurist master index, running at HeuristRef.net. The value 0000 indicates that this database has not yet been registered, Values below 100 indicate databases created or curated by the Heurist team.
- A second number of up to 4 digits which is the internal code of the record type in the database in which the record type was defined.
When a database is registered, the Concept ID migrates from 0000-xxx to nnnn-xxx where nnnn is the registration ID of the database. When the record type is later imported into another database it retains this concept ID so that it can be automatically aligned with the same record type in other databases.
This also allows Heurist to carry out specific actions based on known concept IDs or to import a copy of a needed record type for a specific function.
NOTE: the same system of Concept IDs applies to every base field, every vocabulary and every term within the Heurist domain, as well as to every record and every value (for registered databases). One can locate the definition or record/value wherever they are through a PID (Permanent Identifier) which is recognised by any correctly installed Heurist server.
Ch 04: Data entry
Documentation rédigée le XX/XX/XXXX par Y mise à jour le 25/06/2026 par Oanez Hélary
When you create or edit a record it opens automatically in data entry mode. It is a form where the fields to fill are specific to each entity type and the values given to the fields change for each record.

The data entry form is also a data structure modification form - click Modify structure at the top (available to database adminstrators only). This allows direct modification of the structure for the record type being edited so that the changes can be tested as you work. See later, and the following chapter.
1. Opening and Navigating Records
1.1. New Record
To create a new record and fill its data entry form, you can click the [New] button. The type of the record you add by doing so is indicated in italics under "New". It will be the same type as the last record you added. To change it, just stay over the button without clicking it : a slide tray appears and allow you to click the correct record type (entity type).

Another way to add new records is with the [Populate] menu. See chapter 6 for further details.
1.2. Existing Record
To edit an existing record, you first need to find it. This can be done with the [Explore] section. You can access it by clicking on the Heurist logo or on the button in the left menu. See chapter 7 for further details
.
Double-click on the record you want to edit, or click on the pencil icon or new tab icons
 which appear when you roll over it in the results list. You can also click the pencil icon on the Record tab in the righthand pane or wherever it is used to view information on a record.
2. Layout of the Data Entry Form
The Data Entry form allows you to edit the record you're consulting and its metadata ([Record Summary]). It also give you easy access for editing the structure of its record type ([Modify Structure]).

The heart of the Data Entry is the form which allows you to indicate the values of your record. At the right of the form, there is an expandable column with metadata about the record. At the top of the form are some buttons, either related to the record type ([Modify Structure] and [Constructed title]) or to the form itself (in green on the screenshot). Finaly, two horizontal bars frame the windows : they govern the window itself and the interactions the latter allows with the database. We will examine each of the components of this form in turn.
2.1. Top and bottom bands
2.1.1. Top band
The top band gives a summary about the record : its record type, unique ID number for the database, and its constructed title (which is the name of the record in the database). On the right side of the top band, there is a [Fullscreen] and a [Standard] button : the first one expands the window, the other centers a smaller view of it. When screen scaling is changed, the form automatically resizes to keep the controls onscreen.
2.1.2. Bottom band
At the left of the bottom band are the navigation controls. If the record has been opened from a set, you will have the option of stepping to and fro through it (the order is determined by the filter applied to reach the data, if non it is antechronological by last modification). If any change has been made, you will be proposed to save the changes.
Some buttons are disabled if no changes have been made to the data, but even when apparently disabled the [Save] button can be clicked to update the record title or the personal data which do not trigger the changed data flag.
2.2. Record type related buttons

In the top left corner are the icon and name of the record type to which the data belongs.
2.2.1. Modify structure of the record type form
Click [Modify Structure] to modify the fields of the record type. A new windows will open with a summary of the fields to be completed for a record of this record type on the left, and the Data Entry form on the right.
This is an extremely powerful function, as it allows you to modify the structure of your database on the fly without affecting existing data (other than intentional deletion of fields and associated data, which comes with adequate warnings). Fields can be added, renamed, reorganised, grouped under headings and to some extent field type changes are permitted (without loss of data).
The numbers next to the tree show how many times a field has been used; this is particularly useful when importing legacy data to identify little-used fields which one may wish to remove or combine with other fields. The tick and crossed-out circle icons allow one to open a new browser window for all the records with / without the given field.
See chapter 5 for further details.

A gear icon appear at the left of the fields. Rollover displays a short menu of frequently used changes. Clicking on it allows you to edit the field in question.
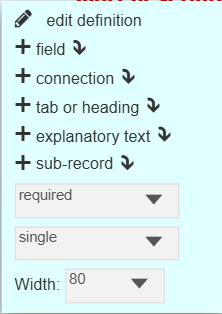
Strucural changes will be applied to the entire record type, thus modifying the structure of all records for that type. Values entered in the form relate to the current record and can be saved exactly the same way as in standard data entry mode.
2.2.2. Modify the constructed title
Click the gearwheel left of [Constructed title] to modify the title mask for the record type.

The title mask gives you a summary of the record content which is displayed in lists of results and where a record is referenced through a record pointer or a relationship marker. The form you get by clicking on [Constructed title] allows you to personalise it by selecting the fields which are concatenated to provide the title. See chapter 5 for further details.
2.3. Form options
At the right of the record type related buttons are several options :

- When checked [Show help] shows the Help text, which specifies the expected value of the field under it. This help text corresponds with the Description of the field entered when defining the field (and can be changed)
- The [Optional fields] checkbox allows you to show or hide optional fields in the form

[Hide from public] : when clicked, only the registered users can see the record. When unclicked the record is readable by anyone. The visibility of the record is indicated in the [Record Summary] (see 2.4), at the end of the record view (which everybody can see with the HTML link if the record is public, even if the database is not), and in the result view with the color (blue if public) and eye symbol.

[Refresh structure] : refresh the structure. Useful if modifications have been made to the record type or to the constructed title from the data entry form to apply them to the actual record.
[History] : open the History section of the [Record Summary] (see 2.4)
[Template] : download a csv summary of the form for the record type with details about the fields and their accepted values, starting with the values automatically asked for all the records, regardless of their record type (H-ID : the unique identifier automatically attributed to the record ; rec_URL : the record URL ; rec_Tags : the tags attributed to the record).For use in offline or highly repetitive data collection using a spreadsheet. Lists of terms can be used to control data entry (requires setup in the spreadsheet). Data can be imported back to Heurist with Import > Delimited text / CSV.
[Bug report] : open a form to report a bug
2.4. Record Summary
On the right side of the form is a tab titled [Record Summary] giving several pieces of information relating to the data but distinct from the values which compose it. The righthand panel is organized in seven parts: general information about the record and six sections in accordion-style: Private; Tags; Linked records; Scratchpad; Discussion; History.
2.4.1. General information
Opening the right side panel shows the record type of the record. Click on it to change it. The values of the previous fields will be relocated in other fields (for example the value of the field "Family name" will be assigned to the field "Title") if the field of the source record type is not in the record type of destination.
Under the name of the record type are indicated the record access and ownership. By default, the record is viewable by anly logged-in user and the owner is the one who have created it. The later can change ownership and visibility of the record by clicking on the pencil icon.
- Ownership can be reattributed to "Any logged-in user", everyone, a specific user, or a specific workgroup (about workgroups, see chapter 10)
- Visibility can be changed to be the same as the ownership, "any logged-in user" or public (everyone can access it)
Under access and ownership are :
- the name of the person who has added the record
- the date of creation
- the date of last update
Those cannot be changed (except for the third one which changes automatically when the record is edited).
2.4.2. Private
This section concerns the management of the record by the logged-in user. It contains two parts who can be edited using the pencil icon.
Bookmarks : this part is personal and cannot be consulted by other user. It allows you to define a password reminder, to rate the record and to write personnal notes. Writing something in this section will trigger the bookmark icon, who will appear orange in the database. If you have write a password reminder, a little key will show as well.

The content is not encrypted. Do not enter important passwords verbatim, as the security on on this data is basic. We suggest using a prompt whih is meaningful only to you, rather than an actual password.
To remove the bookmark, go to the result section, select the record, click [Selected], then unbookmark it. It will remove the bookmark itself as well as its content, the tags of the record and the password reminder.

The Data Entry form doesn't allow you to unbookmark a record, only to clear the content of the bookmark if you created one prior.
Note: The bookmark's icon doesn't appear anymore in the later version of Heurist.
Reminders : allow the setting of immediate and periodic reminders to either an individual user, a workgroup or specific email addresses. The minimum frequency is daily, but monthly or yearly might be more appropriate.
2.4.3. Tags
Tag retrieval functions are rather limited (tag:eat will find anything with"eat" in it; tag=eat will only find the word Eat or eat) and they cannot be used in facet searches, crosstabulation, linked open data, or organised hierarchichally. We therefore recommend setting up any controlled categorisation using Term list fields which have many more retrieval and organisational functions.
Note: Tagging a record creates a bookmark on that record.
2.4.4. Linked records
This section shows any records which have record pointers or relationship markers connecting to the current record. The listing is clickable so that one can navigate either to the linked record or to the relationship record linking the two records.
Note: The indenting is purely due to the length of the relationship terms – it has no hierarchical significance.
2.4.5. Scratchpad
The Scratch space section is merely a text field which can hold data until it is organised. It is saved as part of the record but it is not accessible in any way except as a cut-and-paste space during data entry.
2.4.6. Discussion
This is a deprecated function which is not expected to be resurrected.
2.4.7. History
Click on [History] on the main form for the record to retrieve its history. It show the changes done to the record and allows to revert them by checking the version you want to keep. The user who made the changes is identified by their ID number. You can bulk check by modification date.
2.5. Record form
The form body contains all the values that make up the record. Depending on the record type's structure, the fields may be divided into different tabs (these are purely for organizational convenience; they do not change the data in any way). The different fields of the record type are then displayed one after the other, along with their corresponding values for that record.

you can tab from field to field during data entry
2.5.1. Field categorization
Fields can be required, recommended, or optional.
- Required fields are bold and red. The form cannot be saved until they are completed.
- Recommended fields are bold and blue. They will always be displayed in the form.
- Optional fields are blue and can be hidden by unchecking "optional fields".
If you really must save a record even though you have not completed all the required fields, you can click Modify Structure (at the top of the form). It will ask if you want to save the data - reply Yes. Althogu you are now in Strucute mode, you can simply exit nd the data will have been saved. It will show up as an error in Admin > Test integrity, but it will not cause a problem (other than that it is not there when it is meant to be)
2.5.2. Field behaviours
As you roll over a data field you will see a number of icons at the beginning or the end of the field.
 clear (delete) the value
 hide (currently everybody can see the value) or
 show (currently only the registered users can see the value) the value to public. You can show a record to public (see 2.3) but hide some of the values of it by doing so.
 open the vocabulary editor (directly at the vocabulary used by the field). Allowing you to act (add, edit, creating sub-term, merge, rearrange, delete) upon the terms it contains
 add new term to the list from where the value is taken
 add a value to the field. It is to the left of the field, only if it can take more than one value
 drag the value up or down. Allows reordering the values of a multi-valued field
 appears under the name of a multi-valued field after a reordering of values. Will undo it.
 show calendar to select a date. It remembers the last date entered to minimise navigation. However, if you wish to skip to a different period or enter a historic date you may type the whole date with dashes, or simply type year and month or just year. If you then select he calendar icon it will jump to the appropriate year and month.
 brings up a more comprehensive date setting with several tabs (see 3.2.1.)
 add a picture by taking it with with the camera on the device you are using
 edit image metadata
3. Field Types
Not all icons appear beside each field, as the actions they trigger isn't always expected. The data entry form is designed to gather data in a structured format. While designing the database (see chapter 5) you specify the required data type for each field :
- Dropdown (terms, may be hierarchical)
- Numeric (integer or decimal)
- Text (single line text)
- Memo text (multi-line text, html or code)
More complex fields - Date / temporal More complex fields with specific behaviours
- Geospatial Used to record locations/areas and build maps
- File or media URL Used for images, audio, video, 3D, and other files (can be on a remote server)
Linking fields - Record pointer / Foreign Key } These fields are the key to linking records
- Relationship marker }
3.1. Simple type fields
Numeric (integer or decimal) A positive or negative number, with or without decimals. Non-numeric characters other than minus or decimal point are ignored.
Text (single line) A single line of plain text, typically used for names, titles and short descriptions. Use multi-line text for longer descriptions. Max 250 characters. If a text value starts with http:// or https:// it is treated as a URL.
Memo Text (multi-line or html) A plain text field which can accomodate multiple lines of text. Use for longer textual content (drag and drop the bottom-right corner to expand the editor). Offers three editors :
- text: write in plain text
- wysiwyg: What You See Is What You Get, interface with several button to format your text so you don't have to know html to do so
- codeeditor: a code editor, it makes it easier to write directly in a structured language such as xml or html or to correct it.

As this type of field deals with html, you can integrate to your text other elements, such as :
- Multimedia elements (pictures, videos, etc.). It will propose you to caption it.
- Hyperlink to be open in the current or a new window
- Link towards another record.
Dropdown (Terms) A flat or hierarchical list of categories, where the terms are drawn from a predefined vocabulary (the vocabulary can include terms from otehr vocabularies by reference). Generally from a single one eg. countries, languages, source, condition, material, colour. Using dropdown terms ensures referential integrity standardizing entries (e.g., avoiding inconsistencies likes "Yes" vs "yes"). Use dropdown when the list is relatively static and the categories do not exist as separate records in the database (in which case use record pointers).
3.2. Special type fields
3.2.1. Date / temporal
A calendar date with or without time of day. Whole years can be used. BCE dates are expressed as negative. Can also accommodate date range and uncertainty.
The date can be entered manually, with the calendar icon, with the [range] button, or with the range icon. The second line of the field allows to select directly yesterday's, today's and tomorrow's date in one click.
- Entering the date manually :
You can write the date in the field using the yyyy-mm-dd format. You don't have to write the whole date until the day's number. - Using the calendar icon :
The calendar automatically open on the last date entered. You can start writing the date manually and then select the day on the calendar to fastering the process.
You can click [clear] to reset the date you started entering, or [Today] to jump to today's date and navigate from there. - Using the [range] button or the range icon : for date estimation.
If the purpose is to obtain a date range, you should use two fields : Start date and End date, which will give you two values. Both of them are date field type. Using only one date field will provide only one value. Thus the range function of date type field is useful for indicating a date whose accuracy is not certain.

- Simple Date : for a single date. To use to specify the degree of certainty about the date (exact, approximate, before, after), the time of the event, the type of determination of the date, the calendar, and to add comment about it.
- Simple Range : for setting a estimation of date based on two other (earliest possible and latest possible). Allows you to precise the probability curve (flat, central, slow start, slow finish), the way the estimation had been made (attested, conjecture, measurement), to precise the calendar and to comment the date.
- Fuzzy Range : same as Simple Range except that the certainty is modulated as the beginning and end date of reference are subdivided in "not before/after" (Terminus Post Quem, Terminus Ante Quem) and "probable begin/end".
- Radiometric : useful for radiometrics values. Can only be used to set a BCE (before common era) or a BP (before present) date. You can precise what is the standard deviation (Std dev) of the value, its positive deviation (pos dev)or negative deviation (neg dev). It is also possible to indicate the Lab Code of the sample used and if the date as been calibrated. The date can be commented.
3.2.2. Geospatial (point, line, polygon ...)
A vector spatial object describing a location on the earth's surface. This field type is recognizable by its little earth icon.
Clicking on the field automatically open a map where you can set the location by using the search bar to select a place, by entering coordinates or by clicking on it after having selected a draw option (polyline, polygone, rectangle, circle or marker).
You can click and drag to navigate the map. There is buttons to zoom in and out, but you can also use your mouse's wheel. The map comes with several features.
At the left of the screen, you'll find :
- Bookmarks : you can bookmark places/areas on the map. You have to name your bookmarks. You can then find them by selecting their name in the dropdown. To edit or remove a bookmark, click at the left of the exit cross. A polygon or a circle cannot be used as a bookmark.
- Drawing options : Simple markers (record type icons or specified markers including cirlces and rectangles) can be used to indicate the place referenced by the geospatial field. Several icons at the left of the screen allow you to do so.
- Editing layers : @todo: JE N'AI AUCUNE IDÉE DE CE QUE ÇA FAIT
- Create new map document : add a new record of type "Heurist Map Document" . Map documents allow you to set u pa series of map layters, data sources and styles to create a specific map representation. For more detail see chapter ??
Record types are composed of fields, which have a field type. For example, the record type "Place" contains several fields which have field types : Place name (text), Place type (dropdown), Country (dropdown), Location (geospatial), etc. A lot of record types and fields are already in the Heurist database (here, the geospatial field type is linked to record types that are present from the start into the database). We advise against deleting them.
3.2.3. File or media URL
A file such as a photo, video, PDF, scanned document, spreadsheet or XML, uploaded and stored in the database or a URL to a remote file or streamed content. This field type is recognizable by its file icon.
Clicking on the field will open a small windows which allows to choose between using a file already uploaded in the database ([Choose previously referenced file]), upload a new one (to Heurist or to external repository, but the later is depreciated), or use an external URL linking directly to the file. You then might indicate some metadata about the file : its name, copyright, copyright owner and visibility (public or logged users)

3.3. Record linking type fields
These fields types create connections between the new record and other records of specified type or types (potentially including the same type as the record you are editing).
There are two kinds of record linking field type :
- record pointers : these simply add a direct link to a particular record (equivalent to a foreign key in conventional relational databases) as a value in the record. The target record type(s) allowed are defined by the record pointer settings;
- relationship markers : these add a new Record relationship record linking the current record with another record. The target record type(s) and types of relationship allowed are defined by the relationship marker settings.
In both cases the link will appear in the network view (see chapter 8b) and if the target record is not yet in the database, the field will allow you to create new records (see chapter 5).
Record pointer / Foreign key A simple connection to another record, normally constrained to specific target record type(s).
- Use where the field represents a direct connection and is permanent eg. parent, author, component, place, period.
- Record pointer fields allow a new record to reference other records of specified type which contain sets of related information, often components of the parent record, eg. a ship's captain, a person's father, etc. The referenced record may be an independent entity (eg. place, publisher, person, work) or group together related information such as the attributes of a person or object, a set of attributes which apply for a specified time period, or the attributes of some part of an object or for a particular type of object.
- The type of relationship, however, is implicit in the field name - father, mother, service, education, place or component all imply a fixed relationship to the parent entity - but not otherwise recorded.
- Typically, selecting the field opens a list of available values, comparable to a dropdown field, except that the options are existing records instead of terms from a vocabulary.
Relationship marker A more complex connection which allows specification of relationship type and period of validity.
- Use where there are numerous possible connection types and/or connections have a time span eg.roles in an event, social relationships, ownership, marriage, address.
- Relationship marker fields create a connection between two entities with an explicit relationship type (selected from a dropdown), as well as a date range and other contextual information.
- They are particularly useful when there is a large list of potential relationships, such as roles of actors in an event, interpersonal relationships, stratigraphic relationships and so forth.
- Relationship marker fields look like a composite field in the data entry form but, rather than creating an attribute attached to the record, they create a separate relationship record which can carry significant extra information about the relationship.
- Filling this field will require to specify the relationship type and the target record. To ad additionnal informations, click on [Edit attributes]. You'll then be able to add start and end date of the relationship, a description, commentaries and title.
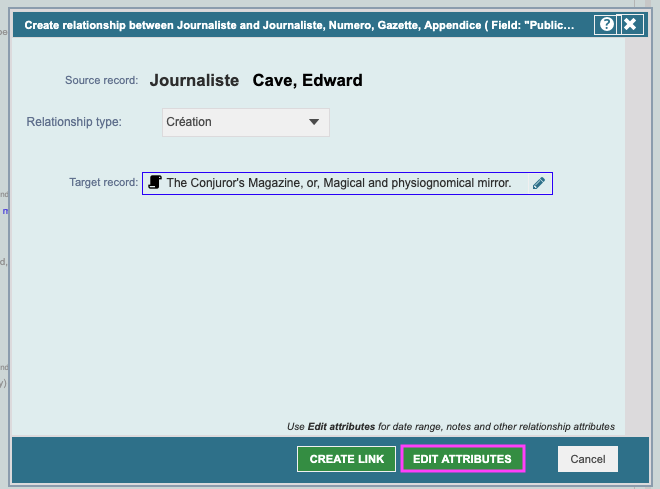

4. Optimising Forms for Usability
The few extra minutes you will spend ordering the fields in each record type, splitting them up into sections with section headers, and setting the basic parameters of requirement, repeatability and field width, will make all the difference to ease of data entry and the way you—and other users—feel about entering data.
- Make informative field names. For example "Location of meeting" rather than simply "Place", or "End date" rather that "End".
- Use tabs and dividers to break the data up into logical groups.
- Set field lengths appropriately. Set single line text fields to a length which will fit a normal value, as they will automatically expand as you type or if the value exceeds the indicated length.
- Think about which fields should be Required, Recommended or Optional (use for fields which are rarely filled in).
Keep all of this in mind while structuring your data, which is the subject of the next chapter.
Ch 05: Modifying record structure & connections
Documentation rédigée le xxx par Guillaume Porte
One of the most powerful features of Heurist is the ability to modify record structures at any time without rebuilding the database or reprogramming the interface, and to do this while you are in the middle of data entry. This is the key to the iterative nature of structure development in Heurist.
To open the structure modifying interface :
- Either : Design → Record Types → [click on the pen next to the Record Type name] → [bottom of the pop up window] Modify record structure (fields, tabs etc.) - was Edit fields in older versions.

or

Or : Create a new record or open an existing record of the appropriate type for editing
and click Modify structure (at the top of the form).
We recommend using this method to dynamically change structure as you start to develop your data

Note: Shifting to Modify structure mode will save the record data without checking it for validity. It can be useful to temporarily save a record but you should use Admin > Test integrity to check for any records which have been incompletely described. Incomplete records do not cause Heurist any problem, it is just that data which should be there is missing so counts, record titles or formatted output could be affected.
Modify Structure will open the data entry/strcuture modification window :
You can continue to edit the data while you are in structure modification mode - it is a useful way to test that the structue you are creating coresponds with your real needs.

The example above shows a complex form with 12 tabs and nearly 150 fields, before cleanup, imported from a legacy database. The navigation tree is synched to the fields so that one can navigate in either the form or the tree, and move or delete fields from the tree. The form on the right is updated immediately. The tree also shows details of the field on hover.
Navigation panel
Clicking on Modify structure opens a navigation panel on the left, which we describe in detail below.
Options (above the tree)
- << chevrons - clicking on the chevrons will shrink the navigation panel, but you are still in Modify Structure mode. The chevrons will reverse to >> which allows you to reopen the panel
- Export fields as CSV : gives a list of fields with their parameters and usage count. Note also that there is a Template download link towards the right of the data entery form which downloads a CSV file which can be opened in a spreadsheet to use as a base for data collection.
"Field name","Field type","Multivalue","Requirement","Usage count"
"Person H-ID","Built-in","Multivalue","Required","N=273"
"Gender","Terms list","Single","Optional","N=246"
"Role","Terms list","Multivalue","Optional","N=263"
"Start date","Date / temporal","Single","Optional","N=198"
etc...- Update Counts : update usage counts shown to the right of each field - blank means the field is never used
Tree view of Fields and Tabs
The tree view is a powerful way of reorganising the order of fields, including moving several fields at once by dragging the tab or heading which contains them.

- Each field in the tree shows:
- the field name
- the number of times that this field is used in this record type (multiple values are counted, it is not just the number of records which use the field)
- the tick icon opens a search on all records using that field
- the cross-out icon opens a search on all records not using that field
- On hover, you see the internal code and concept code and the description of the field
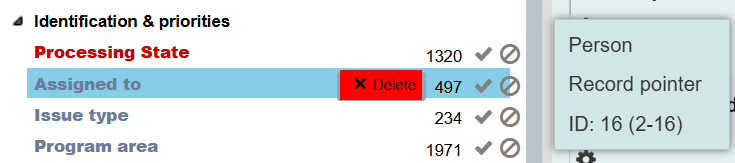
Note that all fields, including hidden fields, appear when in Modify Structure mode, since otherwise there would be no way of resetting their status or deleting them.
You can refresh the counts if they are not showing (they are not calculated automatically if there are a very large number of records, > 100,000 in a single type) by clicking on the word Count.
Deletion of fields

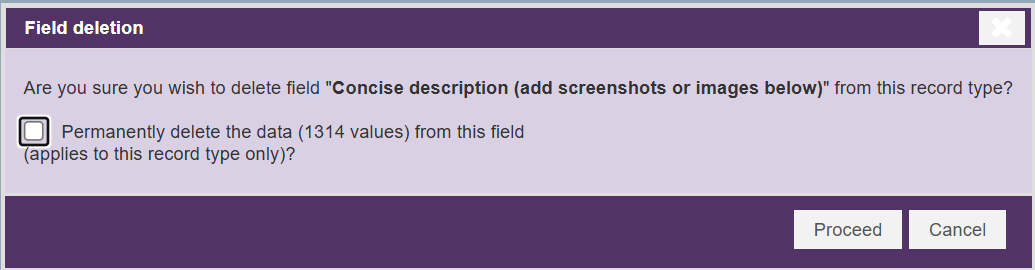
Note that deleting a field does not in itself delete the data associated with a field. To delete the data as well, you will need to check the box on the popup warning. If this box is not checked, the existing data will appear at the bottom of your form in a section “Non-standard data for this record type” . This can also be useful for copying data into the fields which remain before deleting the values individually. If the data is really not required check the box to permanenly delete the data for that field.
Deleted fields which still have data can be recovered by clicking on the upwards arrow next to a value (which will reinstate the field for all records of that type) and then renaming the field (which will be identified by its base field name and description; the revised name and description assigned to it for the particular record type are no longer available, so for example "Title of painting" might be reinserted as "Name or title").
If there is no data anywhere in the database which uses the base field on which this field is based, you will be asked whether you want to delete the base field completely. It is a good idea to keep standard base fields which were part of the initial set up of the database, as they may come in handy later and they promote standards across many databases, and to get rid of base fields you have added to the database (generally through adding a field to a record type, which creates a base field at the same time) if you no longer need them.

You can delete an individual value from a field by clicking the X icon which appears at the end of the field when your mouse pointer is over the field. This will not delete the values from any other record.

Edit a field
[TODO]
Field settings icon
The gearwheel icon left of each field displays a small dropdown on rollover:
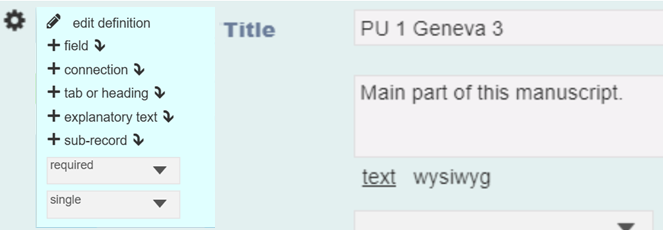
The bottom section allows rapid adjustment of cardinality (requirement and repeatability) and of field width.
By default new fields are set to Recommended.
Fields can also be marked as Hidden. In that case neither the field nor its value (if any) is shown in any mode except structure modification. Hidden fields are particularly useful, and were originally developed, to allow a template to contain many fields for different uses so that they are available to be unhidden as required, rather than presenting the user with a plethora of fields which is highly confusing/off-putting, that they then need to delete (and in the process lose, requiring more thought than simply exposing an existing field).
The other entries in the menu are discussed in the following pages.
- Edit definiton gives access to all the settings associated with an existing field – its name, help, width and height, cardinality, target record types etc.
- + field allows insertion of new fields
- + connection is a shortcut method for inserting the connection field types (record pointers and relationship markers). It exists to encourage users to think about, and use, these very useful functions
- + tab or heading allows insertion of new structural and layout elements such as tabs and dividers within tabs (these are shown as expansible sections in the navigation tree and may be dragged to move blocks of fields associated with them).
- + explanatory text allows insertion of a block of text which will show up on a grey background in the data entry form. It can be used to provide instructions or make notes on record structure changes which are needed (it will appear on every record). It has a title, which appears even if help is off, and a body which appears only if help is on
- + sub-record allows a set of fields to be designated as a sub-record, transferred to a new record type, linked to the current record type by a child record pointer field, and then all the data is transferred and the record pointers updated.
Field types
//TODO
- Text field
- use only for names etc which can be represented by a single line text
- handling URLs
- Memo fields
- text vs wysiwyg vs code
- processing URLs within text
- inserting media
- linking to other records simply by H-ID
- Terms
- Vocabularies - see more detailed discussion of vocabularies later??
- Adding terms
- Importing terms
- Hierarchical terms, importing, retrieval
- Terms as checkboxes/radio buttons
- Image terms
- Description and standard code
- Term translations
- Linked terms
- Relationship terms - see under relationship markers
- Checkboxes and radio buttons
- Dates
- Years, years-months and simple dates
- Date ranges, different ways of representing
- Fuzzy start and end
- Different calendar and conversion
- Import and auto-correction of dates
Entering historical dates: When entering a date, simply type the year in the box to instantly jump to that year, then select from the calendar dropdown
- Numeric
- Dealing with integers and whole numbers
- Record pointers
- Pointer mode
- Filter browse list
- Child records
- Relationship markers
- //TODO
Insert field
We strongly recommend adding a record of each type and adding fields using Modify structure from within the data entry mode, because this allows you to test how it works as you go along. This is much more effective than creating a set of fields or a form in the abstract and then finding that it is unusable in practical terms.
Choosing existing base field(s)
The top half of the form allows one to browse for existing base fields and insert them into the current record type definition/form via the Choose base fields button. The text on this part of the form gives some guidelines: explains the process:
_Rather than defining every field from scratch, you can pick some frequently used pre-defined fields from the existing Base fields. The base fields chosen should have a similar sense of meaning, e.g. use Start date for Birth date, Creator for Author, Short __description for Abstract, Extended description for Notes. You can rename the fields to what you actually want once selected - the new name applies to the current record type only (the base field retains its name).
Do not completely redefine a base field f_or a different purpose than it appears to be intended for, for instance redefining Family name as Street, Length as Count, or Format as Condition. Significant change to the meaning of a field may later lead to confusion and reduce the degree of interoperability between databases.
Fields which use the same base field will reference the same vocabulary (for term-list dropdowns and relationship type) or the same target record types (for record pointers and relationships) - you cannot change the vocabulary or target record types for on_e without changing it for all the others.

There are over 200 pre-defined Base fields. Use the Search for field function at top right of the list of fields to find ones that are useful (remembering to search for English words – sorry to speakers of other languages).
Only Base fields not already used by the record type will be shown – a Base field can only occur once in each record type (although it may contain multiple/repeating values).
Creating a new field from scratch
If none of the Base fields seem to correspond with your need, fill in the details for the new field you wish to create in the lower part of the form:

The Field name will show a list of possible matches against existing Base fields as a dropdown once three characters have been typed. If none of them looks useful, continue typing your desired name and select it from the list |(it should be marked as NEW). Add the help/description text and select a data type, at which point it may ask you to select or create a vocabulary for a term list field or relationship marker, target record types for a record pointer or relationship marker field. You can also select cardinality and enter semantic reference URI(s).
The result will be a new field for your record type. However, at the same time, Heurist creates a new Base field with the same name, description, data type, vocabulary and/or target record types. This Base field can then be re-used as a field in any other record type; its name and description will default to the Base field name and description, but these can be edited separately for each record type.
Normally you will click the simple **Create new field **button. However, if you click the Create and customise new field button it will create the field and immediately go into field structure edit mode to adjust details such as cardinality, width and height, default values and incrementing, and field visibility. This may also be useful if you want to use a very generic name to ensure a generic name for the Base field, and then change it to specific version for the current record type.
Insert tab / divider
Tabs and other dividers (formerly known as separators) can be used to make your forms much more usable. You will first be asked what sort of separator is required, and after initial creation you will be able to enter the name and description (which will show as the text below the name if Help is on).


- Tabs run across the top of the edit form, unless you choose Tab (new group) in which case it will start a new section below the existing set of tabs.
- Forms can also be broken up with static or collapsible blocks (which can be initially open or initially).
- Within tabs and blocks you can create Section headings which can also be static or collapsible and initially open or closed. These dividers will appear with a horizontal line at the point of division, as well as a help text which appears beneath it if help is on. The help text will often be left blank.

Edit field structure
The edit field form opens up within the data edit form and gives access to all the settings specific to the current record type (field name, help/description, cardinality, field width and height, default value and incrementing). Checking the box “also change base field name and help”, provides a convenient way of updating the name and description of the base field – this will not change the name and description in any other record type.
Some settings (the field type, the vocabulary used, the target record type(s)) are functions of the Base field used by the local field type for this record type and are thus shared with all record types which use this base field. They may only be edited through the Base field editor).
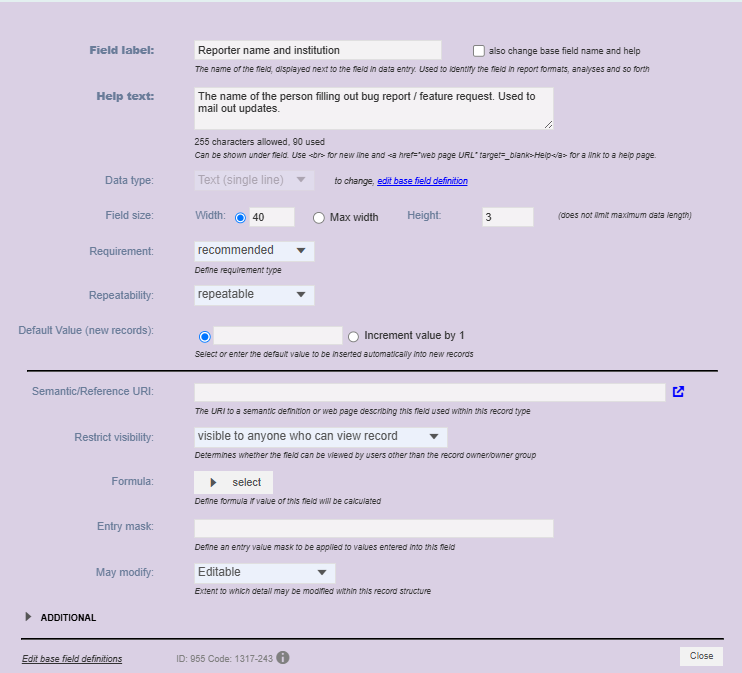
The Additional section of the field structure edit form allows for an extended description of the field simply for documentation purposes (it does not appear anywhere in the interface, but is included in XML and archive output). It also allows the Heurist team to block certain fields from modification through the Status dropdown.
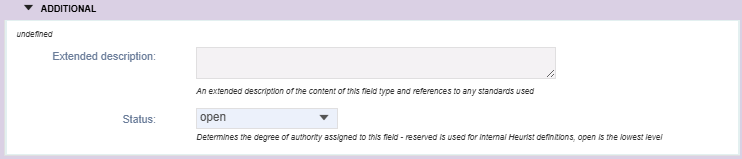
For multi-line (memo) text fields this form also allows setting the height of the field – the default is 3 lines.
The default value is applied to the field for all new records. Where it is a controlled value, it is chosen from a dropdown (terms) or browse for records (record pointer), or it is simply typed in for text, date and numeric fields (“today”, “yesterday” and “tomorrow” are acceptable values for dates which will be converted to actual dates).
For simple text and numeric fields one can alternatively define an increment. This will provide a default value for new records which increments the largest number found at the end of any of the values for the field. |So if the field contains values such ACR-1, ACR-2, ACR-5, ACR-6, ACR-95, it will automatically generate ACR-96. If the numbers are ACR-0001 …. ACR-0095 it will generate ACR-0096. If the last value was XYZ-0095 it would generate XYZ-0096 (it takes its cue from the highest number that it finds at the end of any value). The default value generated is editable.

Note that Heurist does not have an indexing function suitable to avoid duplication of values, although this is on our development roadmap 2027 ... Surprisingly we have had very little call for such a function in the 20 years that we have been working on Heurist, in part because we have a very flexible duplicate detector (Admin > Duplicates) which is often more useful for Humanities data which includes variants and uncertainties. It uses fuzzy criteria to detect duplicates and merge records (including retaining all connections and redirecting merged record identifiers to the result of the merge).
The most interesting part of the form are the two options allowing control over visibility and modification at the field level:
Individual field/value visibility
The Restrict visibility dropdown allows control of visibility of individual values by members of the public (not logged in) or to the owners of the record alone. By default all values are visible to anyone who has access to view the record.

- Visible to anyone who can view the record: if the record is public the value of the field will be visible.
It is however possible to hide individual values by clicking on the eye symbol which appears at the end of the field on rollover:

Clicking the eye hides the value from the public as indicated by the greyed field (it is still editable):

- Visible to anyone + hide from public checkbox: the same functionality as the above but displays an explicit checkbox under the field and the eye icon at the end of the field is always visible. Clicking on either the checkbox or the eye will hide the value from the public.
This is intended to make the user think about whether the field should be made immediately available to the public eg. where further editorial work or vetting is likely to be required.

- Visible to logged in users only: the value will always be hidden from the public
- Visible to owner/owner group only: only the owners of the record will be able to see the value
Individual field locking
The May modify dropdown allows for locking a field so that it cannot be edited. This is useful for fields which are automatically populated or have been previously filled with data which is not to be modified further eg. an incremented field or source data from a legacy database. The default value is Editable.

An intermediate value Edit discouraged is provided which allows the value in the field to be modified but pops up a warning message that this is discouraged. This may be useful where the value does not normally require modification but may occasionally require correction. It also avoids accidental inadvertent modification of the fields without the user being aware of it.
Calculated / computed fields
Heurist provides an ability to compute field values in a variety of ways, enabling users to integrate statistical analysis into the process of data entry, or the generation of websites. A particularly useful way of using this is to automatically split up a complex field, such as a bibliographic reference or a complex item identifier, into its components.
The calculation can be based solely on fields within the record (e.g. combining the length and breadth of a painting to calculate its area) or can combine information from linked records (e.g. counting all the children of a particular Person).
There is no special field type for computed fields; any text, date, or numeric field can be used as a computed field; Heurist will perform a calculation based on data in the database and store the result in the field.
Click on Formula: select to bring up a form to specify the computation:
Either select a compute formula from the list or click on the ADD NEW CALCULATION button which will lead to the calculation construction form, where one can develop the code using SMARTY syntax in the same way it is used for custom reports. You can simply ask an AI to write Smarty code for you and replace the variable names it uses such as {$pages} with the appropriate Heurist field such as {$r.f1118}.
The final line of the code must print a value which is the value which will be inserted into the field. For example, to extract the 'short title' and page numbers from a reference such as "Nakada1982_01: 152-3, II-197" in in field 1118 you simply need one of these lines in the formula:
{{$r.f1118}|regex_replace:'/\s*:.*$/':''} --> Nakada1982_01
{{$r.f1118}|regex_replace:'/^[^:]*:\s*/':''} --> 152-3, II-197
//TODO-link

To use data from the current record, you can use the pre-existing variable $r.
For date, numeric and textual data, you should ensure that there are no html tags in the output. For a memo text field, you can output html elements as you would for a custom report.
Computed field examples
Examples of simple requests:
Area calculation: {$r.f1014 * $r.f1013}
My full name: {$r.f18} {$r.f1}
In neither of these cases is the output wrapped in html tags such as <p> or <div>
Examples of aggregation requests: count of linked life events
{$heurist->getRecordsAggr(array('id','count'), '{"t":"48","linkedto":"[ID]"}', $r) }
average height of persons linked to given record $r
{$heurist->getRecordsAggr(array(1014,'avg'), '{"t":"10","linkedto":"[ID]"}', $r) }
It is possible to execute several aggregation requests per call. The first parameter of getRecordsAggr is an array of pairs using either sum, count or average: field id: sum | count | avg
It is also possible to perform defined query and work with the result set as usual in smarty:
{$records = $heurist->getRecords('{"t":"48"}')}
{foreach $records as $r} {* Start records loop, do not remove *}
{$rec = $heurist->getRecord($r)}
{$rec.recTitle}
{/foreach}
An optional second parameter for $heurist->getRecords can be the record ID
$heurist->getRecords('{"t":"12","linkedto":"[ID]"}', $r)
Hints and examples of good structure
Proposal @todo: need examples @todo: Keep fields separate EG family and given names
- Clarity and Simplicity
- A well-designed structure should be clear and simple. Avoid overloading forms with too many fields. Use tabs and collapsible blocks to organise fields in a logical and intuitive way. Each field should have a specific purpose and contain only relevant information.
- Strategic Use of Hidden Fields
- Hidden fields are useful for storing additional information that may be needed later without cluttering the user interface. For example, you can hide fields that are filled automatically or used for background processes.
- Reuse of Base Fields
- When creating fields, consider using base fields to reuse them in other record types. This ensures consistency and avoids data duplication.
- Organise Linked Data
- For record pointer fields, ensure that the relationships between records are well-defined. This guarantees that information is easily accessible and remains consistent when updated or modified.
- Use Section Headings and Dividers
- Use section headings to divide forms into logical parts. This helps users navigate long and complex forms. You can also use horizontal dividers to visually mark sections and make the structure clearer.
- Use Default Values and Smart Increments
- For fields like serial numbers, use default values or increments to simplify data entry and ensure consistency in values.
- Controlled Data
- Use term lists for fields where only certain values are allowed. This prevents entry errors and ensures data consistency.
Practical Examples:
- For a person record, you could have fields like "Name", "First Name", "Type", and "Home Country".
- An event record might include fields like "Title", "Start Date", "Location", and "Participants", where "Participants" could be a multivalue field with record pointers to people.
Document your database
Don’t cop out on writing proper help texts and descriptions of record types, fields and terms, even if you are the only person using the database.
A few extra minutes spent writing an explanation of the content of each field will ensure that the database is still interpretable way into the future, by you or by others if deposited in an archive (your descriptions automatically become part of the archive package). Do it as you are setting up the database, because you will never come back to do it later …
Download Structure
You can download the structure of your database in XML or plain text format using the "Structure (XML)" or the "Structure (Text)" links under the "Download" section in the Design tab.
Vocabulary and Terms
One of the most important features of Heurist is its ability to describe categorisation and provide structured terminology for data. Vocabularies allow users to define and standardise terms used across different records, ensuring consistency and accuracy in data entry and retrieval. By creating term lists and defining relationships between terms, users can easily classify and manage data according to predefined categories. This feature is particularly useful when dealing with large datasets, as it helps prevent errors, reduces ambiguity, and ensures that data can be analysed and compared meaningfully across different record types.
A term list is the set of predefined 'enumerated' values ('terms') that can be used within a particularly drop-down (i.e. a term list field type). Term lists are based on all or some items in a 'vocabulary'.
A **vocabulary **(parent term) is the underlying top level category of related 'child' terms (e.g. 'Language' is a vocabulary, while 'French' is a child term). Vocabularies can be nested (i.e. any child term can in turn become a vocabulary). The lowest level values are the terms. A term list can comprise a hierarchy of nested terms (i.e. nested), with any 'leaf term' being potentially a new term list. Term lists may be used for any form of classification or categorisation of preconfigured data, such as raw material, condition, period, religious affiliation, language, country etc. For example, a Language dropdown might have the following structure:
Language (this is the name of the field or term list)
- English (term)
- French (term)
- Italian (term)
- Spanish (term)
- Etc.
When defining your database structure, you can create a new field based on the Terms List data type. You can then select what terms are to appear on the list, from the set of available vocabularies (Heurist provides a set of default vocabularies which you can edit and add to as required) and preview your choice. If a term is missing from a list you can quickly add it. The heading for the term list dropdown is the field name you have chosen for this field type.
Term lists are also used for specifying sets of relationships for Relationship Markers. For example, Family (Is Parent OF, Is Child Of etc.).
Selecting a Vocabulary and Terms

You can select the required term from the Terms List in the Vocabulary dropdown within the field. If a particular term does not exist in your chosen vocabulary, you can add a new term by clicking the gear icon. The Manage term window will open, allowing you to edit (pencil icon) existing terms or create a new one (+ ADD icon). The same applies to vocabularies.

The following options are available:
- Add Terms. Use this to add a term to the current vocabulary (this does not add it to the base Vocabulary, just this instance).
- Edit Terms Tree. Use this to edit the base vocabulary. (See Terms.)
- Add Vocabulary. Use this to create a new vocabulary. (See Terms.) The new term is appended to the end of the term list (this also updates the base vocabulary).
The Manage Terms Screen
You manage the vocabularies that underlie term lists via the Manage Terms screen. Here you can edit the standard vocabularies, or create new vocabularies and terms. Click a vocabulary to show its available terms. Terms Pane
Actions for a vocabulary or term are available in the title bar of this pane:
 Add a term
 Import terms
 Export terms
 Find terms in all vocabulary groups
Editing a vocabulary or term
Select the vocabulary or term from the vocabulary hierarchy and edit its properties as appropriate.

Finding a term
Before adding a new vocabulary or child term to the vocabulary hierarchy, check if it already exists, by entering all or part of its name into the Find field to show all matching terms. If it does exist, it will appear in the box. You can click on the entry to highlight the term.
Creating a new, top-level vocabulary
If the new term does not already exist (see above), complete its properties as follows and click Add Vocabulary:
Term. The label for the vocabulary in the hierarchy.
Description. A user friendly description.
Standard Code. For standard codes such as three letter country indicators.
URL. For example, pointing to a semantic definition.
Image. You can use this field to attach an image (ideally 400x400 pixels) to a term (these will then show as a visual description next to the term on data entry screen). New terms must be saved first.
Status. You can set the status for any term (e.g. setting the Status to Approved prevents any additional changes to a term).
The term (vocabulary) is added (alphabetically) to the vocabulary hierarchy.
Adding a child (root) term
Check if the term you wish to add already exists (see above).
Select or hover over the vocabulary (or term if you are creating a hierarchy of vocabularies) you wish to add to and click Add Child (or click the Add Child button in the Properties dialog).
The new term is temporarily added to the hierarchy with the default name 'new term'.
Change the default name 'new term' to the name of the term you are adding and complete the other properties as appropriate (see above).
Click Save Term. New terms are added alphabetically but can be repositioned.
Repeat this process for each new term you wish to add (ensure you select the correct vocabulary).
Note. Adding a term to a vocabulary does not add them to the individual term lists for different fields, since these are individually selected from the complete vocabulary. You need to update the lists for each field to which these terms should be added.
Moving and deleting terms
To reposition a term/vocabulary, go to the Terms pane, then simply drag and drop it in the hierarchy (child terms are automatically included in the move):

To merge a vocabulary into another (i.e. combine their child terms), go to the **Vocabularies pane** drag and drop it onto the vocabulary you wish to keep:

To delete a term (or vocabulary), select it and click Delete.
Important. If you delete a vocabulary, all of its child vocabularies and terms are also deleted, and cannot be restored.
However it is not possible to delete any vocabulary or term which has been used in a record in the database.
Importing/Exporting a Vocabulary
Import

To import a vocabulary, select the vocabulary (or child term) and click the Import button
Step 1, prepare data for import as a comma or tab-separated file.
Paste the data or upload an existing CSV file (e.g. a previously exported vocabulary).
Step 2, define the parse parameters. Click Analyse, and preview the data to be imported in the lower pane.
Step 3, map columns to term field. When ready to import, click Import.
Export
To export a vocabulary, select it and click the Export button  The vocabulary is exported as a CSV file.
TUTORIAL
Accessing the ‘Vocabularies’ menu
The aim of this tutorial is to modify the structure of the database so that we can record, for example, the ideological affiliations of each world leader in the database. To do this, we need to create a Vocabulary of different political ideologies that our world leaders might espouse.
You can view, add and edit all the Vocabularies in your database by accessing the ‘Vocabularies’ menu in the ‘Design’ pane. Add a new Vocabulary called ‘Political Ideologies’:

Adding Terms to a Vocabulary
Once you have created a new vocabulary, you can select it in the Vocabularies menu, and then start adding terms to it. Add some terms such as ‘Communism’ or ‘Neoliberalism’ to your new ‘Political Ideologies vocab’:

Creating a relationship Vocabulary
Relationships are defined by Vocabularies. To create a Vocabulary for a relationship, the process is exactly the same as for creating a basic Vocabulary. However, you must ensure to tick the box ‘Use for relations’ when you create your new vocabulary. Add a new relationship vocab called ‘Poltical Offices’:

And you should also use a different naming convention. It is best to use verb phrases such as ‘is Prime Minister of’ for relationships, rather than simple nouns such as ‘Prime Minister’ (e.g. ‘Angela Merkel’ → ‘is Kanzler of’ → Germany). Add a few terms to your Political Offices vocabulary such as ‘is Prime Minister of’ and ‘is Dictator of’:


Hierarchical terms
Question : est-ce qu’on peut importer un thésaurus ou un vocabulaire controlé existant (ex. Opentheso) ?
À priori OUI à partir du moment où l’export peut se faire en csv ou SKOS (?) -> @todo lien vers opentheso Lookup
Heurist recognises a period-separated term suh as Stone.Igneous.Granite and Stone.Sedimentary.Limestone as creating a three level hierarchy (one can also specify that the periods can be treated as just periods within the labels).
Vocabulary terms can be structured as a hierarchy by dragging under any other term, thus creating a tree structure.

A simple example of such a structure (trees are not limited to two levels):
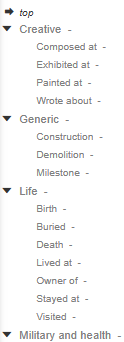
Clicking on merge into target term allows terms to be combined when dragged onto anotehr term - any term which is merged with another will be replaced in any records that use it with the result of the merge. A verification popup is displayed before any merge as the result is irreversible.
Reordering terms in the vocabulary tree
The  icon which appears on hover over a term will pop up a window which allows terms in that branch of the vocabulary to be reordered by drag and drop
Effects on search
Controlled tree vocabularies are useful for drop down choices as they allow search on a general term (eg. all Bénédictins) or on a more specific term (eg. Ordre de Fontevraud)

###To be continued !!! 04/03/2025
Editing terms
Term descriptors:
standard value, label, semantic you are i, image
flag terms
Setting Inverse Terms
By default, terms are 'non-directional'; that is, the same relationship term is used whichever the direction of the relationship (e.g. Painting > Linked to < Artist). However, if the relationship term does have an inverse that needs to be described (e.g. Versions > IsEditionOf has the inverse Versions > HasEdition), you can add it. Note. An inverse term must already exist in the Vocabulary tree list; if not, create it first.
Link terms
change field type
CSV export and import to modify field content
Record ownership
Add record URL with tags and field values and ownership
Sustainability - no plugins
@todo This does not belong here
Many systems provide basic functionality in the core product and depend on plugins for for quite common functions such as field formatting for data entry or export of common file types. This is a recipe for disaster, for example Drupal has more than 40,000 modules many of which only apply to specific versions, have not been completed to usable condition or no longer work.
=== Define Connections ===
Connect Data
A powerful feature of Heurist is the ability to relate or link records together to connect your data in a meaningful way without the complexity one might be familiar with in relational systems. Relationships are immediately available between ANY record types, without any further work, but these can also be constrained through a constraints menu so that only particular relationship types are allowed between particular pairs of record types, and this also allows constraint of the number of relationships allowed (e.g. one can only have two parents or a specimen bag can only belong to one context). However we also have two powerful methods for embedding connections directly in the records so that they appear contextualised in the data entry form: Record Pointers & Relationship Markers. For step-by-step instructions to create new pointer fields or relationship entities, click the links below:
Below, we explain the theory behind pointers and relationships. Which should you use, when and why?
Making connections
- Record pointers
- 'dropdown' presentation with search
- adding new values automatically linked to record
- Child record pointers
- Only one parent
- Invisible back pointer, but it is in fact accessible as
- cannot/should not use as stand-alone
- 'knows' its parent so cn make use of fields in parent
- In which direction should you make connections???
- Use of the visualisation diagram to make connections
- Relationship markers
- Relationship terms
- Relationship vocabularies
- Inverse terms / reflexivity
- Pros and cons of using relationship markers
- Mediaeval monks as an example
- Intermediate records
- Referencing bibliography types
- Sub-records
- Use for varying attribute sets
- Use to describe elements eg. of a tool or a structure
- Sub-record creation function
- Use with caution, non-reversible
Record Pointers
The simplest way to connect two records to one another is using a Record Pointer field. In most cases, a record pointer will be sufficient. For example, if you wish to record that a particular Building is situated in a particular Place, it would usually be sufficient to have a field called 'location' in the Building record which simply points to the 'Place' where it is located. However, Heurist provides many additional ways of linking records to one another, when the simple Record Pointer solution is inconvenient.
A record pointer is a field within a record that defines or references a one-way link to one or more specific record types. You define pointers between data when you create the database structure. The type of a pointer can be constrained so you can only select a record of a particular type (or types).
Similar to term lists, pointers allow a field to be populated from a controlled list, but in this case the list is all records in the database of a particular type, or types. This effectively ‘embeds’ all the information from the chosen record in your current record (but it is only stored once, however often it is ‘embedded’).
Typically, record pointers are used when there is a specific known relationship. For example, to identify people (authors, owners, actors, ..), multimedia items (pdf, images, video), events, places, organisations etc. with specific relationships to a record. Record pointers can define relationships between heterogeneous records (e.g. event with person, building with date etc.).
For example, imagine a record about a chapter in an edited book. It has one or more authors and it belongs to a book. But it may share the author(s) with many other books, book chapters, articles and so forth, and the book with a dozen or so other chapters, each with different authors. Rather than entering the author(s) as text fields and repeating this information for every chapter in the book, you can create records for each of these Author entities and link them into the record for the chapter. You can then use the Author(s) field (which in this cases is a repeatable field) to select exciting authors in the database, or if they do not already exist, create them. In the same way you can create book records, series records, publisher records and so forth, and simply point to these records instead of re-entering the data.
Using pointers saves typing, reduces data entry errors, and ensures a continuous connection between records that share the same source material (e.g. authors, books, publishers etc.).
Use record pointer and relationship marker fields
Record pointers are the workhorse for quickly and easily building simple relationships between records. Use a record pointer field to establish a hierarchical relationship through a pointer to a parent record (e.g. a chapter belonging to a book or a photograph belonging to a collection) or to indicate records with a specific role in relation to the entity being described (e.g. the author of a book, the producer of a film, the venue where a play is performed, a birth or commemoration event, a qualification).
Relationship markers are similar to pointers but carry additional information; minimally, a relationship type, but also commonly a date range over which the relationship is applicable. Relationships are useful where there are lots of potential types of relationship (e.g. roles that people may play in relation to a theatre production), as an alternative to defining a separate pointer field for each role.
They are also useful where the relationship has a limited duration (e.g. relationships of employment, patronage, residence or exhibition/loan).
As a general rule, use a pointer field, constrained to a specific record type (e.g. place, person, series, component), where you will record a single value (e.g. parent) or a small number of values (e.g. authors) which have an unequivocal relationship with the entity being described and where multiple pointers are all equivalent (although they may be ordered—authors being a good example).
Use a relationship marker field where you do not know a priori which relationships will be present and/or there are numerous possible relationship types, or the relationships have a temporal range, or the relationships are subject to interpretation and you need to provide supporting information through notes or references.
Relationship markers
Relationship marker fields provide a built-in method for connecting entities with typed relationships and dating. This is very useful for things like relationships between people eg. family or associates, or between people and groups eg. organisations, associations. It is valuable because Heurist can automatically 'reflect' the relationship so that a relationship marker placed in both records will show the relationship from the perspective of the record where it is located. So if A is shown as Master Of B in A's record, B will be shown as Student of A in B's record (see example of Briuno of Cologner and Willigis, Archbishop of Mainz below).
Relationship records can include start and end date of the relationship as well as other attributes such as notes and bibliographic references, and the user can add additional attributes if they wish, as with any other record type
However, although relationship markers can define the set of relationships which are allowed and the types of entity which are to be related - so we can have family connections of people and stratigraphic relations of archaeological contexts in the same database - relationship records are limited by the fact that there is only one type of Relationship record. So, if one adds additional attributes they will be added to all Relationships.
This may not make a lot of sense if one starts to add, for instance, fields for stratigraphic drawings, photos and field notes describing the stratigraphic relationships, which will then appear for family relationships; although its is perfectly OK just to ignore them, it's inelegant. This is where intermediate records connecting entities come in to play. They take on much the same role as relationship records, but each type of relationship will have its own record type with the attributes specific to that relationship.
However it may be worth creating an intermediate record even if there is only one type of relationship in order not to overload relationship records with additional fields and with a view to adding other intermediate record types in future.
Relationship markers A relationship marker is a record that defines a two-way link between two records that you wish to connect. Relationship markers allow connections to be established between any two types of entity, but also allow the type of connection to be recorded via a separate relationship record. What the relationship marker does is build in the relationship to the databases structure and prompts the user as they build their database. It provides structure as to what relationships the user can build.
**Note. **Relationship pointers differ from relationship markers in that they create a direct one-to-one link between records, without an intermediate relationship record, which in some instances may be the preferable solution.
(See ‘When to use a pointer and when a relationship?’ below).
The relationship marker is implemented as a separate record that links two records together, regardless of type. All relationship details are stored in the relationship record itself, which has two fields that point to the source record and the target record of the relationship. The relationship marker field is embedded directly in the data entry form – it does not actually contain any data itself, instead it acts as a marker (or prompt) to the user to create a new relationship record (‘show this type of relationship at this point in the form’).
Relationship markers may be further constrained to specific record types and a limited set of relationship types appropriate to that point in the form; the constraints restrict the term list (of relationships available) and the target record types. Relationship markers are useful in recording connections that are less standardised. For instance, have lots of different options (such as stratigraphic relationships or family relationships by birth) or have a time-limited component (such as museum loans or personal relationships by marriage or association) or otherwise require additional information (such as assignments of connections which require interpretation and explanation).
A good example of a relationship is that between a brother and sister. You can use a relatinship to represent Jack being Jill's brother, as in the diagram. In this case, there are three entities at play: Person(Jack) + Relationship(Siblinghood) + Person(Jill). In this case, Heurist automatically deals with Jack and Jill's genders, and implies that Jill is Jack's sister as soon as you enter that Jack is Jill's brother.
Child Record Pointers
A somewhat similar usage is to break down sets of attributes which apply to components of an entity or only appy to particular subtypes of an entity. For example:
- Components: individual scenes (components) of a painting or decoration panel might be recorded as sub-records, and they might have further sub-records describing individual figures or motifs.
- An architectural structure might similarly be broken down into components, some of which may be repeated eg. rooms, doorways, while others may only occur once eg. roof, with each of these component types having its own distinct set of attributes.
- Subtypes: A stone artefact might have general attributes such as type of material, weight, dimensions, measurements and artefact class eg. ground axe, core, scraper etc., and then for each of these classes a sub-record, of which only one will be present, describing the more specific attributes relating to that class of object.
- In the Intermediate records section, we used the example of a database about plays and the theatres where they were performed. In that example, we suggested that you might create a 'Production' record type to link plays to theatres. Now each 'Production' would usually, by definition, be a 'Production' of only one particular play – this would be a good use case for a Child Record Pointer. By making the 'Production' a child record of the 'Play' record type, you ensure that each Production is linked to a play and to only one play. This also makes it easier to read your database, as the 'Productions' will be neatly listed in the data entry form for each Play, and the Play for each Production will appear prominently at the top of the data entry form for each Production. In all of these examples, the sub-records are records in their own right, and can be seen as such in the database, but they 'belong to' a specific parent record. This is implemented by making the pointer from the parent record to the component or subtype record a child record pointer (the lefthand image shows only the most relevant fields from the record pointer field modification form, the righthand image shows how the child record indicates its parent):
Sub records and child records / Intermediate records
Relationship markers are ideal when you wish to record many different types of relatively simple relationships between different records. For example, Relationship Markers are ideally for recording family relationships – there are many different types of family relationship, but from a data perspective most family relationships are quite simple (some simply is someone else's mother). However, if you want to record a more complex interconnection between two records, then you may need an intermediate record type. For example, imagine that you wish to record where a particular play was performed. You have a number of plays in your database, and a number of theatres. Now a play is not simply performed in a theatre – each production potentially has a different cast and crew, runs for a different number of weeks, uses a particular text or version of the play and so on. So instead of creating a Record Pointer or Relationship Marker that directly connects a play to all the theatres where it was performed, you may wish to create an intermediate record type, such as 'Production', which sits in between plays and theatres. The 'Production' would record which play was produced and in which theatre(s). You could also record any other information you liked about each Production, such as the cast and crew, acting style, budget and so on. Sometimes you may need to create a number of intermediate record types to link two records together. Thinking about linking records in this way can be a good way of building the structure of your database.
Deletion of child record pointers
Move fields into sub-records
This is a complex funciton. We recommend, therefore, making a backup copy of the database with Admin > Clone before running it (and perhaps trying it on a clone before running it on your production database).
Using data in intermediate and sub-records/child records
Having recorded data in records which are connected to the records of interest, either one step or two steps removed, how do I access the fields in these records, for instance to find all the books illustrated by a particular illustrator, the images containing a particular type of motif, all the buildings with peristyles longer than 10 metres or the silcrete artefacts with polish on the lefthand edge? We can access these fields in several places: Constructed title Filter builder Facets builder Custom reports
Pointer or Relationship? The primary difference (as shown in the diagram opposite) between a record pointer and a relationship marker is that in the first instance the relationship details are stored in the record whereas in the second instance the relationship details are stored in the intermediate relationship record, which gives you more control over the relationship (e.g. specifying the type of relationship, date range, label, annotations etc.). The simple rule is, if you simply need to identify a fixed type of relationship, such as an incontrovertible whole-part or a specific function such as Excavator, use a Pointer field. If you want greater richness, such as specifying an open-ended list of roles, e.g. for a film Director, Producer, Gaffer, Actor, Cinematographer, etc. and to enrich those roles with temporal limits, annotation and so forth, then use a Relationship Marker field. When to use record pointers
- Aim to use a record pointer if possible, that is where the relationship between two records is not time-limited. Record pointers can also be set to parent-child (whole-part) where there is such a relationship.
- If you have several types of relationship you can use several record pointers.
However, if there is a long list and/or time limits eg. in family relationships, or where you wish to add notes and referencing information to explain each relationship individually:
- Either: use a relationship marker field (which allows a list of relationship types in the relationship type field, plus space for additional fields such as time, notes and referencing information);
- Or: use a record pointer field to a new record type (intermediate record) which expresses the relationship and any other information you wish to record. In this case you are effectively introducing a typ of relationmship record, but one which does not use the special functions (notably inverse relationship types) of relationship records.
- Where some entity (e.g. an author), is referenced by many records. The data about that entity (name, title, date of birth, location, roles etc.) can be entered once into the record describing the entity and then referenced from as many other records as you wish. This is preferable to listing all the related records in the single record to which they are related (which is why we reference an Author for each book or artiucle they wrote, rather than listing al lthe books and articles under each author).
- For resource pointer fields, where you wish to constrain the pointers to one or more specific record types. This is useful, for example, if you want a pointer to a person or organisation (e.g. as the owner of copyright) and want to make sure that this pointer can only point to one of these entities and not to, say, a website or an artefact. When to use relationship markers
- If the relationship is not permanent (i.e. it has a time range, such as a person as emperor of an empire)
- There are several different types of relationship possible between any pair of entity types (for example, an organisation can be related to people as director(s), owners(s), member(s), student(s) etc. Rather than creating separate pointer fields for each of these relationships, they can be created as relationship records with a range of relationship types)
- The relationship is not unequivocal or has rich information associated with it, and therefore requires commentary, justification or bibliographic references (which can be entered as Interpretations or notes in the relationship record – there is nowhere to store additional information in a pointer field);
- The set of relationships is open-ended or requires complex constraints, such as genealogical relationships which might be extended with new relationships, and where one might wish to specify, for example, that a person can have no more than four grandparents, only two of whom can be grandfathers.
- By using relationships, you can record additional information about the relationship, including the type of relationship (from a list of allowable types), the date range of the relationship and notes about the relationship
Constructed titles and Title masks
One of the most powerful and underutilised features of Heurist is hidden-in-plain-sight. It is the title used to represent records in the results list, in connections, in reports and many other places.
The Constructed title is like the reference you might find in the bibliography at the end of a book: it uses a concatenation of important fields, sometimes shortened, to uniquely identify and summarise the database record in question. The constructed title is generated on-the-fly when the record is created or modified.
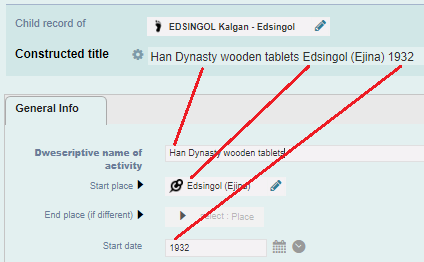
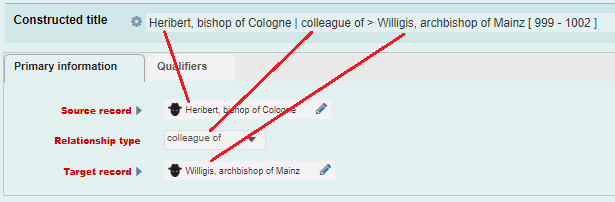
Constructed titles are used to represent records when they are listed in search results and as the visible representation of the record referenced in a pointer field (first image below) or relationship marker field (second image below).
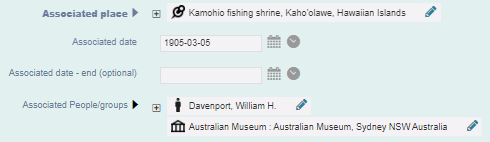
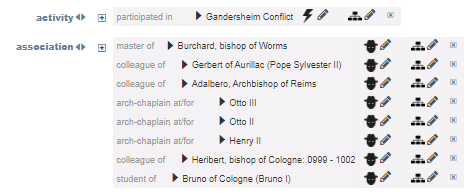
Constructed titles can also be used in reports and visualisations, for sorting, in other constructed titles, and as the constructed title of connected records. We strongly recommend putting a little thought into the design of the constructed titles, as well-designed constructed titles can greatly improve the clarity and ease of use of the database.
The Title Mask defines the choice of fields in the constructed title. Title masks are one of the most useful, and perhaps misunderstood or under-used features of Heurist. A separate title mask, with different fields, is defined for each record type. The constructed value is used as the extended title displayed in search results and other lists.
The title mask builds a constructed title from the values of fields in the record.
- Fields are identified by [ ] e.g. **[Title], pp. [Start_Page]-[End_Page] **might generate: "Alice in Wonderland, pp. 37-39" Conditional text
- Add optional text before a field (if it has a value) or a different set of text if a value is not available by adding {\Text for existing value \Text for missing value} after a field, for example: [Starting_date] {\Starting date: \Start date unknown} will either generate: "Starting date: 04-11-1974" if there is a date, or "Start date unknown" if Starting_date is empty. You can also leave the value blank, in which case nothing will be output in the case of a missing value.
- Inserting a literal square-bracket : use two consecutive square-brackets ([[ or ]]).
- Inserting fields from the tree : The element names in square brackets should match field names for the record type, and this is ensured by providing a tree of available fields which can be inserted

Constructed titles can use fields in the parent record (connected by a parent-child record pointer), as we can see in this example:

Constructed title aka Record title or RecTitle
Setting the constructed title
To set the constructed title for a record type, edit any record of that type (or simply add a new blank record) and click on the Constructed title link left of the title at the top of the edit form:

which will bring up a dialogue allowing you to select the fields which you want to use to construct the title for every record of that type. **HTML tags in Constructed Titles.
Admin > Rebuild Record Titles
This option recalculates all the constructed (composite) record titles, compares them with the existing title and updates the title where the title has changed (generally due to changes in the title mask for the record type). At the end of the process it will display a list of records for which the titles were changed and a list of records for which the new title would be blank (an error condition). Note. To check the validity of title masks, see Administration | Verify Title Masks. Result Title fields are scanned and title usage updated where applicable. The scan shows a list of records for which the titles were changed. This includes: number processed number marked for update number left as is (these are left blank due to incorrect formatting etc. and need to be checked manually via the next step) To view all updated records in the Search Results Pane (in a new browser window), click the view updated records link. Note. If the title is blank, update the record appropriately (see Define New Record Type | Title Masks).
Content to be merged or eliminated
<so underused …> show lots of tips and tricks of how to use them, notably when dealing with hierarchical entities Title masks allow you to define composite titles that can be constructed dynamically from field values.
**You can add simple html tags in the constructed title eg. for bold or link to put link to open an image referenced in the record purely by its name. Please remember to close tags. Bold, italic, underline, strong, emphasis and superscript are allowed, Others are stripped out automatically. If you need others, contact the Heurist team. Note. To verify title masks, see Masks provide the ability to build a composite title based on information taken from other fields in the record, on the fly. The title mask is a string into which field values are inserted to create an extended title for the record. The constructed value is used as the extended title displayed in search results and other lists. Fields in the record are indicated by square brackets. The element names in square brackets should match field names for this record type. For example, a Person record might have the fields: Given Name(s), Family Name, Title. In this case you could create the following title mask: [Family Name], [Given Name(s)] ([Title] A person whose Family Name = 'Smith', Given Name(s) = 'John', Title = 'Dr' will be rendered in the Title field as: Smith, John (Dr) Other people will be rendered appropriately. Fields in records that are referenced by the record through pointers can also be used. For example: [personpointer].[Last name] This pulls out a person's name from a person record pointed to by the current record. Additional text or punctuation can also be included. For example: [Title], pp. [Start_Page]-[End_Page] This renders the Title field and Start and End Page fields as, for example: Alice in Wonderland, pp. 37-39 To insert a literal square-bracket, use two consecutive square-brackets ([[ or ]]). Fields in records referenced by the record through pointers can also be used: [personpointer].[Last name] This gets a person's name from a Person record pointed to by the current record. To create a title mask
- Once you have saved your record type, select the Edit Mask button. Note. To later edit the Record Type page, navigate to the Record Type page (go to Database | Manage Structure, select the relevant group and click the Edit icon for the record type.) The Record Type Title Mask Edit dialog displays:
 Note. You can enter a mask directly into the field if you wish, or build the mask as follows.
 - Position the cursor in the Build Mask field.
- Select the field(s) you wish to insert from the left hand column (this shows all available field markers in the current record, plus fields in records pointed to by this record) and click Insert Fields. You can repeat this step for each field or set of fields.
- To add additional text around the field markers, enter the text without square brackets in the appropriate location.
- When ready, you can test the mask using actual data. From the Test Mask dropdown, select any record, then click Test to view the result:

- When the mask is correct, click Save Mask to save it. The mask will now appear in the Mask field.
Ch 06 : Populating the database (import, lookup & synchronisation)
Ch 06: Populating the database
1 Populate menu
1.1 Introduction
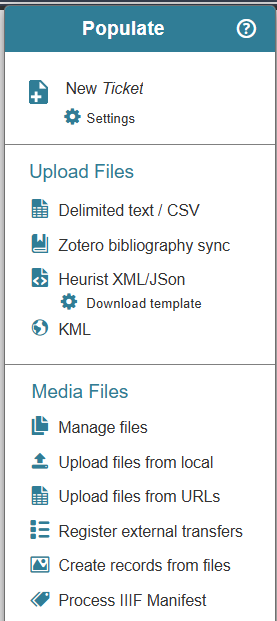
1.2 Populate menu functions
Functions for adding and importing data.
- New record - opens a data entry form to enter data for a new record
- Upload Files
- Delimited text / CSV - CSV upload wizard, splits complex CSVs into component record types
- Zotero bibliography sync. - synchronise records with one or more Zotero databases
- Heurist XML/JSON - import XML or JSON exported from another database, Heurist or other
- Download template (XML) -- get a template for formatting data for import by the above
- KML -- import spatial data, creating a new record for each spatial object
- Media Files
- Upload media files/images -- uploads individual files or directories, maintaining structure
- Upload media from URLs -- uploads a set of files specified by URLs
- Index external transfers -- scans media folders and add missed to Media Files, indexing uploaded files or external transfers
- Create media records -- creates, updates and reads XML manifest files in the folders ; creates Digital Media records for all files uploaded to the database
- IIIF Images -- upload IIIf images or manifests
- Process IIIF manifests -- reads an uploaded IIIF JSon manifest and creates Canvas and Annotation records
2 Manual input
2.1 New record
This function creates a new empty record, ready for data entry. This is the primary means by which a database is populated manually by the users. By default and in order to speed manual data entry, the type of record created will be the same as the most recently created record. This default record type appears in italic; in this example, the default type is Person.
Clicking [New] button directly creates a record of the default type. A popup appears in which you can immediately begin entering data.
Below [New], hovering over [Settings] opens the slide tray showing the available record types in the database. To create a new record of a particular type, simply click on that record type.
Inside the record editing window, fields in bold red type are mandatory fields, which must be filled in order for the new record to be saved. There are range of options for editing both the record and also change the structure of the record (Modify Structure in the top left corner). It is not recommended to modify the structure of records unless you are an experienced user and have a good reason for doing so. In the bottom banner, there are several options for saving the current new record and then taking other actions:
- duplicating the record (Dupe),
- creating a fresh new record (New),
- save the current record but remain editing it (Save),
- save the current record and close it (Save + Close),
- and close the current record without saving it (Drop Changes).
2.2 Permission settings
You can control and change permissions settings to all the data entry of a specific record type by clicking on [Permission settings] at the top of the list (right-hand panel below) which pops up on rollover of [New], or by clicking on [Settings] below [New] button. It offers additional controls over the new record parameters:

By default, records in a new database will be visible only to logged in users. [Settings / Permission settings] brings up a dialogue allowing you to control the type and permission settings for future additions (cf. chapter 2 Roles and permission).
This can be used not only to determine the future record type and permissions which will be created when you click on [New], but also provides a URL which can be bookmarked or added to a web page to create new records with those specific permissions. The use of a tag or tags can be used to flag new records added, for example, by guests, that can be retrieved for editorial vetting. Other values can also be set with suitable parameters in the URL.

3. Upload Files
3.1 Delimited text / CSV
3.1.1 Presentation
Delimited text / CSV upload is the primary means for populating your database with bulk data. This tool is used to parse delimited text, comma-separated or tab-separated variable (CSV or TSV) data, and then organise that data into structures that are compatible with Heurist. The import tool is a very powerful way to populate your database, but it can be a complex process. It is important that the data is as clean as possible, prior to import. If you are unsure about any step in the import process, please consult the Heurist Help System, watch the walkthrough video, or contact Heurist community mailing list. There are three ways to begin using the Delimited texte/CSV upload workflow:
- Upload new file -- an existing CSV or TSV file from your desktop
- Select previously uploaded file -- these files appear in a dropdown menu
- Paste delimited data below -- you can paste data directly from the clipboard. Please observe the conventions for representing data, including using column labels in the first line, proper line terminations, quotes, and special symbols. These are explained in the help sidebar, and also in a dedicated page in the Help System.
3.1.2 What is CSV?
CSV, which stands for 'comma seperated values', is a simple text-based format for saving spreadsheets or tables. Data is stored as text. Each line in the text file represents a row of data, and commas are used to seperate each column (hence 'comma-seperated'). Consider the below example. You may have a text file called actors.csv, which looks as follows:
Surname, First Name, Street, Suburb, Postcode
Chopra, Priyanka, 200 Malabar Cres, West Bandra, 400050
Weaving, Hugo, 65 George St, Sydney, 2000If you opened this file in a spreasheet program such as Excel, Numbers or Sheets, it might look like this:
| Surname | First Name | Street | Suburb | Postcode |
|---|---|---|---|---|
Chopra | Priyanka | 200 Malabar Cres | West Bandra | 400050 |
Weaving | Hugo | 65 George St | Sydney | 2000 |
Since CSV is such a simple format, it can be understood by virtually all data analysis programs from Excel to SPSS. If you are planning to export your data for statistical analysis, then CSV is likely to be the ideal format.
3.1.3 Describing the importing process
This import facility lets you import delimited text files:
- CSV (comma separated values) file. Stores tabular data (numbers and text) in plain text. Each row of the file become a data record, while each comma-separated entry becomes a field.
- TSV (tab separated values) file. Stores tabular data in columns and rows (as in a worksheet). Rows and columns are imported into records and fields.
The entries in the file are matched against entries in the database; unmatched rows can be added as new records.
The import process handles the following types of scenarios:
- Pointer fields. Splits-out data into new record types linked with a pointer field (e.g. pulls out Authors or Place Names which are repeated for many records in the input data).
- Multi-values. Manages multiple values in a column, multi-line text columns and handles imbalanced quotes and other typical CSV/TSV issues.
- Misformatted data. Detects and reports line numbers for incorrectly formatted data to assist in correction. It can handle a wide variety of separators, long multi-line text fields with <CR> characters within fields, single quotes within double quotes and vice versa.
- Geographic Data. Geographic data is accepted in WKT (Well Known Format); for example: POINT(x y). See here for more details.
- Repeatable Fields. Multiple values for a repeatable field can be specified by separating the values with a | (pipe) symbol within the field. For example: 1,2,"3|4",5
- Normalisation. In order to normalise the data (e.g. to extract a list of persons (entities) as records and then point to these person records rather than including names repetitively in the main data records), start by importing only those fields relating to the entities to be normalised. After import, the data will be redisplayed with the ID numbers for the extracted records, which can be used as a pointer field in the subsequent import of the remaining columns of data. You needn't assign all the columns as unassigned columns will be ignored. Duplicated records will be treated as you specified.
- Disambiguation. When importing, Heurist tries to identify similar records which already exist in the database (a process known as disambiguation) and gives you the option of bookmarking one of these rather than making a new record.
3.1.4 Before You Begin
At a minimum, you must have a suitable record type structure defined in the database (it is possible to add addiitonal fields durign the import, but you at least need th record types and their connections) and a corresponding CSV/TSV file holding the entries you wish to transform into records.
Importing can be a complex business. It is important to clean up the data as much as possible in advance. The following provides some tips on how to prepare your data:
- We recommend breaking very large files into manageable blocks of about two thousand lines.
- Only one record type can be imported at each step of the process.
- Have one row per entry, with each column containing a single element of data (split concatenated values into separate columns, and place notes about data items in a separate column, not appended to the data value).
- The first line MUST contain column labels. Do it for your own sanity! The first line of your data also determines the expected field count.
- Data rows must occupy a single line of data terminated with a linefeed: CRLF (Windows) or LF (Unix/Mac). Linefeeds within memo fields should be represented by CR only. Fields should be separated by tab or comma. Quotes may exist within unquoted fields, but within quoted fields they should be preceded by a backslash ( \" ). Fields containing the field separator should be enclosed in quotes. Editors such as Notepad++ (a free, open source Windows application) show tabs, CR and LF as symbols and can do global replacements on them.
- Coded columns should use a consistent set of codes. In addition to your spreadsheet program, you may find OpenRefine a useful tool for checking and correcting coded columns, splitting fields, georeferencing, finding URL references and so on.
- We strongly suggest editing the structure of the database to add any fields and terms that you will require for the import, before attempting to load the data. If you start trying to load data without the appropriate fields in place you will find it frustrating having to exit the process repeatedly to add fields.
- If you have missing data for Required fields, you may find it convenient to set those fields to Optional before importing, then set them back to Required, then use Database > Structure > Verify to get a list of the records which need correcting. Alternatively, you can add some dummy value to the data, such as 'Missing', and search for this value after import.
- The import process can be repeated on the file to extract multiple entities from different columns and replace them with record IDs which can be used in a subsequent insertion or update of records.
- Please visit the page on Importing delimited text files on the Heurist network site for tips on successful import. <ce renvoi ne devrait plus être nécessaire par la suite>
3.1.5 Delimited Text Importer Wizard
The Import Wizard takes you through a number of screens and steps to assist you in defining the import. (Read the screen instructions carefully. It might be a good idea to carry out a trial import with a small dataset to check that the result is as you expected.)
Set Data Source
These options are:
- Select uploaded file. If you are importing a file you have imported before, select it from the dropdown. To clear this list, click [Clear All files].
- Upload File. If you are importing a new file, select it using the [Upload File] button.
- Paste Data. If you wish to use copied delimited text, paste it in the box below and click [Upload Data].
Set Import Parameters
For CSV files, before carrying out the import, you can set the import parameters (these settings are saved) as follows:
- Encoding. Select the appropriate encoding.
- Field Separator. Select the appropriate field separator: Comma or Tab.
- Fields Enclosed In. Select the appropriate field enclosure: (', " or None).
- Line Separator. Leave as Auto-Detect or select the appropriate line separator: Windows, Unix or Mac.
- Multi-value separator. Select the appropriate multi-value separator: (e.g. | ; : /).
- Date Format. Select the appropriate date format: European (dd/mm/yyyy or US (mm/dd/yyyy). Other date formats are possible and will be handled in the following wizard dialog.)
Click [Analyse Data] again to parse the expected results. This checks that the structure of your data matches what the Import Wizard expects. The header of the upload CSV (the first line of your data determines the expected field count) is checked against your import parameters, column names are extracted and encoding verified. The Import Wizard then attempts to convert the file based on your settings and displays the result (the expected input as rows (records) and columns (fields)).
Review the result and any error messages and update the source data if required. If you don't have Heurist Record ID (H-ID) value in your file, click on [Continue], else, specify the record that must be used to match the H-ID with already existing data.
:::info In this section you can also select any input column that contain dates (dd-mm-yyyy, mm-dd-yyyy or Iso standard) -- this allows the data to be parsed to extract consistency formatted date fields. :::
Once it's done click on [Continue].
Select Primary Record Type and Dependencies
The primary record type is the one represented by each row of the input file. Additional record types may be imported from selected columns prior to import of the primary, as determined by the dependencies shown. The creation of the primary record type from rows in the input file depends on the prior identification of other entities which will be connected via pointer fields or relationships. The tree below shows the dependencies of the primary record type determined from its pointer and relationship marker fields. Where an input entity matches an existing record, its ID value will be recorded in an ID field which can be used subsequently as a pointer field value; where no existing record is matched a new record is created and the new ID recorded. Check record types to be imported. Red indicates required pointer field.

3.1.6 The three importing steps
When the CSV/TSV data are loaded and that the record and connected entities are selected the import interface will take you through 3 important steps in order to correctly match and prepare your data for import:
- Matching step which take care of verifying if data imported already exists inside the database and thus triggering the appropriate action (updating, deleting, etc.).
- Fields to import step which define which columns of the imported CSV file will be imported into the database and in order to populate which field in the selected record type.
- Insert/update step which take care of populating or updating the database given the chosen scenario.
Step 1. Matching
In the first step of the matching process you can choose what to match or to skip matching. Select a radio button:
- Match on CSV Columns. To match import rows against existing records,select at least one Matching key column (later you can select for mapping) and ensure all selected key columns are allocated to a field. You can check (and scroll through) a sample of the field data to be mapped in the Values column. A new identification field will be created.
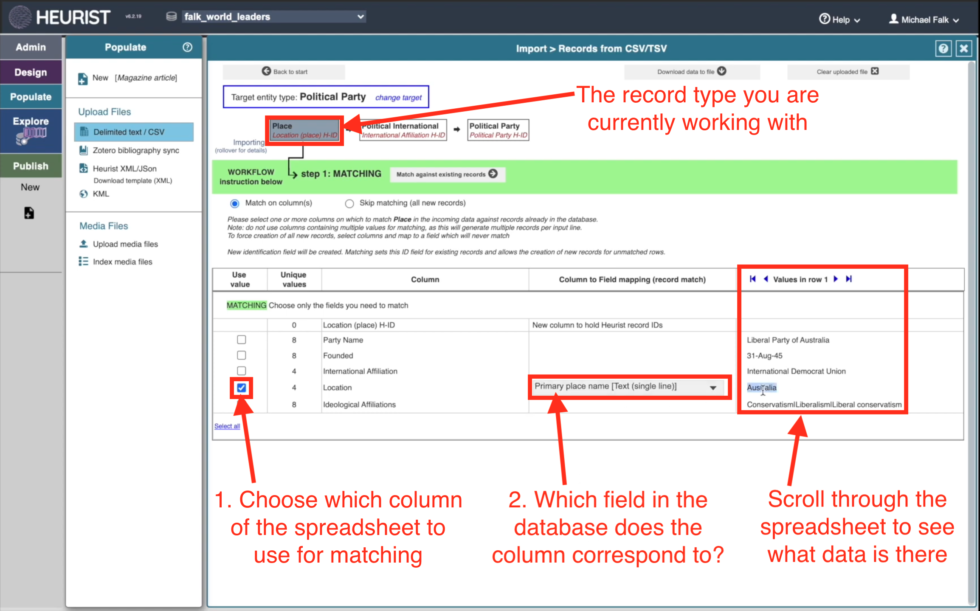
Matching sets this ID field for existing records and allows the creation of new records for unmatched rows.
- Use Heurist ID column. (Only usable if H-ID column exists both in the CSV file and in the records to update inside heurist). In this case, the identification H-ID field (which is a field managed by the system) will be used.
- Skip Matching (all new records). Skips the matching step (in this case only new records are created, one per input row).
Select the [Match on Columns] / Skip Matching button] (depending on the three previous cases). Matches are shown.
Step 2. Fields to Import
If all existing rows already match existing records (e.g. you may have already carried out the import successfully), then you can select the displayed Skip Update button to cancel the import.
The Import Summary box shows a mapping summary:
- Existing. Number of matching records (that already exist based on selected matching columns). These will therefore be skipped.
- New. Number of input rows for which no matching record has been found. These will therefore be added.
The following options are for matched or new rows:
- Show. This displays the records on screen (click the Close (x) button).
- Download. This downloads the records to a CSV text file.
The three matching, importing and inserting steps can work as an iterative operation if the spreadsheet data you are importing is a complex one. Therefore the import workflow allows you to progressively import columns which identify subsidiary entities (other Record Types linked through Record Pointers to the main record type you want to update or need to create data into) such as Place, Organisation, Collection, Series, Person, etc. The first step is to match identifying key fields and create new records from unmatched rows. The process starts with record pointers first and once all subsidiary entities have been matched and imported, you can import the primary entity type selected in the previous import phase.
- Record IDs for the imported columns are added as column 1. Copy and save these data immediately if there are additional fields to import, to allow use of the record IDs as record pointers. Warning: you will lose the record IDs as soon as you start over, so save the data below to a file first. <!--TODO Vincent: je ne comprends pas bien ce que cette partie signifie -->
- If the displayed results are not what you expected, then go through the steps again (go back a step or click [Back to Start] if you wish to start again; all of your settings will be lost) and make any adjustments (including adjustments to the CSV or TSV file and/or Record Type).
Complete the Column to Field Mapping. Since new records are to be created, make sure you select all relevant columns; all Required fields must be mapped to a dedicated CSV column in order to proceed further. Click [Prepare] when ready (importing does not happen yet).

A message will appear if you haven't selected any fields other than the ones which are used to match records, so those are the only fields which will be set, and the result may be incomplete records. Click Proceed if you wish to continue, otherwise Cancel and review your settings.
Step 3. Insert/Update
In this step you carry out the update (this will update the database based on your settings so be sure this is what you wish to do).
Select an option on how you wish to treat data that already exists in a field:
- Retain existing values and append distinct new data as multiple field values (existing values are not duplicated)
- Add new data only if field is empty (new data ignored for non-empty fields)
- Add and replace all existing value(s) for the record with new data
If you are happy to proceed with the import, click [Start Inset/Update]. You will be notified of the updates:
Click [OK] and close the window to exit the Import wizard. Review the imported records.

3.2 Zotero Bibliography
Zotero Bibliography Sync allows you to automatically synchronise a Zotero web library with the already existing bibliography structure within Heurist. It is especially powerful because it allows you to update bibliographic data from an active Zotero library, thereby saving time and effort in updating bibliography records within Heurist.
The synchronisation function looks for changes made since the last synchronisation, so it works fast even with a 20,000+ Zotero library once the initial synch has been done (which will take half an hour or so).
Heurist provides the following functions and capabilities for importing bibliographic data:
- Automatic identification and disambiguation of imported bibliographic types.
- Authors stored as person records allowing rich complementary data.
- Series, Journals, Publishers stored as separate records to eliminate data redundancy.
- Pre-defined domain profiles with collections of useful references, tags and searches.
To use the Bibliography Sync function, you first need to define a connection to a Zotero Library in Design/properties/Synchronisation and Indexing. If this has not yet been done, in your database, you will be prompted to edit the settings that establishing such a Zotero connection. The relevant field is Zotero web library key(s) and IDs for synchronisation.
It should be noted that not all the zotero fields are synchronised with heurist bibliography record types. Moreover the synchronisation process will create automaticaly new records for Persons (author), organizations (Publisher), Places (publication location) and of course book references and so on. The Synchronisation is a one way process from a given Zotero collection to a Heurist database.
3.3 Heurist XML / JSON
3.3.1 Summary
Heurist XML / JSON allows data to be imported from an XML or JSON format that is specially tailored for compatibility with Heurist. When preparing data in this format, it is strongly recommended to first download the XML template. This is an XML document, following a Heurist-XML(HML) schema, that presents the core definitions of records that are necessary for proper functioning of your database. Following this template, you can design an XML document that can be easily read by Heurist. Once an HML or JSon-format is ready, select the file to upload from your desktop. Doing this takes you to a screen where the data is parsed and check. This screen enumerates the records to be imported and asks for final confirmation before the data is imported to create new records.
Click [Import Records] to start the import.
Contrary to the CSV/TSV import which allows a very refined way of updating or creating given field values with the use of matching and preparing steps, the XML/JSON import is a one time operation that imports a whole set of contents in one go. If the data is correctly formatted, as when exported from one Heurist database, it is a very fast and accurate way of importing data into another Heurist database (it can even download structure to accomodate the data provided the source database is a Registered database).
3.3.2 Import XML/JSON
Heurist will import HML exported from another Heurist database or from an external source which have been converted to HML format.
For Heurist database sources
Unless the source database structure is identical with the target, it should be registered first on the heurist master server which keep an index of unique identifiers for record type and fields in order to reuse it yourself or to be shared with other heurist users. You can register your database by going to [Design > Register].
Registration thus allows the target database to contact the source Heurist database in order to import (or update) the record (entity) type and field definitions it finds in the HML file, as well as permitting the inclusion of global conceptIDs in the HML.
For HML exported from a Heurist database, <database id=??> is normally set to indicate the source database. If it is set, synchronisation of definitions will be performed before the data are imported.
For non-Heurist database sources
To import a file generated from another source, eg. by transformation of an RDBMS to XML:
- the XML file should conform to the template output from the target database using [Import > Download XML template];
- the target database must contain definitions for all the record (entity) types and fields encountered in the XML file (in other words, only entity type and field codes defined in the XML template should appear);
- the XML file should specify a Heurist database ID of 0 .
If a database ID is specified, synchronisation of definitions from that database will be performed before the data are imported. Since imported files will normally use a template for record types and fields exported from the target database, this is only useful for synchronising vocabularies and terms.
Record (entity) types and fields can then be specified using concept IDs (these will have a database ID of zero followed by the local ID (eg. 0-1234) for record types or fields defined locally in an unregistered target database.
Terms in the incoming data can be specified in one of the following ways which are evaluated in order:
- first it looks for a valid local term ID.
- If that is not found it tries to match it as a concept ID.
- It then looks for an alphanumeric term applicable to the current field, and finally a standard code applicable to the current field.
- If it gets to the end without finding a match, the value will be added to the database in the (first) vocabulary used by the field.
The XML Template
To create and import an XML file eg. to transfer data from another non-Heurist file or database, we strongly recommend using the XML tempalte which can be exported from Heurist using [Populate > Download template (XML)]. The template file contains full instructions for setting up the file. However, it is worth explaining the handling of record pointer fields in a little more detail.
To reference an existing record in the target database, the record number must be prefixed with H-ID- otherwise Heurist interprets the number as any identifier that matches the identifier filled in <id> for another record in the import file, which may therefore be numeric or alpah/numeric.
This behaviour is quite intentional precisely to avoid making false connections (record IDs are database specific and cannot be known in advance unless re-exported and re imported, which is rendered unnecessary by our approach).
Note that inside the XML template, RECORD_REFERENCE may be replaced with a numeric or alphanumeric reference to another record, indicated by the <ID> tag. Note that this reference will be replaced with an automatically generated numeric Heurist record ID (H-ID), which will be different from the reference supplied. The reference supplied will be recorded in a field Original ID.
If you wish to specify existing Heurist records in the target database as the target (value) of a Record Pointer field, specify their Heurist record ID (H-ID) in the form H-ID-nnnn, where nnnn is the H-ID of the target record in the target database. Specifying non-existent record IDs will throw an error. The record type of target records are not checked on import; pointers to records of the* wrong type can be found later with [Admin > Verify integrity].
Example: I put in H-ID-2456 for a record pointer value:
- if there is a record "2456", the record pointer is set to point to record "2456"
- if there is no record "2456", it is reported as an error
- if I put in any other type of value for the record pointer value eg. 2456 or wxyz or CallNo123456, it will look for a record defined in the XML with the value "2456" or "wxyz" or "CallNo123456" respectively, and set the record pointer value to the H-ID assigned to this record.
It will not try to second guess that "2456" is a valid record pointer value, because that is so database specific as to be almost certain to fail if there is no record with th especified ID, an error will be reported :::
3.4 KML
3.4.1 Introduction
KML is designed specifically for the import of bulk geospatial data into Heurist. In order to use this tool, first prepare a KML document in the standard format. Note that popular mapping tools such as Google Earth and Google Maps are able to natively export geospatial data in KML format.
3.4.2 Import KML
KML (Keyhole Markup Language) is a file format used to display geographic data in an Earth browser such as Google Earth, Google Maps, and Google Maps for mobile. KML uses a tag-based structure with nested elements and attributes and is based on the XML standard. All tags are case-sensitive and must be appear exactly as they are listed in the KML Reference. The Reference indicates which tags are optional. Within a given element, tags must appear in the order shown in the Reference.
Heurist will recognise the KML format and process the file, and prompt you for a record type. All records created by a single KML import will have the same record type.
- Select [Choose File] and browse to select a KML file to import.
- Click [Continue]. A summary of records to be imported is shown. When ready, click [Continue]. Heurist will recognise the KML format and process the file, and prompt you for a record type.
- Select the record type and click Continue.
All records created by a single KML import have the same record type
4 Media Files - images, videos, audio and other files
4.1 Upload media files / images
Upload media files/images function, is designed for use by Database Managers only. It allows you to upload media files/images directly onto the Heurist server for use with a particular database. There are a range of allowable file formats/extension that can be uploaded in bulk in this way. As a Database Manager, you can select a media/upload folder in the relevant directory on the Heurist server. After selecting the target folder within this directory, Add Files from the desktop to upload. Once selected, click Start uploads to begin the process of copying these media files onto the Heurist server. Once completed, close the pane by clicking Finished.
4.2 Upload media from URL
Upload media from URLs function, is designed for use by Database Managers only, uploads a set of files specified by URLs, directly in the database. You can paste URLs and optional description in the area, CSV format is recommended. After pasting URLs or uploading CSV file, the URLs are checked and if the media files are supported, uploaded to the Heurist database. After uploading, assign each file to a record type and link it to the appropriate database entry by selecting file assignment.

4.3 Index external files
Index external files function, which is reserved for advanced users only, scans media folders and add missed to Media Files. Files have to be uploaded through Populate either using :
- Function Upload media files/images
- or by direct sftp access to the file_uploads directory (or sub-directories) on the server for larger files. Make sure the format of the extensions is supported by Heurist. Then, select the folders to scan. Click on [Proceed].
4.4 Create media records
Create media records function, is designed for Database Managers only, and is reserved for advanced users. It creates, updates and reads XML manifest files in the folders listed in Design > Properties and creates Digital Media records for all files uploaded to the database. Before, make sure to upload files through Populate (Upload media files/images). And make sure that the format of the extensions to scan is supported by Heurist. Click on "Continue" to synchronize the files.
4.5 IIIF Images
IIF (International Image Interoperability Format) provides a standard for image interchange widely used by museums, art galleries and others in the GLAM sector.
To enter an IIIF image, you need a File or Media URL field, when editing a specific record, enter the path of either:
- a IIIF image with an url ending /info.json
- a IIIF manifest with a name like manifest.json
Heurist will recognise these specific IIIF file and display them by using the embedded IIIF Mirador Viewer.
4.6 Process IIIF Manifests
Process IIIF Manifests function, is reserved for advanced users. It reads IIIF manifests and incluiding Annoftations, and creates or updates Annotation records in the Heurist database.
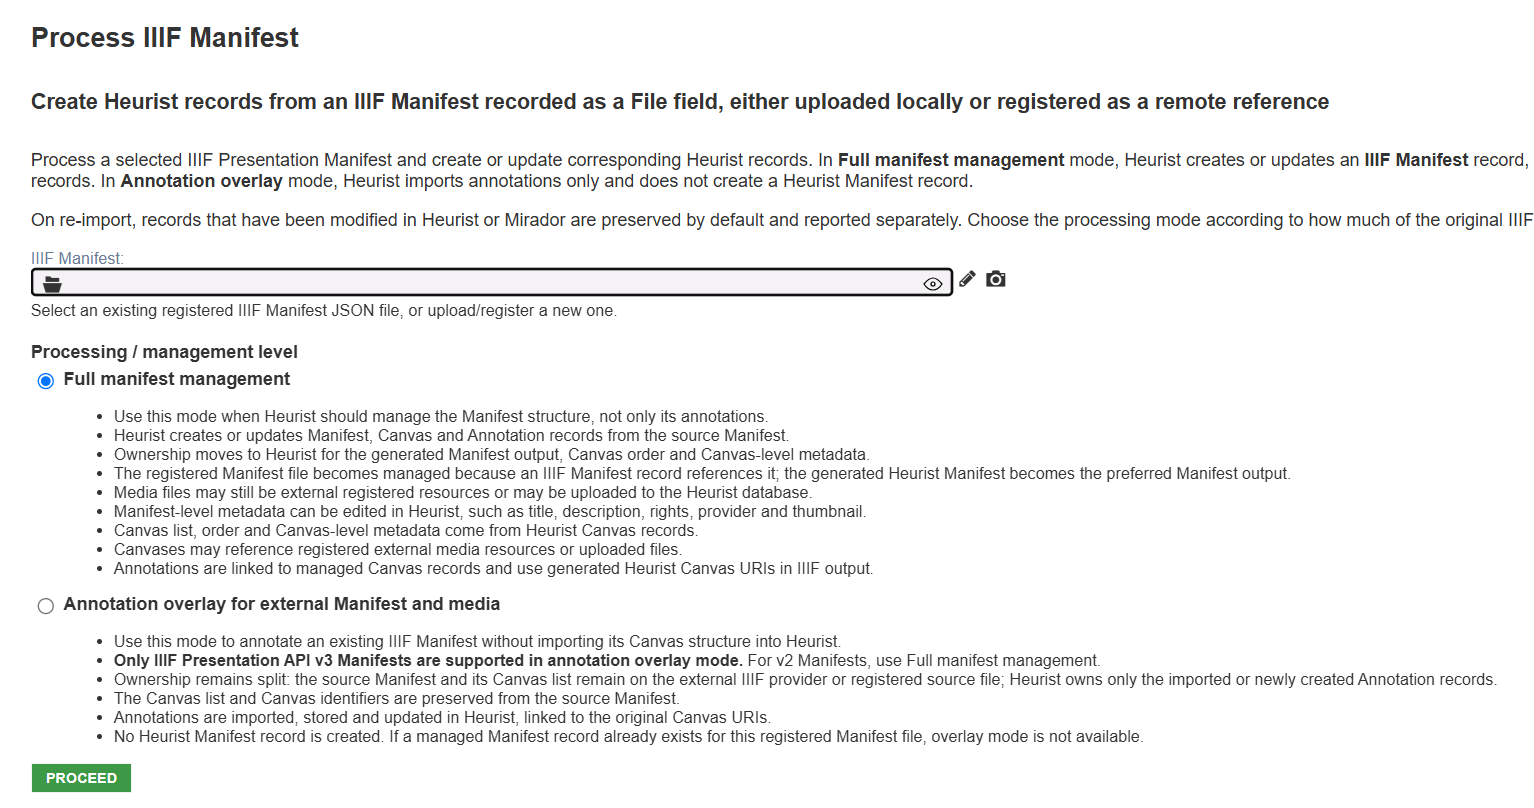
TODO: need more comprehensive documentaiton
5 Annexes
5.1 CSV Import Tips and Notes
5.1.1 Importing child records
Let's assume we have a Person Record Type with Child records linked fields such as Birth, Death, Life Event, Address association, etc. To import Address Association - which associates a Person with a Place for a particular date, date range or list of years - you must import Places to create Place H-IDs. But you must also import Persons to create Person H-IDs.
This may be tricky because the child pointer to these records may be a required field. But it needs to be done first in order to be able to create the child records.
5.1.2 Beware matching a repeating value...
Beware matching on a value which repeats as it can result in a new record for every value. For example, Address Association might be derived from a file listing an address for a particular person for each of 20 years in 20 rows. So one may have 10 rows with 17, First Street and 10 rows with 35, Second Avenue, and each of those rows has a different value in the year column.
What you want is TWO records, each with 10 years listed in a repeating YEAR field, not 20 records each with a year value and each address repeated in ten records. You should therefore ONLY match on Address (and Person). If you match on Year you will end up with 20 records, each with one year value, rather than 2 records, each with 10 year values.
5.1.3 Importing child records
Child records can be used to describe inherent and strongly dependent components of an entity, for example scenes in a frieze or painting, motifs in a scene, features of a building, worked edges on an artefact. They can equally be used to group rarely used attributes specific to a particular variant of an entity, for example pottery attributes for archaeological finds (where some finds are pottery, others bone, glass, stone or shell) - this is the case used here to illustrate the import of child records.
After defining all the fields for the Child Record type, you need a CSV file which either references the H-ID of the parent records, or a unique field or combination of fields in the parent records. In our case the Finds were imported from an Access database and the Find ID in the source database is included as Artefact ID. This allows it to be matched with Finds.Artefact ID (Access DB) in Heurist to obtain the parent Record Pointer.
The attributes to be imported into the child record will also be defined in the file. For categorised fields (a controlled list), we will use Heurist's Term List field type which may be represented in teh incoming data either as the labels or as the codes (foreign keys) used to reference the lookup tables in the source.
@TODO : check images on the previous paragrap in sharedocs document
To illustrate, let's define a test field Pottery type field with values "One", "Two" and "Three", which have numerical code 1, 2 and 3 respectively:
Here is the very simple test file imported by way of illustration.
Note that we use the code rather than the label (where exporting data from another software you may get either out of an SQL query depending on the way it is structured. In MSAccess, for example, some fields get joined with their lookup tables automatically and give you the label. Other softwares just give you the actual Foreign Key value in the field)
Artefact ID, Pottery type
244415, 3This file is loaded using [Import > Delimited text (CSV/TSV)].
First, we select the Parent record type (which is called Finds in this test case) as the target entity type and carry out matching using a unique field or combination (Artefact ID in this case) in order to create the Heurist IDs for the parent records (Finds), either through finding an existing record and setting its ID or creating a new one and assigning a new ID. This step can be skipped if the file contains Heurist IDs for the parent records:

Once you've done that, change target to the child record type (Pottery information in this case) and match on a combination of fields which uniquely identifies each child record (these fields may include the parent record ID, that is Find H-ID in this case). Then select the field(s) you want to import (which ++must++ include the parent record ID, as this determines the parent appropriate to each child record):

In the data entry form for the record imported you will see the child record link (in this case we have not yet defined the full set of fields for the child record, nor the constructed title mask):

The child record identifies its parent and also shows the imported field(s). Notice that I imported "3" and it came out as the label "Three". That is NOT because Heurist connects numbers with their textual representation but because Heurist will look for the standard code if it does not find a matching label. If neither the label nor the code is recognised for one or more rows of incoming data, Heurist offers you the opportunity of adding unknown labels.

5.1.4 Importing relationships / markers
People often ask "How can I import a relationship marker". The short answer is "you can't" since relationship markers are just markers (and constraints) and contain no data. The long answer is, you don't import relationship markers, you import relationship records.
Importing relationship records from a CSV file
While relationships can be imported from an XML file, the easiest way is to create a CSV file containing the relationships, and import using the CSV importer. This minimally contains something to identify the source record (eg. names or the Heurist ID) and the target record, adn the type of relationship. Dates and other attributes eg. notes or bibliographic references or degree of certainty, can also be provided.
Source Name, Source First name, Relation type, Target Last name, Target
First name , Start date, End date \
Dupond, Michel, is husband of, Dupont, Anne, 1512, 1531\
Dupont, Bernadette, is wife of, Dupond, Jean,,\
etc.The direction in which the relationship is defined does not matter provided the right term is used. Relationship type can either be directional, as in the case of isChildOf and isParentOf, or non-directional eg. isRelatedTo
Use [Import > Delimited (CSV/TSV)]:
Identify the target record type as Relationship record.
Relationship records might be marked as a hidden record type, in which case they will not show up in the options. Go to Design > Record types and set them as visible.
Match on the two source columns (Source Name and Source First Name in this case, or other columns that will identify the source record, for example the ID or title etc.), then a match on the two target columns. This will create appropriate Heurist ID columns (if the Heurist IDs are already in the file these can be selected).
Set the generated Heurist IDs to match the Source and Target record pointers, and the relationship type to match the relationship type field.
Finally, import the data into the Relationship records.
The imported relationship records will appear in any relationship markers whose constraints they fit.
Note: Relationship Markers do not contain any data. Nothing! These are markers that have two functions:
- Show Relationship records that match the marker (type of source, type of target, type of relationship)
- Show where you want to create relationships and constrain possible relationships (target type (s), relationship types)
If you put a Relationship Marker in the source type records, and another in the target type records, and if the relationships are either non-directional eg. isRelatedTo (applies in both directions) or the inverse of one-another (eg isChildOf and isParentOf), the relation will show in both records with the appropriate terms, for example:

5.2 Detailed mapping and use of KML and spatial data
5.2.1 KML Field Definitions
This table shows how the data is mapped into Heurist; it lists the KML tags that Heurist recognises as record details, and the bibliographic data fields that they are imported to.
Contact the Heurist Network Association for the full list of KML Field Definitions for the XML file to determine how the data is mapped into Heurist.
Heurist attempts to import each <Placemark> as a separate record.
KML tag | Heurist detail field |
|---|---|
<name> | Title (detail type #160) |
<address> | Location (#181) |
<AddressDetails> |
|
<phoneNumber> | Contact information (#309) |
<TimeSpan><begin> | Start Date (#177) |
<TimeSpan><end> | End Date (#178) |
<TimeStamp><when> | Date (#166) |
<Region> | Geographic object (#230) |
<Point> |
|
<LineString> |
|
<LinearRing> |
|
<Polygon> |
|
<MultiGeometry> |
|
<Snippet> | Shared scratchpad |
<description> |
|
<Metadata> |
|
It is possible to specify Heurist-formatted data in HXTBL format between KML's <Metadata> tags. For example:
...
<Placemark>
...
<Metadata>
<detail name="Name of organisation" id="160">
Archaeological Computing Laboratory
</detail>
<detail name="Organisation type" id="203">
Laboratory
</detail>
</Metadata>
...
</Placemark>
...Heurist will add fields of type #160 (Title) and type #203 (Organisation Type) to the record corresponding to this <Placemark>.
Ch 06a: Importing and matching references (worked example)
Ian Johnson, updated 29 May 2026
Background
This section gives a worked example of importing two sets of references (Primary and Secondary) for inscriptions from a spreadsheet derived from Zotero data. The example comes from the IDENK project (Idenk.net) based at the EFEO, courtesy the poject director Arlo Griffiths [REQUEST AGREEMENT, I am sure it will not be a problem]
Basic structure
- Inscription records contain two record pointer fields (Primary references and Secondary references)

- These point to Bibliographic reference records

- Bibliographic reference records contain
- a record pointer field to a bibliographic record (Book, Chapter, Journal Article, Thesis etc.) derived from the Zotero library
- pagination information (a text field containing page numbers, illustration or other information about sections of the document)
- Bibliography records are of various types (Book, Chapter, Journal Article, Thesis etc.)

The bibliography records are identified by strings such as Adams1912_01 (not shown in the view above). These are identifiers which have been filled in the Zotero Short Title field in a large Zotero library (21,000 references). These are referred to as ZSTs.
*One could also use the Zotero key field, which is automatically populated with an 8 alphamnumeric hash key which is statitically unique and cannot be edited - it is this key that we use to link our internal bibliographic records back to their Zotero origin records.*The steps are as follows:
- The first batch were already in the Heurist database so these identifiers are exported to a spreadsheet. Later batches will be imported from a spreadsheet used to collect data 'in the field'
- If not already separate in the spreadsheet, use Libre Office Data > To columns to split the ZST and the pagination reference (page numbers and or illustrations)
- Deduplicate the rows in the spreadsheet (Dat > Duplicates) based on the ZST and pagination. Each row will then be a reference to a particular place in a particular bibliographic record.
- Import into Bibliographic reference records
- Split the original spreadsheet (before deduplication) into two CSV files, one for Primary and one for Secondary references
- Import each of these files into the Inscriptions table, the first into the primary reference field, the second into the secondary reference field.
These fields are record pointer fields pointing to Bibliographic reference records, so the textual ZST + pagination value is first matched with the values in the database and this generates the ID of the Bibliographic reference records created in the previous steps, and ut us this ID which is inserted into the record pointer fields. - After updating the bibliographic records (Book, Chapter, Journal Artivle, |Thesis etc.) from the Zotero library (Populate > Zotero Bibliography sync we need to relate the Bibliographic reference records to the bibliographic records by matching the ZST in the first with the Zotero Short Title field in the second, using Recode > Foreign Key match.
From scratch
Delete all Bibliographic references. This also deletes the pointers to them from Inscriptions.
Preparing the spreadsheet
Batches 2 and 3 will already have their much more comprehensive spreadsheet, see later.
Export all the existing ZST references for Primary and Secondary refs (not Surrogates)
to CSV using CSV Primary Secondary refs custom report:

Open in Libre Office (the delimiter is tab, not $ as shown)

Highlight ZST column, Data > Text to columns using the colon ( : ) as a delimiter:

You now have the original ZST+pages value and separate ZST and Pagination values in the last two columns (some have no pagination so the last column will be empty).

Now deduplicate on the ZST Pages column in LibreOffice (Data > Duplicates).
Rather than child records we will point multiple inscriptions to common Biblio Reference records which include a page range. Note that editing these records can corrupt other Inscription entries which point to it if the change is such as to change the reference, since the Bibliographic reference records are to a specific place in a particular bibliographic entity.
The alternative is the use of child records and significant duplication (1 in 4 approx). Using independent bibliography references is altogether simpler to deal with apart from the slight drawback above.
Preparing the batch X spreadsheet
To document when I have the final spreadsheet
Loading the bibliographic references and linking
Load into Heurist with Populate > CSV.
Select INScriptions for H-ID as these records relate to data in the Inscriptions

However, first choose Bibliographic record pointer as we want to create bibliography records and then reference them in Inscriptions.
Skip matching as we will import all the records in this first batch since there are currently no Biblio reference records and we have deduplicated.

For subsequent additions you will need to match with existing values
Note: after deduplication we have 1114 Biblio references, these examples were pre deduplication


We now have 1114 bibliographic records like this:

Now split the incoming original spreadsheet into Primary (n=398) and Secondary (n=1076) references based on PRI and SEC in the first column.
Save as two CSV files. Load each in turn.

Select Inscription as the primary type and Primary refs or secondary refs as the dependency (these images are for the Secondary refs)

It will first ask you to match the Bibliographic references in order to set the H-IDs for those references which are to be inserted into the Inscription records.

That sets the IDs of the Bibliographic reference records.
Now select the Inscription records which are to be updated.

Click on Use H-ID (this was in the original file and referenced the INScriptions)
Existing: 191 New: 0 tells us that there are 191 Inscriptions (of the 398) which have Primary bibliographical data (for the Secondary references it's Existing: 282 New: 0)
We import the Primary references H-ID into the Primary refs > record pointer field (later, the Secondary references H-ID into the Secondary refs > record pointer field):
Primary references:
Secondary references:
Prepare, then Start Update:
Primary references: Secondary references:

and all looks good:

Connecting Bibliographic reference records with bibliographic entities
Now we have to connect our Bibliographic reference records with the appropriate bibliographic records imported from Zotero. We must do this for each of the reference types used since we cannot match across multiple tables.
For books:
and for each of the other types:


These are Bibliographic reference record which do not match up with a Zotero record using the ZST, and in most (all?) cases these ZST do not exist in the database except in these records. This needs to be checked individually.
Ch 06b: IIIF Manifests, Canvases and Annotations
This guide describes the IIIF features provided by Heurist for creating, importing, viewing, editing and exporting IIIF Manifests, Canvases and Web Annotations.
Heurist supports two main workflows:
- Use Heurist as an annotation layer over existing IIIF Manifests (annotation overlay mode). The external provider keeps ownership of the source Manifest and Canvas identifiers. Heurist stores and publishes local annotations.
- Use Heurist to manage the Manifest (full management mode). Heurist stores Manifest, Canvas and Annotation records and generates a IIIF Presentation API v3 Manifest from those records.
Heurist also provides a dynamic IIIF server for ordinary record sets and registered media files, and can render external IIIF files and Manifests. In this sense it can act both as a IIIF client and as a IIIF server.
1. Preparation
1.1 Import the required definitions
Before using the IIIF annotation and Manifest tools in an existing database, import the new definitions from the Heurist_Core_Definitions database using Design > Browse templates. Heurist will prompt you to do this if you attempt to process Manifests without the required definitions.

The new record types are in the Documents group. It is enough to select IIIF Annotation. The related record types IIIF Manifest and IIIF Canvas are downloaded alongside it.

The important record types are:
- IIIF Annotation (
RT_IIIF_ANNOTATION, concept code2-109) - IIIF Manifest (
RT_IIIF_MANIFEST, concept code2-110) - IIIF Canvas (
RT_IIIF_CANVAS, concept code2-111)
These definitions include fields for IIIF identity, original/source IIIF identity, Manifest links, Canvas links, annotation state, selector type/value, annotation JSON and related metadata.
1.2 Remove obsolete duplicate fields in old databases
Some older databases may contain a duplicated field named IIIF Anotation 2 with:
- local ID:
1106 - concept code:
2-1098
This field is not used by any current IIIF record type. Remove it before using the new IIIF workflow, especially if it causes confusion in forms or import checks.
1.3 Recommended checks before testing
After importing definitions, check that the database contains the three IIIF record types above and that Browse templates no longer shows missing IIIF definitions in the Core definitions database.
For testing, start with a small Manifest first. A large external Manifest may fail for reasons unrelated to Heurist logic, such as network timeouts, remote annotation-list delays, or unavailable image services.
2. Key concepts
2.1 Manifest
A Manifest is the IIIF object that describes a digital object, such as a manuscript, book, image set or media collection. In Heurist, a Manifest may be:
- a registered external Manifest file or URL;
- a managed IIIF Manifest record;
- a dynamic Manifest generated from a record set or a single registered media file.
Managed Heurist Manifest output is generated as IIIF Presentation API v3. A registered IIIF Manifest file becomes managed only when an IIIF Manifest record references that file. If no such record exists, Heurist treats the registered Manifest file as an external/source Manifest and can use it as an annotation overlay target.
2.2 Canvas
A Canvas represents one viewable unit in a Manifest, for example a page, image, video or audio item. In full management mode, Heurist stores each Canvas as an IIIF Canvas record. Each managed Canvas normally points to a registered file or registered external media URL.
In annotation overlay mode, Canvas records are not imported or managed by Heurist. Instead, annotations remain linked to the original Canvas URI from the source Manifest.
2.3 Annotation
Annotations are stored as IIIF Annotation records. They may be created or edited in Mirador, mainly for defining the annotation area and initial text, or in the Heurist record editor for annotation attributes, which can be extended to support searching and custom reporting within Heurist.
Annotations store:
- text body / summary;
- motivation, such as commenting;
- language;
- original Canvas target URL;
- managed Canvas reference when applicable;
- selector type and selector value;
- raw IIIF/Web Annotation JSON;
- state, such as imported, Mirador-created, Heurist-created, modified, obsolete or removed.
3. Manual creation of a managed Manifest
Manual creation is used when you want Heurist to own and generate the Manifest rather than only overlay annotations on an external Manifest.
3.1 Create the Manifest record
Create a new IIIF Manifest record. Fill in Manifest-level metadata such as title, description and copyright/rights. These fields are used when Heurist generates the v3 Manifest output.
A managed Manifest can be empty. An empty managed Manifest still returns valid IIIF Presentation API v3 JSON with items: [], so viewers should not normally show a technical error.
3.2 Add Canvases one by one
Create IIIF Canvas records and link them to the Manifest. Each Canvas may reference:
- a locally uploaded registered file;
- a registered external media URL;
- an image served by a IIIF Image API;
- other supported media such as audio or video where configured.
The order of Canvas references on the Manifest record defines the order in the generated Manifest. The order can be changed within Heurist data entry by dragging the Canvas references up and down.
3.3 Add or edit annotations in Mirador
Open the managed Manifest in the Mirador Viewer. Use Mirador's annotation tools to add annotations to the selected Canvas. Heurist stores the annotation as an IIIF Annotation record and links it back to the relevant Canvas and Manifest context.
The internal Mirador viewer uses the default annotation lookup scope canvas, which reads annotations from /api/{db}/annotations. A Manifest-scoped endpoint is also available as /api/{db}/annotations/{manifestRecID} when annotation_scope=manifest is requested.
3.4 Edit annotations in the Heurist record editor
Annotations can also be edited directly as Heurist records. This is useful for correcting text, language, motivation or metadata.
Be careful when editing selector information manually:
- Selector type and selector value must remain consistent.
- A rectangular fragment selector and an SVG selector are not interchangeable.
- If the selected area is edited incorrectly, Mirador may display the annotation in the wrong place or fail to display the region.
In general, use Mirador for changing the selected area and use Heurist record editing for textual and descriptive metadata.
3.5 Open the Manifest, Canvases and Annotations from the Record View panel
From the IIIF Manifest record view, open the Manifest either as raw/generated IIIF content or in the Mirador Viewer.
- IIIF Canvas records may include a link to open the referenced Manifest in which the Canvas is used.
- IIIF Annotation records may include a link to open the referenced Manifest, so the annotation can be viewed in its wider Manifest context rather than as an isolated record.
- IIIF Canvas records can also be opened independently, in the same way as any Heurist record with a file field. This is useful when checking a single page/image/media item before opening the full Manifest.
For internal Mirador viewing, Heurist passes omit_annotation_pages=1 to the generated Manifest URL where needed. This prevents the same database annotations from being loaded twice: once from embedded Manifest annotation-page links and once from Mirador's annotation endpoint.
3.6 Add Canvases in a batch — planned feature
A planned batch action will allow users to select one or several ordinary records that already have file fields and create Canvas records from those files. This is intended to make managed Manifest creation faster for large image sets.
Until this is implemented, add Canvas records manually or import/process an existing Manifest in full management mode.
4. Import or process an existing IIIF Manifest
Use Process IIIF Manifest to work with a registered or uploaded IIIF Presentation Manifest. A Manifest can be registered as:
- an external IIIF Presentation Manifest referenced by a File field;
- a JSON Manifest uploaded to Heurist as a File field.

The default mode is Full manifest management, which creates or updates an IIIF Manifest record, imports IIIF Canvas records and imports available IIIF Annotation records.
Annotation overlay is different: it imports annotations only. It does not create an IIIF Manifest record. The registered Manifest file remains the source Manifest and Heurist stores local annotations against the original Canvas URIs.
4.1 Annotation overlay mode
Use Annotation overlay when the external Manifest remains the authoritative source for Canvas structure.
In this mode:
- only IIIF Presentation API v3 Manifests are supported;
- the source Manifest and its Canvas list remain owned by the external provider;
- Heurist does not create an IIIF Manifest record;
- Canvas identifiers are preserved from the source Manifest;
- annotations are imported into Heurist and linked to the original Canvas URIs;
- when
/api/{db}/iiif/manifest/{obfuscatedFileID}is requested, Heurist can output a v3 overlay Manifest by replacing sourceCanvas.annotationswith Heurist AnnotationPage links; - local Heurist annotations are preserved on re-import/re-processing when they have been edited locally.
Do not use this mode for IIIF Presentation API v2 Manifests. For v2 source Manifests, use full management mode. If a managed IIIF Manifest record already references the selected registered Manifest file, annotation overlay mode is not available because the file is already under Heurist management.
4.2 Full manifest management mode
Use Full manifest management when Heurist should manage the Manifest structure.
In this mode:
- Heurist creates or updates Manifest, Canvas and Annotation records;
- the existence of the IIIF Manifest record is what marks the registered Manifest file as managed;
- Heurist owns the generated Manifest output, Canvas order and Canvas metadata;
- media may still be external registered resources or local uploads;
- media should be stored in Heurist where referenced resources are not held by a stable long-term repository or institutional service;
- Manifest-level metadata can be edited in Heurist;
- Canvas order comes from the Canvas references stored on the Manifest record;
- annotations are linked to managed Canvas records;
- generated IIIF output uses Heurist Canvas API URLs.
This is the preferred mode for IIIF v2 source Manifests, because the overlay workflow is v3-only.
4.3 Re-import / re-processing behaviour
On re-import, Heurist attempts to update imported records while preserving local work. Records that have been changed in Heurist or Mirador are preserved by default and reported separately as preserved local records.
The report includes:
- managed Manifest record ID, or
not createdfor annotation overlay; - total Canvases found;
- Canvas records added, updated, unchanged or preserved;
- total annotations found;
- annotation records added, updated, unchanged or preserved;
- issues encountered during import/processing.
4.4 Thumbnails
The import tool can create thumbnails for annotation records. This is useful for browsing annotations in Heurist, but it is slower because it may need to access remote images or render selected regions.
5. Add annotations for an arbitrary registered file or URL
You do not need a managed Manifest before annotating media.
You can open the Mirador Viewer for any registered media file or supported registered URL. Heurist dynamically creates a single-canvas Manifest for the media and lets you add annotations. These annotations are stored in Heurist against the Canvas URL used for that file.
If you later add the same file to a managed Manifest, the annotation can be preserved because the Canvas identity is based on the registered file's obfuscated ID. This allows annotation work to start before the final Manifest structure is prepared.
Typical uses:
- annotate a single image before adding it to a larger Manifest;
- annotate a registered external IIIF image;
- test annotation behaviour on one file before importing, processing or building a large Manifest.
6. Viewing in Mirador
Heurist provides a Mirador Viewer for:
- a managed IIIF Manifest record;
- a registered external Manifest file;
- a single registered media file;
- a dynamic Manifest generated from a query or selected record set.
Registered Manifest files are opened through /api/{db}/iiif/manifest/{obfuscatedFileID}. If an IIIF Manifest record references the file, the API returns the managed Manifest generated from Heurist records. Otherwise it returns the source Manifest: v2 sources are returned as-is, while v3 sources can be returned with Heurist annotation-page links overlaid.
The viewer supports two annotation lookup scopes:
annotation_scope=canvas— default. Shows all annotations that target the same Canvas URL.annotation_scope=manifest— shows only annotations linked to the current Manifest record.
For internal Mirador viewing, Heurist avoids duplicate annotations by passing omit_annotation_pages=1 to generated Manifest URLs where needed. External IIIF consumers can receive normal Canvas.annotations links when this parameter is not used.
7. Dynamic Manifests via Export IIIF
Heurist can generate IIIF output dynamically from ordinary record searches and file selections. This is useful when you want to view or share a record set without creating a permanent managed Manifest record.
7.1 Single registered media file
A single media file can be opened in Mirador or exported as a IIIF Manifest by using its registered file obfuscated ID. Heurist wraps the media in a single-canvas IIIF Presentation API v3 Manifest.
Useful for:
- quick viewing of one image, audio or video item;
- adding annotations to one registered file;
- testing IIIF output for one file.
7.2 One ordinary record with media files
When a record contains one or more suitable file fields, Export IIIF can generate a Manifest whose Canvases correspond to the media files linked to that record.
Useful for:
- records that represent objects with several images;
- quick Mirador viewing without creating explicit Canvas records;
- public sharing of record media as IIIF.
7.3 Several ordinary records with media files
When the current record set contains multiple records with suitable media, Export IIIF can generate a Manifest with one or more Canvases from those records, subject to the export limit.
Useful for:
- search results containing image records;
- temporary collections;
- comparing several media records in Mirador.
7.4 One registered IIIF Manifest in the record set
If a record set contains one registered IIIF Manifest and no generated media Canvases, Heurist can return that Manifest directly through the IIIF API.
Useful for:
- opening a registered external Manifest through Heurist;
- keeping a registered Manifest discoverable as a file in a record;
- testing external Manifest access.
7.5 Several registered IIIF Manifests in the record set
If a record set contains several registered IIIF Manifests, Heurist can generate a IIIF Collection that references those Manifests.
Useful for:
- publishing a set of related Manifests;
- opening several Manifests together in Mirador;
- grouping imported, processed or external Manifests without merging their Canvas structures.
7.6 Mixed record set: registered Manifests and media files
If a v3 dynamic export contains both registered Manifests and ordinary media Canvases, Heurist can generate a Collection. Registered Manifests become Manifest items in the Collection; generated media Canvases are grouped into a generated Manifest item.
Useful for mixed search results where some records already contain IIIF Manifests and others contain image/audio/video files.
7.7 IIIF v2 output policy
Heurist no longer generates IIIF Presentation API v2 output. Dynamic export and managed Manifest output are v3-only. Heurist can still import v2 and hybrid v2 source Manifests in Full manifest management mode and then publish them as generated v3 Manifests.
8. Recommended workflow examples
8.1 Annotate an external v3 Manifest without taking over its structure
- Register or upload the v3 Manifest JSON.
- Open Process IIIF Manifest.
- Select Annotation overlay.
- Import/process annotations.
- Open the registered Manifest file in Mirador. The viewer uses
/api/{db}/iiif/manifest/{obfuscatedFileID}and the annotation endpoint. - Add or edit annotations.
- Use the same API URL when external viewers need the v3 source Manifest with Heurist AnnotationPage links.
8.2 Import a v2 Manifest with many Canvases and annotations
- Register or upload the v2 Manifest JSON.
- Open Process IIIF Manifest.
- Select Full manifest management.
- Import/process Canvases and annotations.
- Inspect the report for failed remote annotation lists or unavailable image resources.
- Open the managed Manifest in Mirador.
If the v2 Manifest is very large, test first with a trimmed Manifest containing a few Canvases.
8.3 Start with one image and later build a Manifest
- Register or upload an image.
- Open the image in Mirador.
- Add annotations.
- Later create a managed Manifest and add that file as a Canvas.
- The annotation can be preserved because it targets the file-based Canvas identity.
9. Troubleshooting
The import widget says required definitions are missing
Import IIIF Annotation from Heurist_Core_Definitions. The related Manifest and Canvas record types should be imported with it.
The database contains an old field named “IIIF Anotation 2”
Remove the obsolete duplicate field with local ID 1106 and concept code 2-1098. It is not used by the current IIIF record types.
Overlay mode rejects a v2 Manifest
This is expected. Annotation overlay mode is v3-only because it stores annotations against original v3 Canvas URIs and can publish v3 Canvas.annotations AnnotationPage links. Import v2 Manifests in Full manifest management mode.
Overlay mode is disabled for a selected registered Manifest file
This means an IIIF Manifest record already references the selected registered Manifest file. That file is already managed by Heurist, so use Full manifest management mode.
Mirador shows duplicate annotations
Use the internal Heurist Mirador viewer, which passes omit_annotation_pages=1 for generated Manifest URLs where required. This avoids loading the same annotations both from Manifest Canvas.annotations and from Mirador's annotation endpoint.
Import fails on a very large Manifest
Try a small trimmed Manifest first. Failures may be caused by remote annotation-list access, timeouts, malformed source JSON, unavailable image services, or network interruptions.
10. Summary of ownership by mode
Feature | Annotation overlay | Full manifest management |
|---|---|---|
Supported source Manifest version | v3 only | v2 and v3 |
Source Manifest ownership | External provider / registered file | Imported into Heurist management |
Generated Manifest output | Source v3 Manifest with Heurist AnnotationPage links when requested through the IIIF API | Heurist managed v3 output |
Canvas list ownership | External provider | Heurist |
Canvas identifiers | Original source Canvas URIs | Heurist Canvas API URLs |
Canvas records created | No | Yes |
Annotation records created | Yes | Yes |
Manifest metadata editable in Heurist | No managed Manifest record is created | Yes, used in generated output |
Best use | Add Heurist annotations to an existing v3 Manifest without creating a Manifest record | Build or take over a Manifest in Heurist |
Ch 06c: Omeka-S to Heurist
Omeka S is a configurable database (there is an older version Omeka Classic). It is much more complex to set up and much more limited, although it does have some functions in the semantic web area which we don't yet address and extensive tech documentation, having been defined from scratch after a decade of Omeka Classic, and is therefore easier for programmers to extend with add-on modules. There is also an Omeka (either version) to Datacrate conversion and Heurist to Datacrate conversion developed in Python by Peter Sefton at UTS - you can find Datacrate on github - which might form the basis for an alternative pathway.
Please note that the migration from Omeka S to Heurist was developed before 2020 and may not operate 'out of the box'/
Converting from Omeka S to Heurist
The following table shows the correspondences between structures defined in Omeka S and structures defined in Heurist:
| Omeka S | Heurist |
|---|---|
Resource_class | defRecTypes |
Resource_template_property | defRecTypeStructure (order, altlabel, requirements and data_type?) |
Property | defDetailTypes |
Resource | Records |
Value | recDetails |
Conversion
- Since data_type is not defined in Resource_template_property (it was empty in def19 databases), it is necessary to detect type for every property.
- ++Resources++: where value.value_resource_id IS NOT NULL
- ++Terms++: look at tables with the same name as property and number of distinct values <100
- ++Blocktext++: where number of long values is considerable length(value.value)>100
- Get all properties in use
SELECT p.id, p.local_name, count(\*) FROM value v, property p
where v.property_id=p.id group by p.id, p.local_name order by p.id- Get properties in use by record class
SELECT distinct r.resource_class_id, p.id, p.local_name FROM value v,
property p, resource r where v.resource_id = r.id and
v.property_id=p.id- Order by r.resource_class_id, p.id
- As a result, you need to create following CSV tables.
For terms
- Property id: list of enum properties uses the same vocabulary
- Table name: takes terms from this table, don't worry if value is missed in this table it will be added to target vocabulary
- Vocab name: name of vocabulary to be added to heurist
- Resource class ID: check properties for these class only. (in OMEKA some fields are inconsistent for its types for different classes)
Property ID Table Name Vocab Name Resource Class ID 202
fonctions
fonctions
155
"223,245,325"
pays
pays
283
causes-fin-brevets
brevet cause fin
291
genres
genres
329
types-adresses
types de adresses
346
typesdeproces
types de proces
"290,383"
roles
roles
For all fields:
$config = <<<'EOD'
| rty | id | local_name | dty_Type | dty_ID | ptr/vocab Explanation |
|---|---|---|---|---|---|
|
| 7 | date | date | 9 |
|
| 252 | birthdate | date |
|
|
| 35 | isReferencedBy | blocktext |
|
|
| 131 | nick | freetext |
|
95,110,111 | 143 | surname | freetext | 1 | map property 143 to heurist 1 for classes 95.. |
150 | 143 | surname | resource | 16 | map property 143 to heurist 16 for class 150 |
|
| 230 | parrain | resource | 95 |
|
| 125 | gender | enum | 20 |
|
| 202 | agent | enum | 6255 |
Classes by records
SELECT resource.resource_class_id, rc.local_name,count(\*) FROM
resource, resource_class rc
where resource_class_id=rc.id group by
resource.resource_class_id,rc.local_nameConversion notes (for developers)
I will do mapping their ResourceClass/Property to Heurist Rectypes/Fields
Enumeration types are vague in their system. If some of properties have table of the same name (for example property genre has table genres this property considered enumerated)
Import Resource/Values to Records/recDetails
DEFINITIONS: Map existing Heurist record types/fields to Omeka resource classes/properties.Omeka database does not keep any information about its database definitions just two tables that refers to resource/properties of RDF models (url of xml that describes these models are in Vocabulary table).
Example:
Resource class Agent (id 95, vocab_id=4) refers to Agent in http://xmlns.com/foaf/0.1/
Property Genre (vocab #6) refers to http://dbpedia.org/ontology/genre
Manual matching Omeka->Heurist: Resource class->Rectypes Property->Field type
Store RDF name (like foaf:Person OR dbo:Genre) in some field of defRectype, defDetailTypes tables OR keep matching in external file Omeka ID->Heurist ID, or RDF name->Heurist concept code I believe it is much cleaner to store such data in the database, this then allows us to use it directly in a future RDF export. Every time we use files we end up with problems eg. of synchronisation, referential integrity etc.
DATA: Import Omeka resource/value tables into Heurist Records/recDetails
Ch 07: Using the database (find, filter & view
[Explore] is the workhorse function that allows you to make use of the data recorded in a database. The core function of Explore is filtering the database to isolate a subset of the database to which some sort of listing, analysis, visualisation or export will be applied (filter also acts as a simple search to locate information to look through eg. a reference, web bookmark or images). This workflow, from filter through results list or subset to reading, visualization, analysis and output, is represented in the left-to-right flow across the Explore screen :
- filter building and saved filters on the left
- results listing in the middle
- various visualisations and outputs on the right. This is the starting point for all information retrieval.
1. Overview of the [Explore] menu
1.1. Filters
Here you can find pre-programmed filters for viewing particular records in the database.
1.1.1 Recent | All by date:
[Recent]: View the most recently added or modified records, with the most recent at the top. This is useful for fetching the records you are currently working on.
[All by date]: View all the records in the database. This is useful for browsing small databases.
1.1.2.Entities
[Entities]: Filter the database by record type.
Displays records sorted by entity type (favourites or ordered by most used). For example, you might wish to see all the Persons in the database, all the Places, all the Books or all the Events.
1.1.3. Saved filters
[Saved Filters] give an access to filters or faceted searches you have created yourself and previously recorded for re-use (frequently used or used in website publication).
Heurist allows the saving of filter criteria which become entries in a tree of saved filters, accessible through [Saved filters and Rules] menu entries, and in a dropdown below the [Filter] button.
Saved filters can be simply a predefined filter which generates a given subset of the database for a specific purpose (eg. sets of things you need regularly, perhaps sorted in a specific order, or a list to be displayed in a website), or they can be facet filters which provide a guided pathway allowing interactive exploration of the database through the display of subsets with frequency of occurrence according to the selections made.
Saved filters (simple or facet) and rules can also be created directly from the list of saved filters by clicking on the rollover icon or right-clicking on the list. The dropdown menu also allows the creation of folders within the list, editing and deletion, and other functions. Filters can be moved by drag and drop.
Note also that saved filters and rules are organized by workgroup, to allow database managers to create different sets of filters for different groups of users – for example the filters needed by volunteer data collectors or filters to be displayed on a CMS website (a Website Filters workgroup is defined by default for this purpose).
1.2. Build
1.2.1. Filter builder
[Filter builder] Open a wizard which can be used to create a custom filter, which selects records from the database that meet certain criteria.
For example, you may wish to see all living Persons in the database, or all the Places that lie within a particular region.
The Filter builder provides an easy way of building queries of moderate complexity, hiding the complexity of writing filter strings. Simple searches, such as a partial string match on title, can be entered directly in the filter fields or constructed with the Filter Builder.
1.2.2.Facets builder
[Facets builder] Open a wizard to build sophisticated multi-level facet filters and rulesets.
This wizard configure a faceted search, in other words an interactive filter (which will be familiar from online shopping sites). For example, you may wish to search for People by surname, while also having a time-slider to filter by birthday at the same time. Using the facets builder, you can decide which aspects of a record you would like to use for filtering (e.g. surname), and decide what kind filtering interface you would like to use (e.g. a searchbox or dropdown).
The Heurist system for building facet filters is not restricted to building facets on the attributes (fields) of a single selected entity type. It can drill down into the connections between entity types to allow selection on the attributes of related records at several levels removed. The choices are made from a treeview of attributes which can be expanded to view the attributes of connected entity types.
The facet builder can also apply rules to traverse the network of connections to find entities which are connected to the results of a facet filter. Rulesets can be created and used independently.
These queries allow a range of sophisticated instant analyses, without programming, along the lines of “select all the organisations which have published books written by female authors who have degrees from a University located in London”.
Facet filters can be embedded into websites generated by the Heurist CMS.
1.2.3. Save filter for re-use
This tool saves the current filter (simple or faceted) into the tree of saved filters for reuse.
Heurist allows the saving of filter criteria which become entries in a tree of saved filters, accessible through [Saved Filters] and Rules menu entries (cf., and in a dropdown below the Filter button.)
Use of workgroups Saved filters and rules are organized by workgroup, to allow database managers to create different sets of filters for different groups of users – for example the filters needed by volunteer data collectors or filters to be displayed on a CMS website (a Website Filters workgroup is defined by default for this purpose). :::
1.3. Advanced
1.3.1. Rules
Rules are expanding search results to connected entities. In other words they allow you to select interrelated sets of records of different types from the database.
For example, when searching for people in the database, you may wish to display the record for a Person's spouse or place of residence as well as the record for the Person themself. To do this, you would create a ruleset which defines exactly which related records to retrieve when you search for people. These rulesets can be used in conjunction with custom filters or faceted searches.
1.3.2. Set as subset
:Set as subset saves the current set of records as a subset, which can then be filtered or manipulated further.
2. Build and save a simple search or filter
2.1. The search box
At the top of the Filtered Results pane in the Explore Menu, there is a searchbox : you can use it to do simple searches of the database, but it also drives Heurist's advanced filtering features.
If you are an advanced user, you can learn to use Heurist JSON Query Language, and design powerful, customisable queries quickly and precisely (although it is much easier with teh Fitler Builder).
Directly search for records using a range of modifiers: tag: , type: , url: , notes: , owner: , user: , field: and all:.
For example, to search for tagged records in the database, enter either tag : string or tag = string in the Filter box. For example, tag : Database (any tag including the string ‘Database’) or tag = Database (matches Database but not ‘Databases’ or ‘Database Management’). Tags are not case sensitive (i.e. 'database' = 'Database').
- If search terms include a space, enclose them in single or double quotes (e.g. tag : ’Database Management’ ).
- To find exact matches, use the = operator (e.g. title = xxx ). You can also use the greater than (>) and lesser than (<) operators if you are filtering by a numerical or date field (e.g. year < 2007 would find records from before 2007).
- To find records that include either of two search terms, use an uppercase OR (e.g. timemap OR “time map”).
- To find records with geographic objects that contain a given point, use latitude and longitude (e.g. latitude : 10 longitude : 100 ).
- To exclude records according to a particular value, use a minus sign (e.g. -maps , -tag : timelines ).
@todo link to JSON query part below.
2.2. The filter builder
The easiest way to create a custom filter is to use the [Filter builder]. You can also access this tool by hovering over ‘Filter builder’ in the left-hand column. In the example, we want to retrieve data about world leaders who are still in office. In this database, a person’s term of office is represented as a ‘Relationship Record’ connecting the person to the country they rule. Therefore this filter should retrieve ‘Relationship Records’.

2.3. Set Filter Criteria
You now need to set one or more filter criteria. In the following example we simply want to find each person who is still in office. For the ‘Criteria’, you should therefore choose ‘End date’ (to look at when people’s terms of office ended) and then choose ‘no data’. If a person’s term of office has no ‘End date/time’, then they must still be in office!

A filter can use several criteria, using the logical operators AND and OR.
- With AND : the criteria are cumulative (for any response in the list, criterion 1 and criterion 2 are both true in the same time)
- With OR : the criteria are juxtaposed (for any response in the list, either one of the two criteria is true, or both are true.)
The filter builder allows to request in several linked record types : the dropdown menu where choose the filter criteria enables you to navigate to the Record Types linked to (or from) the one in which you are making the query. In the previous example, in a bibliographic database, we are searching only for the dramatic works of a given author. The works are found in the Work Record Type, which contains a field "literary genre", and an "Author" pointer to the Person Record Type: by following the links of the dropdown menu, you can display the fields in the Person Record Type and select the ‘name’ field, for example.

Tips for building your search filter
- For complex filters, create smaller elements of the filter, and then combine these to build the full filter.
- Using codes (Record ID) in the filter rather than names not only keeps your filters compact, but also ensures that when the filters are saved the codes are invariant, whereas names can be freely changed and it can be a complex task to track these changes and edit all the saved filters.
2.4. Saved filters
2.4.1. Uses of saved filters
Saved filters are the key to setting up useful ‘views’ of your data. Use them to quickly navigate to the records you are working on, to produce sorted lists, to publish sets of data to a web site, to organise the data which have been entered or imported in no particular order. Saved filters not only define a subset of your data and its ordering, but can also set up the way it is presented (e.g. as a map, a formatted report or a visualisation of related records).
If you want to keep your custom filter for later use, you can save it by clicking the [save filter for re-use] icon under the filter search field.

You may wish to save filters that are useful for your analysis, or you may use saved filters to select particular portions of the database to display on the public website.
2.4.2. Accessing Saved Filters
You can access saved filters by hovering over [Saved Filters] to the left of the screen.
3. Build a facet search
Facet searches are a powerful way of drilling down into a database, particularly if they are combined with Rules (there is a rule builder built into the facet search editor) which can pull in related information (such as, for example, spatial information for mapping when the search is based on records which are linked to places but do not themselves contain spatial information). Facet searches allow single and multi selection, alpha versus order by count, effect on speed and optimization of searches with large databases.
You can access the facet builder by hovering over [Facet Builder] at left menu or right clicking on the saved search tree and add Facet search on the bottom of the submenu.
3.1. What is a faceted search?
Faceted searches are interactive tools for searching a database. They are everywhere on the internet. You have probably used one today! Faceted searches allow users of websites like Goodreads, Amazon, the British Library or Google to filter search results according to criteria such as Price, Copyright Status, Rating or Department. Whenever you are allowed to fine-tune search results according to certain criteria, you are using a faceted search.
Heurist allows you to create your own customised faceted searches specifically designed for your database and your users.
To create a new faceted search interface for your database, you can use the facets builder from the Explore Tray.
3.2. When should I use one?
There are two main use cases:
- To create research tools for you and your team, so you can easily find relevant records;
- To create a public interface for your website.
In either case, the process of building a faceted search is the same. You build the faceted search in the Explore Menu and save it in the Saved Filters tree. If you want to use it for your own internal purposes, you can find it again and re-execute it. If you want to insert it onto a webpage from the Publish Menu, then you can use the 'Saved Filters' widget (see Chapter 9 of this documentation).
3.3. How to build a faceted search ?
3.3.1. First step : general settings
- Click on the [Facet builder] item of the left menu : this open a pop-up window in which you can configure the facets.
- Here let's assume that we are in a bibliographical database and that you want to search volumes or periodicals recorded in a Record Type named "Manifestation (édition)". Configure your faceted search :
*[Search for (entity type)] : choose the main Record type in which the faceted search will be performed
*[Faceted search name] : the name under which the facet will appear in the saved filters tree once you have saved it.
*[Save in work group] : the folder in which you want to save those facets in saved filters.
*[Display full sets of records] : useful for a website but note that ticking this box may slow down the process if the database is large.

Keep in mind that the record type you choose as input is always the one you will get as output, unless you use the rulesets function (see below).
However, the faceted search allows you to choose your criteria of search from other record types linked to or from this original record type.
- Configure the optional features : you can choose
- the order in which your results should appear (choose the field of the record type you wish to use to sort the results : by date, by title, etc.)
- If you want a box [Simple search] to be display
- If you want to apply a preliminary filter to select only a subset in the main record type (for example here : only the volumes and periodicals published in Paris)
- If you allow the user to toggle it to expand his or her search to all records.

- Configure the display of the faceted search in public interface (in case it is used on a website)

3.3.2. Second step : choosing criteria
The following section of the facet builder allows you to choose the fields you wish to use as criteria of selection.
Note that you can follow the paths to the linked, or linked-from, records (thick the box on top-left of the window).
3.3.3. Third step : configuring the display
The following interface allows you to choose how each facet is displayed :
- simple search box : text search
- dropdown : display the values of the field in a drop-down menu
- list : display the values of the field by the number of their occurrences, one below the other
- wrapped : display the values of the field side by side
- slider : to select a range of dates

The interface provides other options :

- [Show entity hierarchy above facet label] : to be avoided for public websites, but very useful for personal research
- *[Accordion view/ Show accordion view] : allows the user to fold/unfold the facets when there are many of them
- *[Limit list initially to] : allows you to choose how many responses you want to display when you select the [wrap] and [list] options
- *[Rollover] : can be used to write a help text for users
- *[Group/Order by counts] : to choose the order of the results' display.
Once the facets are configured, they can be saved. You can re-open it by clicking on it in the saved filters menu, and use it for your own searches and/or to display it on a website.
4. Visualisation panel

The central panel of the interface displays a list of search results. By default, it displays all records in the database sorted by date of creation. It offers several useful features for data management and cleaning, and allows you to perform various operations on multiple records at once.
4.1.[Selected]

Choose the master record (the one to be kept), then [Merge duplicates].

Choose the fields to be kept in the final merged record, then [commit changes]. Note that the references (i.e. linked records) will be all retained.
- [Delete] : delete the selected records from the database.
4.2. [Collect]
This range of functions allows to make by hand personal collections of data : select the records you want to add to a collection, then use [add] (to add it to a collection) and [save as...] to save your selection as a filter.
You can also [remove] records from a collection, [clear all], display the collection in a new tab and/or as a search result.
4.3. [Recode]
This range of functions allows you to make bulk edits to multiple records in the database at the same time. Here you can :
4.3.1. Modify the values of the fields
- adding, replacing or deleting the value of a field
- add a link to another record ([relate:link])
4.3.2. Modify some aspects of the structure
- [Foreign key matching] : This function processes the current query looking for records in another (or the same) entity type, based on matching the values of a field in each entity type. Fields to be matched may be text or numeric. The current query must contain only a single record type (this is enforced to avoid accidental errors). Where a match is found it will insert the ID of the matched record into a record pointer field in the source record.
- [Change entity type]
4.3.3. Manage media files
- [Local files to remote repository]: to transfer the files to Nakala.
- [Remote URLs to local files]: adds a field "File(s) uploaded or remote", whose value is a URL to a remote file.
- [Reset thumbnails]
4.3.4. Extract and modify text
- [Case conversion]
- [Multilined text to html]
- [Translation] : translate the value of the selected field. The translation is inserted after the existing value, not in a separate field.
- [Extract text from PDF file(s)] : This function extracts text (up to 64,000 characters) from any PDF files attached to a record and places the extracted text in the field specified (by default "Extracted text" (2-652), if defined). Bad characters encountered are ignored. If there is more than one PDF file, the text is placed in repeated values of the field. Text is only extracted if the corresponding value of the field is empty to avoid overwriting any text entered manually.
4.4. [Share] : managing collaborative work
In this section of the menu you will find tools which allow you :
5. Rulesets
5.1. Why RuleSets?
In a database, important information is often distributed between many different records. For example, imagine you want to know what country a person was born in. In your Heurist database, there may be a 'Person' record for the person, which is linked to a 'Place' record which describes the place they were born. To know what country the person was born in, you would need to locate the 'Place' record for their place of birth, and then see what country that Place is in. In the example below, the Person record for William Shakespeare refers to the Place record for Stratford to describe his Place of Birth:
If you are just looking at one record, you can simply click on the record pointer in the Explore Menu to be taken to the linked record – so really there is no need for any additional tools.

But what if you are examining many records at once? For example, you have filtered the database for a selection of important Persons, and want to see all the Places they were born? Or you have filtered some Places in your database, and want to see all the books published there? Or, more complexly, you have filtered the database to obtain a list of relevant pieces of Legislation, and want to know which Political Party each of the Persons who voted for the Legislation belonged to.
This is where RuleSets come in : you can use a RuleSet to systematically fetch related records from the database, expanding the current result set to include additional relevant records.
Possible applications of RuleSets include:
- Researching complex relationships between records in the interface
- Fetching additional related records to display on the map or network diagram along with the main records in your result set
- Allowing visitors to search for one kind of record (e.g. Educational Institutions) and see another kind of record in the results (e.g. Persons who attended those Institutions)
5.2. How to create a RuleSet ?
To create a RuleSet, hover over [Rules] in the [Advanced] section of the Explore Tray. Choose a workgroup to save the RuleSet under and click 'add'. Or click right on the RuleSet tree and select [New RuleSet]. In the RuleSet editor, you can step from one Record Type to another using Record Pointer and Relationship Fields. It is possible to step in two directions. In the above example, you could step from the Person Record for Shakespeare to the Place Record for Stratford, or you could step from Stratford to Shakespeare. At each step, you can optionally apply a filter, which you can define using Heurist's Filter Builder. You can also add a RuleSet to a predefined filter.
5.2.1. Building a RuleSet : an example

In the image above, the Ruleset looks at all the Persons in the current results set, and finds the Places where they died. It then finds any Life Events associated with those Places. Thus, if you filter the dataset to find some interesting people, you could answer the question: What Life Events are recorded for these Persons' places of death?
As an added element, the Places can be filtered when the RuleSet is applied. To add a filter, either type the filter directly into the box using Heurist's query language, or click the pencil icon to use the Filter Builder. In the screenshot, Places are filtered so that only Islands will be considered. Thus the question becomes more specific: What Life Events are recorded for the Islands on which these Persons died?
If you click [Add new Rule], then you can include a second, separate set of steps to fetch related records. For example, if you wanted to see the Places of Birth as well as the Places of Death for the Persons in the result set, then you would need to add a new rule to the RuleSet.
5.2.2. Integrating RuleSets with other tools
Once you have saved a RuleSet, you can integrate it with other tools in Heurist. For example, if you have defined a faceted search that queries the Borrowing Records in a Library database, you could then apply a RuleSet to replace all the Borrowing Records in the results with the Persons who actually borrowed the books.
The main places you can apply a RuleSet are :
- To the results of a Faceted Search
- To the results of a filter created using Heurist's Filter Builder
But more generally you can apply a ruleset to any set of results and if it is appropriate it will expand the set of results folowing the rules defined.
6. Advanced Users: Introduction to JSON Queries
A Json query is an array of objects (predicates). Note that this JSon format is generated by the rules+filter button
Each predicate is a pair: {“keyword”:”value”}:
-
A keyword stands for record header field, detail or link predicate.
-
The value depends on the keyword. It may be literal, csv. It may be preceded by a compare operator or contain a range or % operator.
example :{"q":"sortby:-m after:"1 week ago""} -
For link predicate, the value is a sub query (another set of predicates).
example :{"q":"sortby:-m after:"1 week ago"","rules":[{"query":"t:12 relatedfrom:14-4533 ","codes":"14","99","4533","12","",4],"levels":[]}]}
Heurist queries, in both JSon and simple filter forms, can be used in several contexts. The table below outlines the various contexts in which queries can be used, and explains the considations that must be taken into account in each context. In some contexts, the query must be placed within another JSon object whose name is "q:" and whose value is the desired query; this is called the "q:" parameter.
| Context | JSon or Simple Filter | "q:" parameter | Example |
|---|---|---|---|
| Main page search box | BOTH | No | sortby:-m after:"1 week ago" |
| CSV output query | Simple ONLY | No | f:149:34 |
| Mappable query | JSon ALWAYS permitted.Simple Filter permitted ONLY IF no rules are applied to the query | Yes | {"q":"sortby:-m after:"1 week ago"","rules":[{"query":"t:12 relatedfrom:14-4533 ","codes":"14","99","4533","12","",4],"levels":[]}]} |
| Facet search pre-query | BOTH | No | {"f:10":"1914-12-31T23:59:59.999Z<>1931-01-01"} |
| Expansion rules | JSon ONLY | No | [{"query":"t:12 linkedfrom:16-90 ","codes":["16","90","","12","",2],"levels":[]}] |
Specifying database for mappable query data sources
The user can specify db parameter in query field of “Mappable query datasource so that it can be rendered from any database.
For example: {"q":"t:12 f:26:108","db":"osmak_38"}
6.1. Syntax
6.1.1. Simple filter syntax
Up to version 4, Heurist used a simple search-engine style of filter syntax which is documented in the help link next to the filter field on the Explore page. This syntax is still supported and is useful to quickly find things eg. by simple text searching.
In versions 4 and above, the syntax of the Heurist queries is based on JSON (JavaScript Object Notation), which allows for programmer-writable inputs. Click here ==missing link== for a basic introduction to JSON syntax. For mere human beings, the Filter Builder will build the JSon queries, which may then be edited by hand for small changes.
Queries are written as JSON objects, which begin and end with braces {}. An object contains zero or more name-value pairs, in which the name and values are separated by a colon: Multiple values are separated by commas. All strings and comma-separated sequences must be enclosed in double quotation marks for the query to be valid in JSon syntax.
Many basic Heurist queries can be performed using a simplified version of JSON syntax in which the braces and double quotation marks are removed.
For example, a basic query is written in simplified syntax as f:1:a and will return the set of all records whose titles contain the letter "a".
Negation is expressed in simple syntax by placing the minus sign before the whole object: -f:1:a returns all records whose titles do not contain the letter "a".
Be cautious when using simplified syntax, as not all queries can validly be expressed in this form. For example, the "==" operator is not implemented in simplified syntax, only in formal JSon syntax. If in doubt or if an unexpected result set is returned when using simplified syntax, please revert to using full formal syntax as described below.
6.1.2. JSon query syntax
In a Heurist query, the name represents the field or attribute being matched, and the value represents the logical predicate that is matched to it. For example, the query {"t":"1"} is interpreted as follows: "return all records such that their attribute "t" (record type) matches the value "1" (relationship record)". Thus this query returns all relationship records in the database.
It is possible to write a name as an object, which is used to specify the field being matched. For example, the object {f:1} (a simple filter object interpreted as "the field with code 1") denotes the Name field of any record, so {"f:1":"a"} is interpreted as follows: "return all records such that their field with code 1 (i.e. their Name field) contains value "a"". This query returns all records whose titles contain the letter "a".
To include multiple query terms using the JSON syntax, you need to enclose your query in square brackets: [ ]. For example, to search for all Persons in the database whose surname is "Patel", you could type: [{"f:1":"Patel"}, {"t":"Person"}]
Basic query terms
The following table gives the names and values that constitute basic queries, with an explanation of their meaning and use, as well as examples in both simple filter format and formal JSon format. A result set from a simple filter search is automatically sorted, while a result set from a JSon search is unsorted by default.
| Name (Meaning) | Value | Result | Simple filter (sorted by default) | JSon syntax (unsorted by default) |
|---|---|---|---|---|
| t (record type) | number OR string | Returns all records of type value. If value is a number, it refers to the index of that record type, and if value is a string, it refers to the name of that record type | t:1 returns all Relationship Records;t:Person returns all Person Records |
{"t":"1"} returns all Relationship Records;{"t":"Person"} returns all Person Records |
| f:#, field:# (field type) | string | Returns all records whose field with index # contains value. Hot tip: The field number is optional. If you wish to search all the fields associated with the records, then you can simply use "f". | f:1:a returns all Records whose field #1 (Title) contains "a".f:a returns all Records which have an "a" in any field |
{"f:1":"a"}returns all Records whose field #1 (Title) contains "a";{"f":"a"}returns all Records which have an "a" in any field. |
| ids (record ID) | number | Returns all records with record IDs value. | Separate multiple IDs with commas:ids:51,52,53returns Records #51, #52, #53, #54 in the database |
{"ids":"51,52,53,54"} returns Records #51, #52, #53, #54 in the database |
| linkedto(linked records) | number | Returns all records that point to the record with ID value. | linkedto:123 returns all records that point to Record #123 |
{"linkedto":"123"} returns all records that point to Record #123 |
| linkedfrom (linking records) | number | Returns all records that the record with ID value points to. | linkedfrom:123 returns all records that Record #123 points to |
{"linkedfrom":"123"}returns all records that Record #123 points to |
| related (related records) | number | Returns all records that have a relationship to the record with ID value. | relatedto:123 returns all records related to Record #123 |
{"relatedto":"123"} returns all records related to Record #123 |
Extending queries
It is possible to extend the value of a query using commas. Thus in formal JSon syntax: {“f:1,4”:”find me”} returns all records in which either field #1 or field #4 contains the string "find me".
It is also possible to include relational operators in the value, in order to specify the match more precisely. For example {"f:210":"==Poet"} in which the relational operator = requires an exact match, while the relational operator == gives a case sensitive match. Please note that the PHP operator "===" (identity) is not implemented in Heurist.
Special attribute queries
The following queries target special attributes of records such as Ownership, Visibility, Date Modified, etc. These must be written in formal JSON syntax, for they do not work with simplified syntax.
{"addedby":"29,1000"}
{"addedby":"-osmakov"}
{“owner":1}
{"owner":"Database Managers"}
{"access":"hidden"}
{"access":"viewable"}
{"access":"public"}
{"access":"-public"}
These can be combined: {"owner":3,"access":"viewable"}
In order to query multiple types of record whose visibility is not public, use the following query in simple filter syntax : visibility:-public (t:24 or t:11 or t:25 or t:27 or t:28 or t:29 or t:44)
or the equivalent query in JSon syntax: {"access":"-public","t":"24,11,25,27,28,29,44"}
6.2. Logic
These are the logical keywords used in queries:
- not
- all
- any
- OR
- AND (default)
- notall
- NOT ( AND )
- notany
- example :
notany:[{"title","Black"},{"title","White"}] => NOT ((rec_Title = ‘Black’) OR (rec_Title = ‘White’))
- example :
- NOT ( OR )
By default the set of predicates conjoined by AND: [{"title":"President"},{"f:1","Nixon"}] stands for (rec_Title = ‘President’) AND (dty_ID=1 and dty_Value=’Nixon’)
To shorten the query, it is possible to unite predicates of one level into single object: {"title":"President", "f:1","Nixon"}
It is also possible to nest logical conjunctions. For example: {"not":{"any":[{"title":"Milano"},{"title":"Veneto"}]}} returns every record whose Title mask does not contain "Milano" or "Veneto".
6.3. Keywords
6.3.1 Record headers
- f, field, **Example:
[{"t":"10"},{"f:1":"goethe"}] - url,u, rec_URL
- title, rec_Title
- addedby, rec_AddedByUGrpID (takes as a value an user or users group ID)
- Example :
{"q":"addedby: 7"}
- Example :
- added, rec_Added
- Example:
{"q":"added: 2025-07-02"}
- Example:
- date, modified
- Example :
{"q":"modified: 2025-07-02"}
- Example :
- after, since, before : Synonyms for modified with compare operator in value
- workgroup,wg,owner,rec_OwnerUGrpID
- id, ids, rec_ID
- t, type, rec_RecTypeID (takes as a value an ID or a string)
- Example:
{"q":"t:109"}ou{"q":"t:Place"}
- Example:
- latitude, lat, longitude, long, lng
Links
- linkedto
- Example:
[{"t":"102"},{"linked_to:1158":[{"t":"103"},{"title":"goethe"}]}](is for : Which records of the Record type with ID 102 point to records of the Record type with ID 103, whose title includes the character string "goethe"?) Find records which have linked records specified in value for this predicate (subquery or csv of ids). Resource field ID (:x) is optional
- Example:
- linkedfrom Find records that are linked from records. Resource field ID (:x) is optional
- relatedto Find records that relates to records from subquery. Relation type (:x) is optional
- relatedfrom Find records that relates FROM records from subquery Relation type (:x) is optional
- Example:
[{"t":"10"},{"relatedfrom:1103":[{"t":"102"},{"f:1":"BAVIERE"}]},{"sortby":"t"}]
- Example:
- links @todo ==to verify==
Bookmarks, Tags
- user, usr,bookmarked by user
- tag, keyword, kwd
- Example :
[{"kwd":"à corriger"},{"sortby":"t"}]
- Example :
6.3.2. Values for Keywords
- Literal:
"f:1":"Peter%" - CSV:
"ids":"1,2,3,4" - WKT :
"f:5":"POLYGON ((30 10, 40 40, 20 40, 10 20, 30 10))"
6.3.3. Possible Operators Within Keywords
"X<>Y" : turns into BETWEEN X AND Y "-X" : NOT ( ) "=X" : suppress LIKE operator for freetext field type "<X”, ">X” : applicable for numeric and date values only
A vérifier/recontextualiser
@todo
notes, n Synonym for f:[DT_SHORT_SUMMARY] Where DT_SHORT_SUMMARY is replaced with local code of concept 2-3 todo
<???Facet search pre-query YES?? what format?? this one works and is clearly different from the mappable query format. Are we simply talking about the presence or absence of "q:" ? Have facet search pre-query ignore "q" and "rules" section if present No {"f:10":"1914-12-31T23:59:59.999Z<>1931-01-01"} Expansion rules YES Generated by expansion rule wizard This is a part of the full mappable query JSon opject No [{"query":"t:12 linkedfrom:16-90 ","codes":["16","90","","12","",2],"levels":[]}]
Ch 08 : Result sets, manipulation, custom reports and visualisation
Ch 8: Result Views and Export
Documentation written on 04/11/2025 by Sylvain Besson (MSH Lyon Saint-Étienne / CNRS)
Updating 25/06/2026 by Vincent Paillusson (HTL)
1. Record View
Explore → Filter → Record
The Record view shows all the elements of a recording. The differents fields and associated metadata and possibly relationship between recordings.
How to start:
- To begin, click on [Explore]. ①
- Perform a search or use a [Saved Filter] that returns the records you want to include in your report. ①
- Select a record ②
- Click on [Record] ③

Once on the [Record] view selected, the record’s metadatas appear. There is several informations:
- Title ①: title of the record
- Icon ②: record’s type icon
- Record H-ID ②: Intern Heurist record ID
- Workflow stage ④ which give some information on the workflow stage
- Media ⑤: Picture of the media

Focus on medias
- If a media exists in the record, a thumbnail is displayed
- It is possible to display in [full screen]
 ① or viewing it in popup
  ②
② - The media can also be displayed on [Mirador] (using Heurist’s automatic IIIF manifest) ③ or [OpenSeadragon]
 viewer ④
 - You can [download]
 it ! ⑤
 - By hovering over [description], a description appears if this field has been completed ⑥
- Finally by going over [rights], the rights of the media appears if it was filled during the record creation ⑦

Click on [More…]
- Cite as ① : The record can be cited in XML or HTML. The updating date of the record is shown as the lastest modification date.
- Added ②: Creation date of the record
- Updated ③: Last record update
- Ownership ④: Communicate who owns the record and who can read it
- Rating ⑤: You can rate each record from one to five
- Tags ⑥: You can tag records to find them more easily

2. List view
Explore → List View
[List view] allows essentialy to show the whole selected data in table format ③.
You can choose the field you need ①. You can also save the settings ②. It is also possible to export by simple copy/past (CSV with tab as separator), by excel format and PDF format ③.

🛟
Tip: If you want to export data with more export formats, you may want to try the Export view described in the following section.
3. Export View
The Export view allows to export the request results under differents data formats:
CSV ①
XML ②
JSON ③
RDF ④
GeoJSON ⑤
KML ⑥
GEPHI ⑦
IIIF ⑧
HuNI ⑨
Several formats can be exported as a data feed, as well as a fixed format file. The data feed capability is particualrly useful for sending live data to a processing workflow, often combined with a saved search which filters the required set of output records. It can be a very useful, simpler alteraitv eto usign th Heurist API.

CSV / TSV (Delimited) files
When you click on [CSV], a pop-up opens allowing you to choose the fields you want to export and a range of settings.
Note that by default CSV files are exported as tab-separated, since this causes much fewer problems with complex text (which often contains commas and unmatched quote marks, but very rarely contains actual tab characters)
CSV/TSV exports are a particularly good way of temporarily exporting some fields, carrying out some manipulation in an externa program eg. a spreadsheet, Open Refine or R, and reimporting the results with Populate > Import - Delimtied text / CSV. Because all exported CSV/TSV files automatically include the Hursit ID (H-ID)_ which is uniqiue to each record, it is very easy to reimport the data into the soure records, overwriting or adding to existing values in the same or differnet fields.
First, you must choose the records you want to export ①. You can choose between the current result set and any single type of record occuring within the resultset.
We STRONGLY recommend only exporting one record type at a time. Delimited files are really not meant for dealing with heterogeneous data, and mixed exports will restrict the exportable fields to record metadata and shared fields.
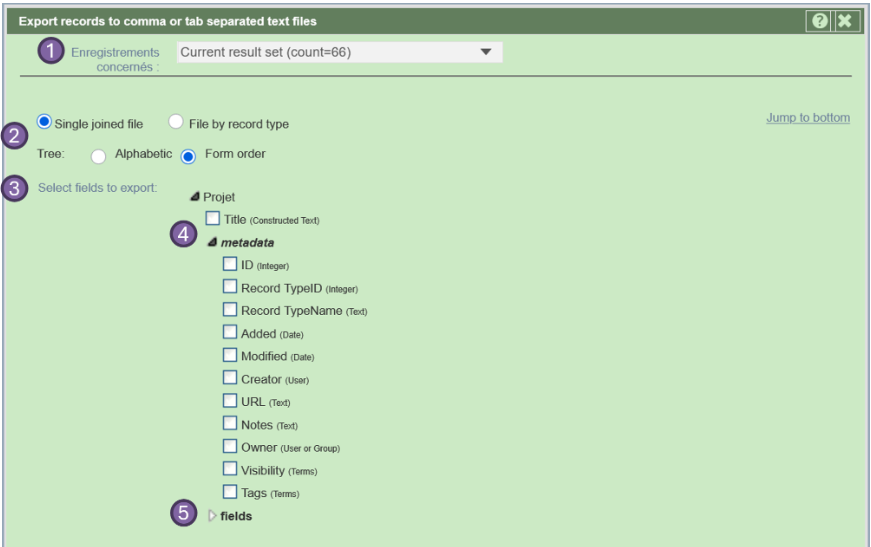
After the records selection, you choose one of the two available export settings ② :
- a single joined file
- a file by record type (if multiple types are selected).
You can choose to display the fields in either Form order (the default) or alphabetic order. Alphabetic order may make it easier to select fields in some circumstances.
The main step of the export setting is to select the fields you want to export ③ . They can be any type of field including the constructed title, record pointers and relationship markers.
You can export metadata about the records ④ as well as the data from the data fields ⑤ .
If you have a current resultset with more than one record type in it, you will only be able to choose the metadata and fields which are shared by all the record types in the resultset.
If the record type you are exporting contains record pointer or relationship marker fields, you can drill down into those record types and export fields from within those records. They can be included in the main file ("single joined file") or exported as separate files with linking IDs ("File by record type").
You should use "File by record type" where there are multiple values in record pointer fields, since the values in each related record will need to be kept separate. For simple cases without repeated value record pointers "single joined file" may be appropriate.
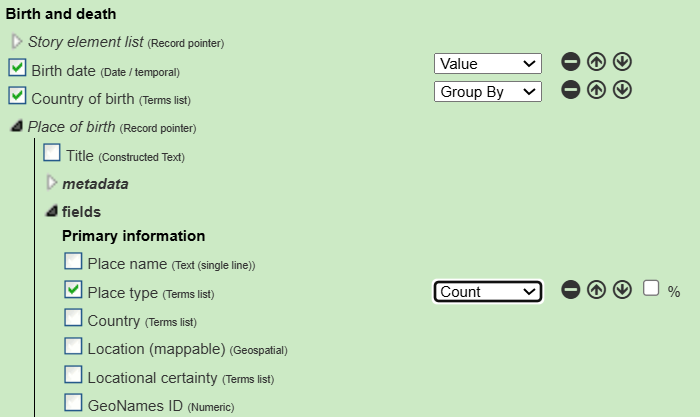
Note how you have some additional options appearing on the right against any selected fields.
For most purposes you will want to use Value, as the other options can be done more effectively in an external spreadsheet. However Group by will group records into a single record for each value encountered in the column, while Count will count the number of occurrences for the field in those groups. The results can be a little hard to interpret.
🛟 Tip:
The H-ID is ALWAYS included in the export because it uniquely identifies every record, so it is essential if you need to import/update data back into the database or to make links between records eg. record pointers
Finally, when ending the CSV export setting, you can change the field/column delimiter for the csv (for example: tab, semicolon, comma, etc.) and character used for quotemarking the textual content.
You can also save settings ⑦ by giving it a name in order to use it later.
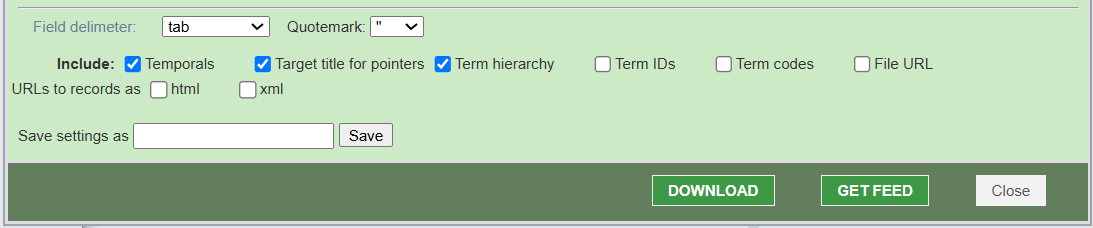
Handling of record pointers and relationships
For all other export types, it is possible to choose between:
- Export the records and their relationships (relationship of the type pointer or the relationships maker)
- Export only the pointer relationships
- Don’t follow the pointer relationships or the relationships makers
- Follow all relationships including inverse pointers (🚨warnings: it could export the entire database)
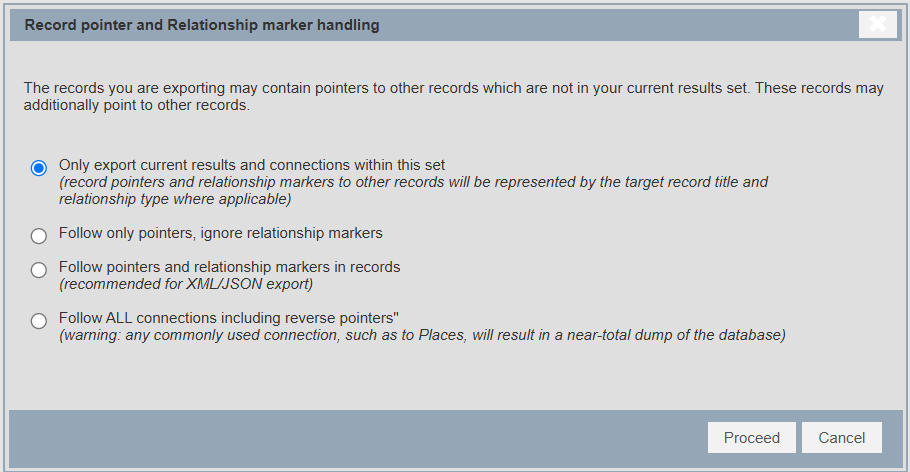
XML
“Extensible Markup Language (XML) is a markup language and file format for storing, transmitting, and reconstructing data. It defines a set of rules for encoding documents in a format that is both human-readable and machine-readable.” (source: Wikipedia)
Heurist defines an XML schema called Heurist Markup Language (HML). HML can be used both as an interpretable archivable format (it is included as the primary element of Publish > Safeguard file) and as a data source which can be transformed with XSLT transforms, Python, PHP, or many other languages to a required format.
Check the box "Include human-readable names and local IDs for everything" if you plan to look at the XML file and interpret its structure (this will create a very large file duer to repetition). It is often better to export an explanation of the structure through Populate >Heurist XML/JSON - Download template.

JSON
“JSON (JavaScript Object Notation) is an open standard file format and data interchange format that uses human-readable text to store and transmit data objects consisting of name–value pairs and arrays (or other serializable values).” (source: Wikipedia)
The choices are similar to XML/HML, except that it cannot include the human readable forms. However, as with XML, you can download the information in the form of a JSon tempalte through Populate >Heurist XML/JSON - Download template.
RDF
“The Resource Description Framework (RDF) is a method to describe and exchange graph data.” (source: Wikipedia)
In this format, you can specify the serialisation you want: rdfxml, json, ntriples or turtle
As this function is still in development (July 2026) it requires a special password to access. Contact the Heurist development team for further information.
GeoJSON
“GeoJSON is an open standard format designed for representing simple geographical features, along with their non-spatial attributes. It is based on the JSON format.” (source: Wikipedia)
You can select the export detail between: No = no detail, Inline = Inline detail, and Full = maximum detail
KML
“Keyhole Markup Language (KML) is an XML notation for expressing geographic annotation and visualization within two-dimensional maps and three-dimensional Earth browsers. It is best known for its use in Google Maps but is widely importable into GIS and mapping packages” (source: Wikipedia)
There are no options for this export format, it is exported immediately as soon as you click on the button.
GEPHI
GEPHI export generates a GEFX file which can be loaded immediately into GEPHI. Note that this export function is also available directly within the network visualisation graph in the Network tab.

In addition to the normal node and edge fields, you can choose to add additional fields to the export ①.

This leads to the pop-up below. We recommend only selecting fields relevant to the record type being exported. You can also export with jsut the default fields ② which will be sufficient in most cases.
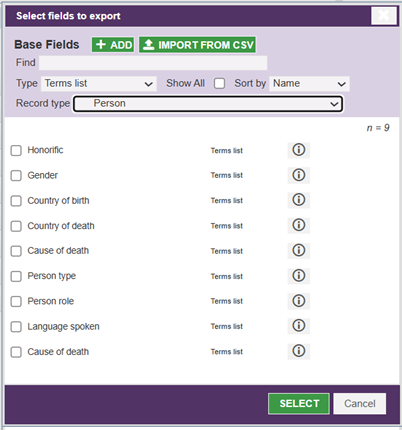
🛟 Tip:
It can be useful to check the box limiting the export to the first 1000 nodes in order to check that the export gives you what you want in GEPHI, befor exporting a very large dataset.
IIIF
“The International Image Interoperability Framework (IIIF, spoken as ‘triple-I-F’) defines several application programming interfaces that provide a standardised method of describing and delivering images over the web, as well as “presentation based metadata”[1] (that is, structural metadata) about structured sequences of images” . (source: Wikipedia). IIIF can also handle tiled image delivery andimage annotation.
Heursit acts as both a IIIF manifest delivery system and image server, and as an IIIF display and annotation client, notably through the use of Mirador Vsn 4 and Open Sea Dragon viewers, and the MAE annotation framework. Heurist can also read and atomise manifests containing annotations, and recompose manifests including those annotaitons and others created within Heurist.
IIIF is a rich and complex system. Heurist's IIIF implementation is discussed in detial in chapter 8e.
HuNI
“HuNI (pronounced “honey”) brings together information about the people, works, events, organisations and places that form Australia and Canada’s past and present.” (source: huni.net). It is an old infrastrucute project dating to the 2000s with limited functionality (essentially harvesting simple metadata from 40+ Australian sources, providing simple search, bookmarking as a 'collecction' and exporting a CSV file with title and URL of the bookmarked records. The HuNI export format has the particularity of exporting one XML file per record. It may be of some use if that fits with your needs.
HTML
This option exports HTML pages for public records (one file-per-record) using the Record view format.
📊 Export‑type quick‑reference table – Which format to choose?
Need | CSV | XML | RDF | JSON | GeoJSON | KML | Gephi | IIIF | HuNI |
|---|---|---|---|---|---|---|---|---|---|
Spreadsheet | ✅ | ✅ | |||||||
Markup (tagging) | ✅ | ✅ | ✅ | ✅ | ✅ | ✅ | ✅ | ||
Versatile (generic data) | ✅ | ✅ | ✅ | ✅ | ✅ | ✅ | ✅ | ✅ | |
Spatial (geographic) | ✅ | ✅ | |||||||
Networks | ✅ | ||||||||
High‑resolution images | ✅ |
8a: Getting started with custom reports
Documentation rédigée le 06/11/2025 par Shannon Bruderer mise à jour le 05/12/2025 par Shannon Bruderer
What is a Custom Report ? :
A Custom Report is a template that structures your database records into various output formats such as HTML (for web display), plain text (for transfers without formatting), CSV (for spreadsheet work, e.g. in Excel or Open Office), JSON (for data feeds), or XML (for tagged data exchange).
Note however that CSV, JSON and XML are handled much more easily in the Export tab in Explore unless some very specialised formatting is required.
The development of custom reports can be quite a slow process, so it is best to plan well what reports you need and apply good naming conventions. Some level of simple HTML will be required, and knowledge of CSS will allow for much greater control of the output. PHP and JS functions can also be included (optional).
Custom Reports are useful when you need to extract and format specific data for further analysis or publication. They are particualrly useful in formatting data to appear in web pages (see chapter 9). They can also be used to download formatted information or set up feeds of data for other purposes.
They are also useful for displaying a single record in Record View, a popup on the map, or wherever data needs to be displayed in response to selection of one or more records.
Tip : Before creating your Custom Report, define clearly what sort of display you plan to do. Your formatting goal will determine both the data you select and the way you format the output.
Reports are built using Smarty, a templating language that combines standard HTML with Smarty tags to dynamically insert data from Heurist.
You may see this message above your report format in the middle panel. CSS and JS are disabled by default in report formats and websites generated by a database as a security precaution, to avoid unwanted actions from parasitic databases. If you wish to use these - many websites will want to customise their appearance or behaviours more than the default settings allow - you should contact the server adminstrator who will add the database to a list of authorised databases.

If you change the name of a database, clone it or create a new database it will not allow CSS or JS.
The new name will need to be added to the list.
How to start :
You may wish to perform a more flexible filter, either by entering it in the Filter field ③ or using the Filter builder or Facets builder just below it, or use a [Saved Filter] from the Filters ection ② that returns the records you want to include in your report.
The selected records will appear in the middle section of your screen. ④
To work with Custom Reports, click on the [Report] tab ⑤
The Custom Report template for your filtered data will appear below the [Report] button.

The report shown in the backend interface is limited to 50 records by default (can be increaed to 200 or 500 in Design > My Preferences) and ends with a line stating this limit, as it is really designed as a preview function. To view the full results click the globe or download icons - see below).
The Toolbar
In the upper part of the Custom Report tab, you’ll see a toolbar:

Edit Tool

Click [Edit] to open the template editor and start writing your Custom Report with Smarty.
The editor is split into three panes ①, ⑤ and ⑨
 :::info Tips :
Actions pane ① :
Insert fields, loops, and conditions via dropdown helpers ②, and a tree view ④ selected with the record types dropdown ③
The tree view ④ allows you to select multiple fields, including from the metadata attached to each record (ID, date of addition, owner etc.), the method of representation of term fields (label, description, code), and to drill down into connected records through record pointer fields or relationship markers.
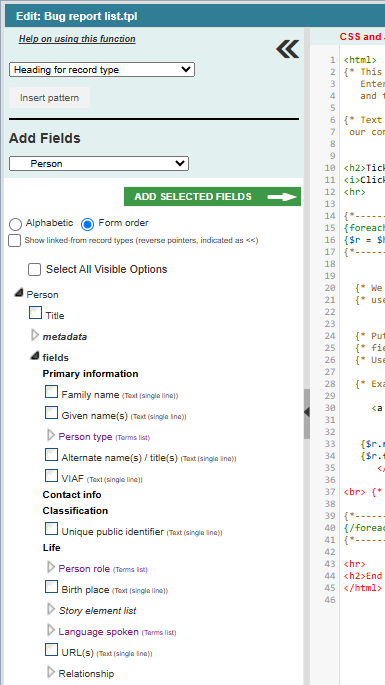
The fields can be organised in record form order (default view, showing the tabs and headings in bold font), or in alphabetic order. The tree can also show record types which have record pointers pointing TO the record type selected (Show linked-from record types checkbox)
Having selected one or more fields, make sure the cursor is positioned where you want them inserted in the report format and click Add selected fields. This will display the following popup;
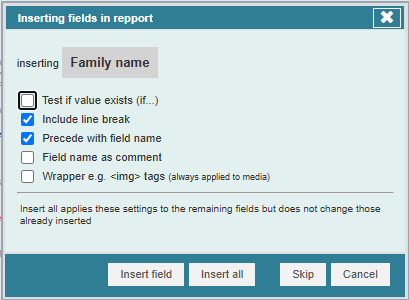
By selecting the checkboxes you can accompany insertion with various additional functions and pieces of information - the two selected by default will be useful in many cases to get some sort of reasonable default output.
Fields can be inserted one-by one (Insert field) allowing the accompanying information to be changed between fields, or you can insert all the remaining fields with the same accompanying information by clicking Insert all. Fields can be omitted with Skip.
The pattern insertion dropdown ② above the treeview function allows insertion of a number of simple html patterns such as tables and record links, as well as patterns to carry out some action eg. writing some label or separator, at the beginning or end of a loop. Note that the list of available patterns may change as new capabilities are added.
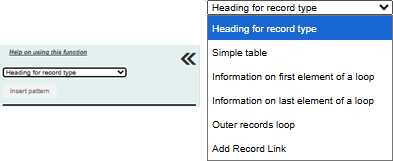
Editor pane ⑤ : write and edit your HTML + Smarty template here.
In the editor, you’ll see the template you selected or the default starter message/template (note that this template may change through time as we improve on it, but it will contain a basic loop for records and some instructions at the end to help you get started).
{* This is a simple Smarty report template which you can edit into something more sophisticated.
It should give basic output for any database, as it uses the standard record types which are part of all databases.
Enter html for web pages or other text format. Use tree on the left to insert fields, loops and tests.
Use this format to include comments in your file, use <!-- --> for output of html comments.
Smarty help describes many functions you can apply, loop counting/summing, custom functions etc. *}
For Smarty syntax please see the following chapter (8b).
Preview pane ⑨ : shows the output when you click [Test] ⑧ .
You can choose to truncate the preview to n records ⑥ and select how to handle debug messages, warnings, and errors ⑦.
Click [Test] to preview ! Nothing is saved when testing.
Use [Save] (or [Save As]) to store your template and keep versions.
Use Ctrl+Z / Cmd+Z to undo recent edits. You can undo a lot of edits by repeating this.
We strongly recommend using the test function frequently making only one or two changes at a time and clicking Test to see the results. If somethign doesn't work, you can immediately undo it and try an alternative. Undo can be applied repeatedly.
Don't get tempted to write a lot of code and then test it because then you will have trouble finding the problem.
Rename

Allows renaming of an existing template. Note that if a template is renamed, any URL or scheduled regeneration which uses the old name will fail.
Create a new template

[Create a new template] works similarly to the [Edit] tool. It opens the same editor interface where you can create a new Custom Report template from scratch.
Use it when you want to start a fresh layout instead of editing an existing one.
For Smarty syntax please see the following chapter (8b).
Delete the Selected Template

The [Delete] tool allows you to delete the currently selected template.
When clicked, a warning message will pop up asking for confirmation.

It will display the name of your template ① like name_file_.tpl . As here for exemple "Basic (inital record types).tpl"
Click [Proceed] to confirm deletion, or [Cancel] to abort the action.
Import and Export Templates


The Import ← and Export → tools allow you to share and reuse Custom Report templates.
For this we have developed a 'global template' format (.gpl) which uses Heurist's unique Concept IDs so that the template can be usd by any database that includes those concepts (definitions of record types, fields and terms). Template files stored in the Heurist database are the same as global files except that they use local codes rather than the unique global concept IDs.
Templates can only be exported from a registered database to ensure that there are Concept IDs for any definitions used in the template. If the database is not registered you will see the following message.

Import lets you upload an existing global template file (.gpl) and convert it to a local template file (.tpl)
Export lets you download your customized template as a .gpl file, so you can back it up or share it with others.
Obtain the URL, JavaScript to embed a report, and set a publishing schedules

The [Publish] option lets you :
- embed a Custom Report in an external website in another CMS
- schedule periodic regeneration with caching for faster load times on large/complex reports.
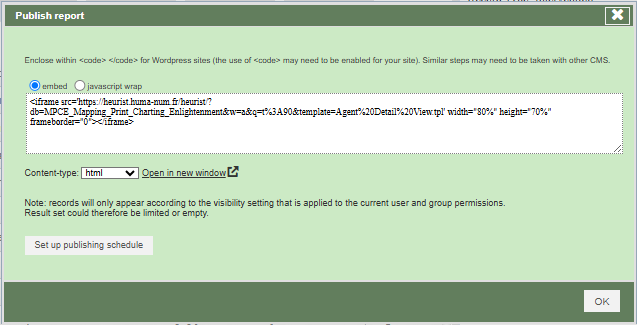
Embedding
The dialogue above gives an iframe instruction to embed the report into another website. Switching to javascript wrap will give an alternative text such as:

The Open in new window link is a useful way of seeing the report cleanly and for obtaining a URL for use elsewhere.
The Content-type dropdown allows a number of differnt output formats to be specified, setting a parameter on the URL used by Open in new window. html and text are the two most useful, the others produce generic outputs which may or may not be of any use. To obtain text output, do not include any html tags in the report format.
Setting up a scheduled (cached) report
Pros/cons of scheduling
Much faster for large tables, complex calculations, or media-heavy pages.
Content is a snapshot at the last generation time (not strictly real-time), so frequency of update needs to be approriately set
The first screen shows any existing scheduled actions:
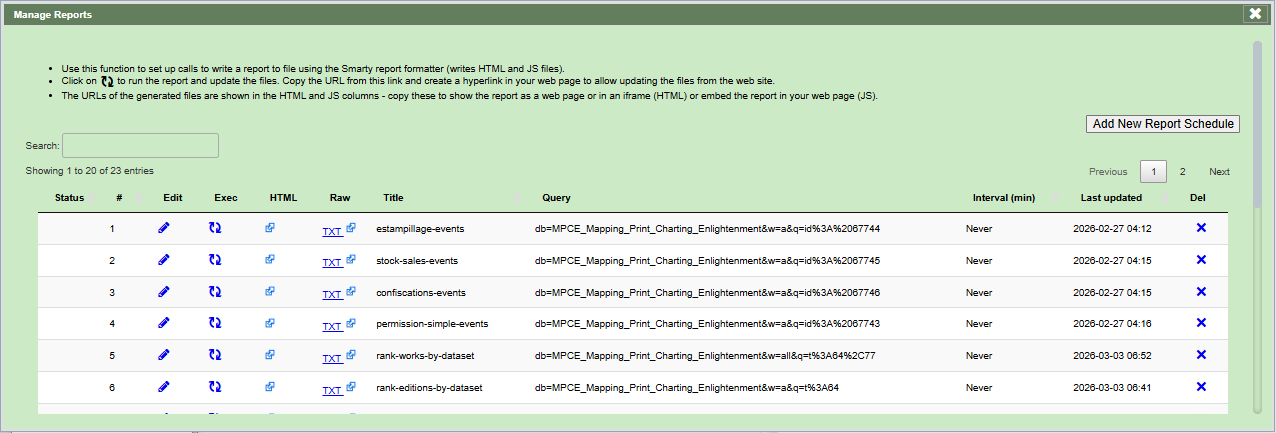
Adding a new report schedule pops up a dialogue to define the parameters of a new schedule using the current filter ("Query") with a number of different options - a title to identify it, the report template to be used, the frequeny with which to regenerate the output (the default value of 1440 minutes = daily, 0 = only manual regeneration, which is useful for data that will never, or very rarely, change).
Download

This allows the download of a plain text file without html formatting (assuming you did not use html tags in the report format)

The [Print] buttom simply generates a PDF of the output from your current Custom Report template. It’s a quick and convenient way to export information in an easy readable and shareable format.
Tip: Don’t hesitate to use this feature to:
Enrich your Data Management Plan (DMP),
Place in a hardcopy archive,
Keep track of specific datasets, or
Share information with colleagues who may not be comfortable navigating Heurist or other “sophisticated” data formats.
Refresh

Click on the [Refresh] buttom to update the data used by your Custom Report template. For filters other than Facet filters (where you must make surther selections) you may also simply hit the Filter button to rerun the filter, which will cause the report to be rewritten.
If your database has been modified (new records, edits, deletions) but the output of your report does not reflect these changes, simply hit Refresh to reload the most recent data and ensure your preview is accurate.
8b: Custom reports - Advanced functions
Advanced topics in custom reports
Note (July 2026): the content was copied via markdown export and lost much of its minor formatting. The images in particular have been downgraded. The original source is here: https://docs.google.com/document/d/1Jyytaln1-aCm3paZ4rBKho0puXBGaJ97/edit
This chapter contains lots of undigested tips for advanced users, skip the first 10 pages or so to get to this material.
Smarty Syntax
If you are not familiar with Smarty or the Smarty syntax, the Smarty Site has a range of information and resources on using the Smarty Report Template Engine, including complete Smarty documentation.
This topic provides an introduction to some basic syntax elements when you are using the Actions Pane to create simple reports.
Advanced features
SMARTY provides a range of features that can improve your reports. For a full explanation, visit the SMARTY documentation.
Template plugins
Template plugins provide advanced template functionality. Template plugins include:
- Functions
- Block Functions
- Modifiers
Plugins are always loaded on demand. Only the specific modifiers, functions, resources, etc. invoked in the templates scripts will be loaded. Moreover, each plugin is loaded only once, even if you have several different instances of Smarty running within the same request.
Main records
The foreach statements enclose a loop which outputs information for each record in the query result. Fields can be inserted with the insert links next to each field. Use the if links to insert tests based on the value of a field (e.g.. to only output text if a field is set).
Subrecords
Further loops can be inserted to output multiple sub-records within the main record loop, using the loop link after the subrecord name. Fields within sub records can be inserted with either the in or out links; use the in link to insert a field within a loop, use the out link to insert a field outside a loop.
Comments
Syntax: {* This is a comment *}
Comments are useful for making internal notes in your template. They are completely ignored in your template file and are invisible to public view (unlike <!-- HTML comments -->).
Variables
Synatx: $foo
Variables allow you to dynamically replace the variable by data when the web page is created. For example, instead of writing the record title in the template, you can use a tag like {$title} in place of the title.
Variables can contain numbers, letters and underscores.
You can apply maths to variables that contain numbers. For example:
{$foo+1}
{$foo*$bar}
{$foo->bar-$bar[1]*$baz->foo->bar()-3*7}
Smarty has several different types of variables. The type of the variable depends on what symbol it is prefixed or enclosed within.
Variables in Smarty can be either displayed directly or used as arguments for functions, attributes and modifiers, inside conditional expressions, etc. To print a variable, simply enclose it in the delimiters so that it is the only thing contained between them.
Arrays in Smarty reports
- You may use arrays in smarty report easily. Access element by its index First element: {$newValue[0]}<br>
Or use standard array functions.Print array: {print\_r($newValue,true)}\<br\> Implode array: {implode('\*', $newValue)}\<br\>
Functions
Smarty has many built in functions for formatting, sorting, totalling etc.
You can also use PHP functions (built-in or ones you define in the code) in a Smarty template, for example:
{$r,fldname} will output the value of the field
{$r.fldname|upper} will output the value of the field converted to upper case (Smarty function)
{str_pad($r.fldname},10,"0", STR_PAD_LEFT) } will pad the string to length 10 with leading zeroes (PHP function)
Every Smarty tag either prints a variable or invokes some sort of function. These are processed and displayed by enclosing the function and its attributes within delimiters like so: {funcname attr1="val1" attr2="val2"}.
Smarty allows for:
built-in functions. For example, {if}, {section} and {strip}. There should be no need to change or modify them.
customer functions. These are additional functions implemented by you via plugins. They can be modified to your liking, or you can create new ones.
Built in functions include:
{assign}
This is used for assigning template variables during the execution of a template.
{assign var="name" value="Bob"}
{assign "name" "Bob"} {* short-hand *}
The value of $name is {$name}.
The above example will output:
The value of $name is Bob.
{$var=...}
This is a short-hand version of the {assign} function. For example:
{$name='Bob'}
The value of $name is {$name}.
The above example will output:
The value of $name is Bob.
{for}
The {for}{forelse} tag is used to create simple loops. The following different formats are supported:
{for $var=$start to $end} simple loop with step size of 1.
{for $var=$start to $end step $step} loop with individual step size.
{forelse} is executed when the loop is not iterated.
For example:
<ul>
{for $foo=1 to 3}
<li>{$foo}</li>
{/for}
</ul>
The above example will output:
<ul>
<li>1</li>
<li>2</li>
<li>3</li>
</ul>
Another example using MAX attribute.
$smarty->assign('to',10);
<ul>
{for $foo=3 to $to max=3}
<li>{$foo}</li>
{/for}
</ul>
The above example will output:
<ul>
<li>3</li>
<li>4</li>
<li>5</li>
</ul>
Example showing use of {forelse}
$smarty->assign('start',10);
$smarty->assign('to',5);
<ul>
{for $foo=$start to $to}
<li>{$foo}</li>
{forelse}
no iteration
{/for}
</ul>
The above example will output:
no iteration
{if},{elseif},{else}
Every {if} must be paired with a matching {/if}. {else} and {elseif} are also permitted.
The following is a list of recognized qualifiers, which must be separated from surrounding elements by spaces. Note that items listed in [brackets] are optional. PHP equivalents are shown where applicable.
Qualifier | Syntax Example | Meaning |
|---|---|---|
== | $a eq $b | equals |
!= | $a neq $b | not equals |
> | $a gt $b | greater than |
< | $a lt $b | less than |
>= | $a ge $b | greater than or equal |
<= | $a le $b | less than or equal |
=== | $a === 0 | check for identity |
! | not $a | negation (unary) |
% | $a mod $b | modulous |
is [not] div by | $a is not div by 4 | divisible by |
is [not] even | $a is not even | [not] an even number (unary) |
is [not] even by | $a is not even by $b | grouping level [not] even |
is [not] odd | $a is not odd | [not] an odd number (unary) |
is [not] odd by | $a is not odd by $b | [not] an odd grouping |
Example {if} statements
{if $name eq 'Fred'}
Welcome Sir.
{elseif $name eq 'Wilma'}
Welcome Ma'am.
{else}
Welcome, whatever you are.
{/if}
{* an example with "or" logic *}
{if $name eq 'Fred' or $name eq 'Wilma'}
...
{/if}
{* same as above *}
{if $name == 'Fred' || $name == 'Wilma'}
...
{/if}
{* parenthesis are allowed *}
{if ( $amount < 0 or $amount > 1000 ) and $volume >= #minVolAmt#}
...
{/if}
{* check for not null. *}
{if isset($foo) }
.....
{/if}
{* test if values are even or odd *}
{if $var is even}
...
{/if}
{if $var is odd}
...
{/if}
{if $var is not odd}
...
{/if}
{* test if var is divisible by 4 *}
{if $var is div by 4}
...
{/if}
{*
test if var is even, grouped by two. i.e.,
0=even, 1=even, 2=odd, 3=odd, 4=even, 5=even, etc.*}
{if $var is even by 2}
...
{/if}
{* 0=even, 1=even, 2=even, 3=odd, 4=odd, 5=odd, etc. *}
{if $var is even by 3}
...
{/if}
{while}
{while} is similar to {if} and takes the same set of modifiers.
Every {while} must be paired with a matching {/while}.
Example {while} loop
{while $foo > 0}
{$foo--}
{/while}
The above example will count down the value of $foo until 1 is reached.
Attributes
Most of the functions take attributes that specify or modify their behavior. Attributes to Smarty functions are much like HTML attributes. Static values don't have to be enclosed in quotes, but it is required for literal strings. Variables with or without modifiers may also be used, and should not be in quotes.
Some attributes require boolean values (TRUE or FALSE). These can be specified as true and false. If an attribute has no value assigned it gets the default boolean value of true.
Example:
{assign var=foo value={counter}}
Loops
Loop (repeat) sets of data with the {foreach} syntax.
Conditionals
Conditional statements have the typical if/else structure:
{if $test == "1"}Yes!{else}No!{/if}.
Alternatively:
elseif: {if $person == "Mike"}You are Mike{elseif $person == "Paul"}You are Paul{else}You are neither Mike nor Paul. Who are you?{/if}.
Variable Modifiers
Variable modifiers can be applied to variables, custom functions or strings. To apply a modifier, specify the value followed by a | (pipe) and the modifier name. A modifier may accept additional parameters that affect its behaviour. These parameters follow the modifier name and are separated by a : (colon). Also, all PHP-functions can be used as modifiers implicitly (more below) and modifiers can be combined.
Examples are:
{* apply modifier to a variable *}
{$title|upper}
{* modifier with parameters *}
{$title|truncate:40:"..."}
{* apply modifier to a function parameter *}
{html_table loop=$myvar|upper}
{* with parameters *}
{html_table loop=$myvar|truncate:40:"..."}
{* apply modifier to literal string *}
{"foobar"|upper}
{* using date_format to format the current date *}
{$smarty.now|date_format:"%Y/%m/%d"}
Modifiers
Modifiers allow you to quickly manipulate data to improve its appearance. Here is a concrete example. Let's say that your Books database has grown very large. Lots of different people have entered data, and you have imported data from many different sources. You aren't sure if all the titles of all the books are capitalised consistently. When you display the title of a Book record in your custom report, you can make sure that it is capitalised consistently by using the 'capitalize' modifier like so:
<p>Book Title: {$r.f1|capitalize}</p>
{* Data in the database: 'the history of Tom Jones, a Foundling. In four volumes.' *}
Book Title: The History Of Tom Jones, A Foundling. In Four Volumes
As you can see, to apply a modifier, simply type the pipe "|" character after the data, and then type the name of the modifier you wish to use.
It is possible to use multiple modifiers at once, and also to change their behaviour. For example, your Books database may contain many long titles, as well as many titles that are not capitalised correctly. You can easily shorten ('truncate') the tiles as well as capitalising them like so:
<p>Book Title: {$r.f1|capitalize|truncate:25}</p>
{* Data in the database: 'the history of Tom Jones, a Foundling. In four volumes.' *}
Book Title: The History Of Tom Jones,...
As you can see, to use another modifier, you can simply type another pipe "|", and put the name of the next modifier after it. If the modifier needs you to specify some settings, you can do this with a colon ":". In this case, you can tell 'truncate' how many characters to keep. By typing :25, you tell the modifier to keep just the first 25 characters of each book title. The modifier automatically adds the ellipsis characer (...) if a word is too long and gets truncated.
There is a complete list of modifiers on the SMARTY website.
The Wrap Function
Inserting text or numerical data into a Heurist Custom Report is easy. It is more complex to insert an image, video, audio file or location data. As a recap, consider the below code:
<p>Name: {$r.f1}</p>
This code will create a new paragraph ( **<p></p> **), which will begin with "Name: " and then with the text from Field 1 ( **f1 **) in the relevant record ( **$r **).
But what if the data you have is an image or audio file? Imagine that your custom report displays records about Persons, and you have made a recording of each Persons's voice, stored in Field 1000. You could try the following code, but it would not do the job:
<p>Voice Recording: {$r.f1000}</p>
You might hope that this would provide a link or some other fuctionality, but instead, when users visit your website, they would see this:
Voice Recording: https://heuristref.net/h6-alpha/?db=example_db&file=68e8f8ce906d1ad44eb70e97ba2b37b10cb80223
To help you with situations like this, we provide the 'wrap' function. The following code would work perfectly:
<p>Voice Recording: {wrap var=$r.f1000_originalvalue dt="file" auto_play="0"}</p>
Voice Recording: 
The wrap function works with images, audio files, video files and also with simple links.
If you wish users to be able to zoom in on an image or video, then you can add a 'fancybox'. To do this, add **mode **and **fancybox **parameters to the wrap:
{wrap var=$r.f438_originalvalue dt="file" mode="thumbnail" fancybox="1" auto_play="0"}
If $r.f438 is an image, video, pdf or similar, viewers of the custom report will now be able to click on it to zoom in and explore details.
**NB: **The 'thumbnail' parameter is necessary for *videos *and *pdfs *, if you wish these to be clickable and zoomable. If you forget to write mode="thumbnail" for an image there will be no problem.
You don't need to remember how to write the 'wrap' function. When you use the wizard to insert a field into your custom report, simply choose the ' **Field + function wrapper **' option before clicking ' **Insert field value **', and the 'wrap' function will be included for you automatically.

For dates
For custom reports the wrap function allows selection of the level of detail output for dates and what calendar to use:
{wrap var=$r.f9_originalvalue dt="date" mode="1" calendar="both"}
{*Date mode: 0-simple,1-full, 2-all fields; calendar: native, gregorian, both *}
{$r.f9} is equivalent to {wrap var=$r.f9_originalvalue dt="date" mode="0" calendar="native"}
html text fields with relative paths
- Images from WYSYWIG/tinymce text field are not displayed in custom reports. Relative url may be the cause ?
https://dicobiosport.huma-num.fr/heurist/viewers/smarty/showReps.php?db=dicobiosport&q=id:76424&template=Record.tpl
For such cases use the internal “wrap” function that converts all relative paths to absolute ones
{$txt=$r.f954|regex_replace:"/\r*\n+/":"</p><p>"}
<p>{wrap var=$txt}{*Biographie*}</p>
Calculated fields
Calculated fields are updated on add/save (including other records that are in list of affected record types cfn_RecTypeIDs). . Calculated fields are updated before update of record title.
Calculate fields are not updated on record import. You will need to rebuild calcualted fields after import with Admin > Rebuild calculation fields
- Configure a ‘Weekday’ dropdown for the Mary Hamilton Project. A simple vocabulary of the seven days of the week, then defined this formula for the field:
{$date = $r.f9} {$date->format(‘l’)}
{date_format(date_create($r.f9),"l")} - for weekday as word
{10630+date_format(date_create($r.f9),"N")} - for weekday as enum value
Bootstrap
Bootstrap is now incorporated as components in website format Vsn 3, but for older websites this may be useful.
Is there a way of using Boostrap without messing up the CMS?
CSS is not enough. Bootstrap is javascript library and affects all elements besides css. It creates its own widgets for buttons, inputs etc. Fortunately since v5 it is jquery free otherwise v4 may load its own jquery jquery-3.3.1 and it conflicts with ours
OK. There is $.fn.button.noConflict(); in bootstrap that resets the appropriate element to original mode.
Manual rendering of file fields
You may encounter situations in which the 'wrap' function does not behave as you would wish. In such a situation, you can manually control how the file field is rendered. Click below for details.
Manually accessing data in file fields:
A common application of this is to include information from the description of an uploaded file in the Custom Report. For example, when uploading an image, you might include image credits in the description of the file, or a caption to be displayed, or alt text for screen readers. To include this data in your custom report, you would use the 'ulf_Description' key, like so:
{$r.f38_originalvalue[0]['ulf_Description']}
Linked and Related Records
There are different ways that Heurist records can be linked to one another. In the simplest case, a record can have a 'record pointer' field, which simply points to another record. For example, a book may have an author field. Rather than containing a name, the 'author' field simply contains the id number of the Person who is the author of the book.
Using Record Pointers in the Current Record
When writing a custom report, it is easy to insert records that the current record points to, simply by using the field browser on the left of the screen. Simply choose which information you would like to include from the linked record, and use the 'insert field' tool. Heurist will insert some code that looks a bit like this:
{$f1000=$heurist->getRecord($r.f1000)}
Here is a detailed breakdown of the code:
- $f1000 ☚ The variable where you will store information about the new record. Heurist will give it a default name based on how the information is stored in the database. In this example, the book's author is stored in Field 1000, so $f1000 is used. You could change this to $author to make your code easier to read
- $heurist->getRecord ☚ Retrieve authors information from the database
- $r.f1000 ☚ The author's ID number, which is stored in Field 1000 of the book record. As the main record type in the Custom Report, the book has simply been labelled $r.
If the field is repeatable, then you should click the 'repeatable' link in the field selector tool, which will insert code that looks something like this:
{foreach $r.f1000s as $f1000 name=valueloop}
{$f1000=$heurist->getRecord($f1000)}
{* Do something with each $f1000 (i.e. author in this example *}
{/foreach}
This is very similar to the above code, except that there is a foreach loop, and instead of asking for the information in $r.f1000, you request information in $r.f1000s, the plural form.
Linked Records
The situation is more complex, however, if you wish to fetch information from *other *records that point to *this *one. For instance, suppose you want to display information about a Book. Part of the information you wish to display is information about the libraries that hold this Book. But in your database, information about library holdings is held in the Library record type. For instance, if you open up the 'New York Public Library' record, and look in the 'Books Held' field, you will see a list of all the books held by that library. When it comes time to display information about a particular book in a custom report, how can you retrieve information about all the Libraries that hold that book?
To solve this problem, Heurist provides the getLinkedRecords method. The code snippet below would retrieve a list of every library that holds the current book, and then put the name of each library into a bullet-point list:
<p>Libraries holding this book:</p>
<ul>
{$libraries = $heurist->getLinkedRecords($r.recID, 25, 'linkedfrom')}
{foreach $libraries['linkedfrom'] as $library}
<li>
{$library_details = $heurist->getRecord($library)}
{$library_details.f1}
</li>
{/foreach}
</ul>
Feel free to copy that code into your own Custom Report and make appropriate modifications. Here is a line-by-line breakdown of the code:
- <p>Libraries holding this book:</p> ☚ This creates a heading for the list of libraries. You could also use a subheading element such as <h2> or <h3>
- <ul> ☚ This tag begins the bullet point list. Every item inside it will be included in the list. Every such item should be enclosed in <li> tags.
- {$libraries = $heurist->getLinkedRecords($r.recID, 55, 'linkedfrom')} ☚ This line fetches information about all the libraries linked to the current book. Here is a more detailed breakdown:
- $libraries ☚ The name of the variable where you will store all the libraries' ID numbers
- $heurist->getLinkedRecords ☚ The method for finding linked records, which is stored inside the $heurist object
- $r.recID ☚ The record ID of the current record you are looking at, which is assumed to be a book for this example
- 55 ☚ The RecordTypeID for the 'Library' type in this database. By putting this 55 here, you are telling Heurist only to look for *Libraries *that point to this book, as opposed to *Bookshops *or *Persons *or any other record type that may also point to Books in your database. To find the Record Type ID for a particular record, go to the Record Types tool in the Design Menu . If you don't provide a number, then Heurist will simply retrieve every record connected to this one. If you wish to search for multiple record types, you can provide an array in square brackets, e.g. [55, 66, 81].
- 'linkedfrom' ☚ This tells Heurist only to look for records that *point to *Books (i.e. to find records that this Book is *linked from *). You can also ask Heurist to find all records 'linkedto' this record. If you don't provide Heurist this clue, then it will simple find all records linked to this Book, whether it is the other record that points to the book, or the book that points to the other record.
- {foreach $libraries['linkedfrom'] as $library} ☚ Loop over each library that this book is linked from, and do something each time
- <li> ☚ Create a new bullet point
- {$library_details = $heurist->getRecord($library)} ☚ Retrieve the current library's details
- {$library_details.f1} ☚ Put the library's name in the bullet point
- </li> ☚ The bullet point is now finished
- {/foreach} ☚ That is all we want to do with this library – now go back to the start of the 'foreach' loop and do the same again for the next library, until all a dealt with
- </ul> ☚ After creating a bullet point for each library, close the list.
Related Records
A similar problem is posed by Record Relationships. These are complex interrelationships between records, and are not actually stored in the records themselves. Instead, there is a seperate table in the underlying database, which stories information about every Record Relationship. If you wish to retrieve this relationship data, we provide the $heurist->getRelatedRecords method. Let's say you are building a new custom report, displaying information about authors in your Books database. If you wished to display information about an author's relatives, you could write:
This example is very similar to the getLinkedRecords example, so I will just pick out a few details that are different:
- {$relatives = $heurist->getRelatedRecords($r)} ☚ This fetches every record that is directly related to this record ($r), and stores the information in a new array called $relatives.
- {foreach $relatives as $relative} ☚ Now we loop over the array, to create a bullet point for each relative
- {$relative.recRelationType} ☚ All relationships have a RelationType, e.g. 'isMotherOf' or 'wasParticipantIn'. You can retrieve this information with .recRelationType
- {$relative.f1} ☚ Assuming that the $relative is a Person, this would insert their surname into the report
- {$relative.recRelationType} : {$relative.f1} ☚ Taken together, this would insert the type of relationship, a colon and then the surname of the relative into the report, e.g. isMotherOf : Smith.
**NB: **As you can see, there is no need to use $heurist->getRecord when using the $heurist->getRelatedRecords method. This method returns *all *the information about each related record, not just the record ID of each relative. Contrast this with the above examples of Record Pointers and Linked Records.
Examples
- I want to use the title (or the family name) of the Person who was interviewed to insert in the Interview extract (Extract is child of interview is child of person). Interview has a pointer to Person that has a title (Family Name = field #1), so you first need to load the person record, then you can access the family name or other fields in Person.
{$person=$heurist->getRecord($f247.f15)} {* Person *}
{$person.f1} {*Family name *}
- How do you retrieve fields from the relationship record (as well as the related record). getRelatedRecords returns an array of related records with additional header fields: recRelationType*, recRelationNotes, recRelationStartDate, recRelationEndDate.
{$rel_record = $heurist->getRecord($Relationship.recRelationID)}
{$src_info = $heurist->getRecord($rel_record.f1160)}
Source de l'Information: {$src_info.recTitle}
{* Get infromation from the relationship record *}
{$rel_record = $heurist->getRecord($Relationship.recRelationID)}
{$src_info = $heurist->getRecord($rel_record.f1160)}
Source de l'Information: {$src_info.recTitle}
Start Date: {$rel_record.f10}
End Date: {$rel_record.f11}

Sorting related records
In smarty reports, when dealing with a {foreach} loop calling child records, you may need to order the resulting set based on a specific variable/field from the child record eg. producing a list of child records ordered alphabetically by author.
{* Bibliographic references *}
{if ($r.f1016s)}
{$bibs=array()}
{foreach $r.f1016s as $bibRef name=bibLoop}
{$reference=$heurist->getRecord($bibRef)}
{$bibs[$reference.recID] = $reference.recTitle}
{/foreach}
{capture}{asort($bibs)}{/capture}
<section class="references">
<p><strong>Bibliographical References:</strong></p>
<ul>
{foreach $bibs as $bib_id=>$bib_title name=bibLoop2}
<li>{$bib_title}
<a href=https://Heurist.Huma-Num.fr/judaism_and_rome/view/{$bib_id}
target=_blank>view</a></li>
{/foreach}
</ul>
</section>
{/if}
V2 - > r in second for loop can be used in the same way as in any other for loops of records
$repeatsorted=array()}
{foreach $repeat as $item name=valueloop}{* *}
{$item=$heurist->getRecord($item)}
{$repeatsorted[$item.recID] = $item.recTitle}
{/foreach}
{capture}{asort($repeatsorted)}{/capture}
{foreach $repeatsorted as $itemsorted name=valueloop}{* *}
{$r=$heurist->getRecord($itemsorted@key)}
{/foreach
***To get info from the relationship record ***
(I've added this to z_Ian_Text report):
Use h6-alpha
{* Get infromation from the relationship record *}
{$rel_record = $heurist->getRecord($Relationship.recRelationID)}
{$src_info = $heurist->getRecord($rel_record.f1160)}
Source de l'Information: {$src_info.recTitle}
Start Date: {$rel_record.f10}
End Date: {$rel_record.f11}
I have put in rubbish dates 1111 and 9999

Note that when using getRelatedRecords and getLinkedRecords, it is not possible to detect what relationship marker field generated the particular relationship. We don't keep this info. You may filter out the required record by rectype and relation type
Detecting if a linked record is visible to public
- Detection, in a custom report, whether a linked record is visible to the public
**{foreach $r.f1107s as $f1107 name=valueloop}{\* Other sources \*}** **{$source=$heurist-\>getRecord($f1107)}** **{if ($source.recNonOwnerVisibility=='public')}**
or: {if ($source.recIsVisible!==false)} {* Hide non-public related sources if not logged in *}
Advanced HTML, CSS and JavaScript
To unlock the full power of the Custom Report tool, you need to have CSS and JavaScript enabled for your database. To do this, please contact your server administrator. On the Sydney and Huma-Num servers, the administrator is ian.johnson@sydney.edu.au . If you are using a hosted version of Heurist at another institution, you will need to inquire there about who has adminstrative rights.
Along with HTML, JavaScript and CSS are the building blocks of the web. JavaScript is a fully-featured programming language with inbuilt tools for interacting with web pages through the Document Object Model (the DOM). CSS (or 'Cascading Style Sheets') is a simple formatting language that allows you to describe how you would like different page elements to be formatted.
There are many ways you can embed JavaScript and CSS into a Heurist website. For a full discussion, please visit the JavaScript and CSS pages of this help system.
Once you have enabled JavaScript and CSS, you can structure your reports using more advanced features.
Note that the custom JS and CSS defined at the site or page level (in CMS Home or CMS Menu_page) are not applied to custom reports. You must add the needed CSS and JS code directly in the report.
Note that you will not be able to use php code and functions within smarty on Heurist. Most php functions have been restricted for security issue. Please contact the Heurist development team should you need to use php code.
Using Advanced HTML Elements
By default, you are able to use the following tags to structure your Custom Report:
- <h1> - <h6> for headings
- <p> for paragraphs
- <a> for links
- <ul> for bullet points and <ol> for numbered lists, along with the crucial <li> tag for each item in the list
- <span> for spans (e.g. for highlighting particular text)
- <strong> for making text bold, and <em> for italicising it
- <div> for divisions
- <table> for tables. There are many other tags that need to be used to make tables work. The most important are <th> , <tr> and <td> , which allow you to define table headings, rows and datapoints. Click though the link to see information about other more advanced features of html tables.
- <img> , <audio> and <video> elements introduced using the Wrap Function .
Once you have enabled JavaScript and CSS, however, you can consider using more advanced HTML tags to structure your report. Some of these elements include:
- <article> – This element is ideal for wrapping a single result. For instance, if your custom report will output a list of Persons, the results for each Person will be inside an <article> element. This helps screen readers and search engines interpret the structure of your page. NB: Each article should have exactly one <h1> element inside it, for the 'title' of the article.
- <section> – Divisions are arbitrary elements, than can serve any number of roles. If you wish to deliberatly divide the content of your report into sections, then the section tag can be a good choice.
- <details> – Using a details element, you can easily create collapsible elements on your page. To change the animation of the element, you will need to use CSS.
- <dl> – A 'description list' provides a natural way to display labelled data. For example, if you wish to elegantly display the name, age and birthplace of a person, then a description list can provide a simple solution.
Enabling JavaScript and CSS
Additional styling from the website’s home page is also added to the custom report, if allowed.
J’ai créé un custom report avec du JS/Jquery (qui a été activé - base SF_ScriptaManent_Dev).
Il comprend surtout des petites fonctions qui permettent par exemple de montrer/cacher des sections au clic sur un bouton
Tout se passe bien quand j’affiche mes résultats en mode inline (voir capture) – le JS et le CSS sont bien pris en compte.
Par contre, si je demande l’affichage sous forme de modale, le JS et le CSS ne sont plus du tout pris en compte. J'ai le même problème lorsque je clique sur un lien pour aller sur un autre fiche en relation, peu importe le mode d'affichage (sur une nouvelle page ou dans une modale).
One of THE most powerful features of Heurist is the ability to modify record structures – not just the fields being
J’ai essayé de placer mes fonctions JS au niveau du site et non du custom report, mais ça ne change rien et je ne vois pas comment résoudre ce problème. Le custom report est bien appliqué mais toute sa mise en forme n’est pas prise en compte et j'obtiens donc un affichage brut. En pièce jointe une section exemple avec le JS/CSS actifs en inline et la version non customisée sur tout autre mode de visualisation.
----------
Merci pour votre réponse. J'ai l'impression que c'est bien le JS + le CSS qui ne sont pas pris en compte, puisque ce sont des classes CSS qui me permettent d'avoir des résultats sur 2 colonnes.
showReps.php - smarty report page runs without loading/initialization nearly all javascripts libraries. If you need to use jquery in your reports - define them explicitly in header of smarty template. I’ve added it
<html>
<head>
<script src="https://code.jquery.com/jquery-1.12.2.min.js" integrity="sha256-lZFHibXzMHo3GGeehn1hudTAP3Sc0uKXBXAzHX1sjtk=" crossorigin="anonymous"></script>
<script src="https://code.jquery.com/ui/1.12.1/jquery-ui.min.js" integrity="sha256-VazP97ZCwtekAsvgPBSUwPFKdrwD3unUfSGVYrahUqU=" crossorigin="anonymous"></script>
<link rel="stylesheet" type="text/css" href="https://code.jquery.com/ui/1.12.1/themes/base/jquery-ui.css" />
<script>
Merci beaucoup, ça marche. J'ai aussi dû ajouter le CSS dans le header pour qu'il soit pris en compte en dehors de la visualisation en inline.
Du coup, ça a également répondu à une autre question que j'avais, qui était comment ajouter bootstrap au projet.
Where to place your CSS
We recommend placing your custom CSS at the top of the report wrapped within style tags.
Embedding Custom CSS
To embed CSS in your custom report, you can introduce <style> tags in the head of the report. These should ideally be enclosed in a {literal} command so that the SMARTY engine will not get confused (in fact, it only rarely gets confused, but you should make sure anyway).
If you like, you can copy-and-paste the below code snippet into your report, immediately below the first <html> tag at the top of the template:
<head>
{literal}
<style>
/* Place all custom styles here */
</style>
{/literal}
</head>
You can also embed CSS in individual elements in your report. For example, the below code will center a paragraph and turn the text yellow:
<p style="text-align: center; color: red;">This paragraph is now centered and coloured red.</p>
This paragraph is now centered and coloured red.
Since 'inline styling' can seem convenient, but in the long run it is better if you place all the styling infoormation in one place, and control it as an integrated whole. For a deeper introduction to CSS, please see our CSS page.
Embedding Custom JavaScript
To embed JavaScript in a custom report, you can use a <script> tag. This can be a tricky task. Generally speaking, when you are getting started with JavaScript it is a good idea to place the <script> tag at the end of your report. The reason for this is that you don't want the user's browser to execute the JavaScript before all the other parts of the report have loaded. If you place the <script> tag at the *start *of your report, then the user's web browser may try to execute all the JavaScript before the rest of the report is ready. It might try to change the colour or size of a particular image or paragraph, but the image or paragraph has not been loaded yet. This will cause an error and probably prevent the JavaScript from working.
If you wish to embed some JavaScript in your page, you can copy-and-paste the below code snippet, and place it at the end of your report, just above the final <html> tag:
<script>
{literal}
// Place all JavaScript here
{/literal}
</script>
For a fuller introduction to using JavaScript in a Heurist website, visit our JavaScript page.
JQuery in reports
showReps.php - smarty report page runs without loading/initialization nearly all javascripts libraries. If you need to use jquery in your reports - define them explicitly in header of smarty template. I’ve added it
<html>
<head>
<script src="https://code.jquery.com/jquery-1.12.2.min.js" integrity="sha256-lZFHibXzMHo3GGeehn1hudTAP3Sc0uKXBXAzHX1sjtk=" crossorigin="anonymous"></script>
<script src="https://code.jquery.com/ui/1.12.1/jquery-ui.min.js" integrity="sha256-VazP97ZCwtekAsvgPBSUwPFKdrwD3unUfSGVYrahUqU=" crossorigin="anonymous"></script>
<link rel="stylesheet" type="text/css" href="https://code.jquery.com/ui/1.12.1/themes/base/jquery-ui.css" />
<script>
Adding Javascript
Heurist sanitises content to remove javascript which users might have inserted in html, for security reasons.
If you need to use Javascript in your web pages, please ask you server manager to enable it
by listing the name of the database in ..../HEURIST/js_in_database_authorised.txt on the server.
Example:
// Sep 2019: This file lists databases on this server which may include JS code in the CMS Home Page or CMS Menu records
// All other databases are excluded from executing such code. Order is unimportant.
balipaintings
johns_hamburg
ExpertNation
etc.
Note:
To add Javascript to a web page you need to put it in the special Javascript field in Website Header / Layout
Javascript embedded directly in the page will be filtered out even if it is authorised through the js_in_database_authorised.txt file.
Where to put your JavaScript
We recommend placing your custom JavaScript at the top of the report wrapped within script tags.
If the JavaScript is situational or requires a specific HTML element, e.g. a button or link, then place the JavaScript within script tags at the end of the report or after the specific HTML element.
Server path and database name
You can reference the server path and the database name in a smarty report as follows (in blue):
<a href="{$heurist->constant("HEURIST_BASE_URL")}/heurist/hclient/framecontent/recordEdit.php
?db={$heurist->constant("HEURIST_DB")}&recID={$r.recID}" target=_blank>{$r.recTitle}</a>
Op wo 18 sep. 2019 om 14:26 schreef Artem Osmakov <osmakov@gmail.com>:
Record URL
the recURL property seems to return nothing on anything I tried it on ({$r.recURL}, {$Relationship.recURL}, {$r.Relationship.recURL})
recURL is special header field. It becomes visible if mark "Show record URL on edit form:" in record type attribute window.
In case you wish to specify url for specific record
https://heuristref.net/h6-alpha/?db=johns_hamburg&fmt=html&recid={$r.recID}
- whereas, in a for loop, {$Relationship.recTitle} works, {$Relationship.recRelationType} doesn't work (i.e., it does not seem to return anything). On the other hand, outside a for loop, {$r.Relationship.recRelationType} does work.
In addition, I still do not know how to access the Person record from an Event in the Report editor. Persons are connected to Events through Actor entities. I can access the Actor through the "Relationship", but I do not know how I can access the Person linked to this Actor. In particular, I'd like to add the URL of the Person, not the Actor, to the report.
No need in {$Relationship=$heurist->getRecord($Relationship)}. each entry in Relationships array is already a record.
I've modified your report. Persons are linked to Actors. Thus need to use getLinkedRecords.
This method has 3 parameters
$rec - record id or record array - record to find records linked to or from this record
$rtyt_ID - record type or array of record type to filter output
$direction - linkedfrom or linkedto or null to return both direcctions
method returns array of record IDs devided to 2 arrays "linkedto" and "linkedfrom"
<br/>Actors involved in this event:
<ul>
{foreach $r.Relationships as $Actor name=valueloop}{* Relationship Events->Actors *}
<li>{$Actor.recID} {$Relationship.recTitle} (url:{$Actor.recURL}) (reltype:{$Actor.recRelationType})
{* PV: How to make this refer to Person not Actor? *}
{$Persons = $heurist->getLinkedRecords($Actor, 10, 'linkedfrom')}
{$Persons = $Persons.linkedfrom}
{foreach $Persons as $Person_ID name=valueloop2}{* Link Actor->Person *}
{$Person=$heurist->getRecord($Person_ID)}
<br>Person: {$Person.recID} {$Person.recTitle}
{/foreach}{* Person *}
</li>
{/foreach}{* Actors *}
</ul>
Images
Multiple images in a smarty report
$r.f8_originalvalue - is array with full info about images (names, size, ids)
$r.f8 - is just an url to an image. Or comma separated list of urls. Like:
https://heuristref.net/h6-alpha/?db=balipaintings&file=f0b08e2d6742e01315cc4adb1255dc8f712ea573,https://heuristref.net/h6-alpha/?db=balipaintings&file=a28c126e2d7b23844f8fd06e9df659a6789f8d34
Thus, to access image urls you have either split $r.f8 to array
{$images = explode(',',$r.f8)}
{foreach from=($images) item=$s name=images}
<div class="scrollimage"><img src="{$s}"/></div>
{/foreach}
Or access image ids from $r.f8_originalvalue.
{foreach from=($r.f8_originalvalue) item=$s name=images}
<div class="scrollimage"><img src="https://heuristref.net/h6-alpha/?db=balipaintings&file={$s['ulf_ObfuscatedFileID']}"/></div>
{/foreach}
I believe the latter is reliable.
See Bali Paintings: test_art report. It has 3 options for file field
{$r.f8}{*Images (full Resolution)*}
<br>
{wrap var=$r.f8_originalvalue dt="file" width="300" height="auto"}{*Images (full Resolution)*}
<br>
{print_r($r.f8_originalvalue,true)}
First one returns comma separated list of file urls.
Second one generates 2 img tags for this field
Third options provides you full access to file data. $r.f8_originalvalue - is array that has all file properties
Array ( [0] => Array ( [ulf_ID] => 35448 [fullPath] => resources/haks/336a.jpg [ulf_ExternalFileReference] => [fxm_MimeType] => image/jpeg [ulf_Parameters] => mediatype=image [ulf_OrigFileName] => 336a.jpg [ulf_FileSizeKB] => 1203 [ulf_ObfuscatedFileID] => 04310a4cfd6883d63eda46e50021b36011f8912a [ulf_Description] => [ulf_Added] => 2015-03-13 16:05:48 ) [1] => Array ( [ulf_ID] => 43315 [fullPath] => resources/earlyFiles/Haks336.jpg [ulf_ExternalFileReference] => [fxm_MimeType] => image/jpeg [ulf_Parameters] => mediatype=image [ulf_OrigFileName] => Haks336.jpg [ulf_FileSizeKB] => 196 [ulf_ObfuscatedFileID] => 36a8179bd143e2e26fd42e6ae13bf66f5fef4b77 [ulf_Description] => [ulf_Added] => 2016-11-08 21:13:08 ) )
Mirador
Load mirador viewer into an iframe within a smarty report:
{wrap var=$r.f38_originalvalue dt="file" height="640" width="800"}
Show thumbnail and open mirador viewer in popup (if heurist is detected) or in new tab:
{wrap var=$r.f38_originalvalue dt="file" height="auto" width="300" mode="thumbnail" fancybox="1"}
Question: How does Herist know that an IIF Manifest is a manifest rather than just any old JSon file? (in fact it currently treats it as the latter in custom reports)
We can register either info.json (reference to local or remote IIIF server that describes particular IIIF image) or manifest.json (that describes set of media and their appearance).
On registration if mime type is application/json we loads this file and check whether it is image info or manifest. For former case we store in ulf_OrigFileName “iiif_image”, for latter one “iiif”.
Dominique Stutzman:
I confirm, the integration of a iiif manifest URL in a "File" type field works fine; sometimes you have to change the MIME type to application/json.
Then a question: is it possible to import this particular type of "File(s)" in mass in the "Populate" menu?
In the individually added data, which is used to generate the thumbnail and the call to the Mirador widget, we have the following metadata:
<origName>_iiif</origName>
<mimeType>application/json</mimeType>
<origName>_remote</origName>
<mimeType>application/json</mimeType>
sometimes
<mimeType>text/html</mimeType>
IIIF
I've tested the method for displaying a viewer in a report and it works for an IIIF image. However, I couldn't get it to work for an IIIF manifest. I imagine there are some small changes to be made, could you tell me what they are? I need to display a manifest in the registry.tpl template.
Artem says, in blue:
(please let me know if you have any problem, and which one you used in the end, as it will be useful documentation):
There are 3 ways
- Via wrap function (preferred)
{wrap var=$r.f1200_originalvalue dt="file" width="1200" height="800"}<br/>
2) Via direct manifest URL
<iframe width=1200 height=800 src="https://heurist.huma-num.fr/h6-alpha/hclient/widgets/viewers/miradorViewer.php?db=pret19_test&recID=&url={urldecode($r.f1200)}"></iframe>
3) Via file obfuscation ID {$r.f1200_originalvalue[0].ulf_ObfuscatedFileID}
<iframe width=1200 height=800 src="https://heurist.huma-num.fr/h6-alpha/hclient/widgets/viewers/miradorViewer.php?db=pret19_test&iiif={$r.f1200_originalvalue[0].ulf_ObfuscatedFileID}"></iframe>
Embedding Mirador for IIIF images
- t should work with this way
{wrap var=$f1135.f1097_originalvalue dt="file" width="1200" height="800"}
However, since media is not registered as iiif manifest it shows it as a plain jpg image.
So there is another way:
{assign var='img_id' value=$f1135.f1097_originalvalue.0.ulf_ObfuscatedFileID}
<br>Obfuscation ID: {$img_id}
<iframe width=1200 height=800 src="https://heurist.huma-num.fr/heurist/hclient/widgets/viewers/miradorViewer.php?db=pret19_test&rec_ID=&iiif_image={$img_id}"></iframe>
-----------------------
- ..miradorViewer.php?db=dbname&iiif_image=d252a3fe145f0f9a5514a01688454ee36d20773d
shows this media only. ..miradorViewer.php?db=dbname&q=ids:123 shows all media for record
Using OpenSeaDragon in a custom report/website
J'ai installé une petite visionneuse (OpenSeadragon) dans un customreport sur https://heurist.huma-num.fr/h6-alpha/?db=GrandFichier_RB, report name OSD, pour zoomer de façon immersive dans une image. Cette "image" est la numérisation d'une archive déposée dans la base Heurist que j'appelle depuis un record nommé "fiche".
Exemple ici de ce que j'aimerais que ça donne :
https://codepen.io/Mathieu-Messager/pen/oggXOBV
Voici mon bout de code sous le Smarty embarqué dans Heurist, corrected for multiple images by Maël Le Noc :
<div class="offcanvas-body small">
<!-- VISIONNEUSE OpenSeaDragon-->
<div id="openseadragon"></div>
<script>
var viewer = OpenSeadragon({
element: "openseadragon",
prefixUrl: "https://openseadragon.github.io/openseadragon/images/",
tileSources:
[
{foreach $r.f1071_originalvalue as $fid name=valueloop}
{
type: "image",
url:" https://heurist.huma-num.fr/heurist/?db=GrandFichier_RB&file={$fid.ulf_ObfuscatedFileID} " {*numérisation de la fiche*}
},
{/foreach}
],
collectionMode: true,
sequenceMode: true,
showNavigator: true,
});
\</script\>
\</div\>Displaying multiple files
MF: In Custom Reports when a field of base type ‘file’ is repeatable, rather than returning an array, $heurist->getRecord returns a string.
Moreover, it returns a list of heurist URLs even If the files are external links. In Vincent’s example below, all the images are hosted externally, but when you get the URL of the image in the Custom Report, you receive a Heurist URL with ?file=XXXXXX. Is this intentional? The behaviour when a file field is *not *repeatable is quite different – you receive the URL for the external file.
------
AO: If you add {print_r($r, true)} to you smarty you will see the output. For file fields we have 2 entries
fXXX - is just a string with comma separated urls and fXXX_originalvalue contains array with ALL fields. If you prefer use external url
{$r.f39_originalvalue[0]['ulf_ExternalFileReference']}
[f39] => http://127.0.0.1/h6-ao/?db=osmak_9b&file=884071c151ae247f9b6912f5e6b5b3df5853a770, http://127.0.0.1/h6-ao/?db=osmak_9b&file=31a7dca1c9e146f1e5c4213e89beba9ec9690926
[f39_originalvalue] => Array (
[0] => Array (
[ulf_ID] => 89
[fullPath] => file_uploads/ulf_89_IMG-ed49a7c0b77925453b7b83640ceee026-V.jpg
[ulf_ExternalFileReference] =>
[fxm_MimeType] => image/jpeg
[ulf_Parameters] =>
[ulf_OrigFileName] => IMG-ed49a7c0b77925453b7b83640ceee026-V.jpg
[ulf_FileSizeKB] => 168
[ulf_ObfuscatedFileID] => 884071c151ae247f9b6912f5e6b5b3df5853a770
[ulf_Description] => [ulf_Added] => 2022-02-11 15:46:02 [ulf_MimeExt] => jpg )
[1] => Array ( [ulf_ID] => 90 [fullPath] => file_uploads/ulf_90_IMG-a3807536a83651e2bd50e88424858586-V.jpg [ulf_ExternalFileReference] => [fxm_MimeType] => image/jpeg [ulf_Parameters] => [ulf_OrigFileName] => IMG-a3807536a83651e2bd50e88424858586-V.jpg [ulf_FileSizeKB] => 81 [ulf_ObfuscatedFileID] => 31a7dca1c9e146f1e5c4213e89beba9ec9690926 [ulf_Description] => [ulf_Added] => 2022-02-11 15:46:14 [ulf_MimeExt] => jpg ) )
Besides use wrap function to output image, video or audio player
{wrap var=$r.f39_originalvalue dt="file" width="300" height="auto"}
Moreover, "wrap" function outputs ALL images. So, I've added
{wrap var=$f1145.f1122_originalvalue dt="file" width="600" height="auto" auto_play="0" show_artwork="0"}
inside "liasse" loop
./viewers/smarty/showReps.php?db=leand_khmerman&w=a&q=ids%3A2467&publish=1&debug=0&template=manuscript%20details.tpl
If you wish to treat images just add another loop for array $f1145.f1122_originalvalue
Image carousel
Note: JS must be enabled by your system adminstrator for your database (an entry in the permit javascript file in the HEURIST root directory)
An image carousel can be added to a page in a website by placing suitable JS code in the custom JS field, as shown below.
See also https://www.w3schools.com/css/css_image_gallery.asp for an alrernative CSS method.

//image gallery on home page
var gallery = $('#image-gallery');
if(gallery.length>0){
var images = [
{"title":"Arch of Titus, Rome (82 CE)",
"img":"https://heurist.huma-num.fr/heurist/?db=judaism_and_rome&file=1c29ae0f2b3d245fb5d4ec47b9e286f9369ba03c"},
{"title":"Masada, King Herod's fortress and palace in the Judean desert (1st century BCE)",
"img":"https://heurist.huma-num.fr/heurist/?db=judaism_and_rome&file=646583fae1f0cbafe699b78a5c62b28d4136329f"},
{"title":"Temple of Gaius Caesar and Lucius Caesar (Maison Carree), Nimes (16 BCE)",
"img":"https://heurist.huma-num.fr/heurist/?db=judaism_and_rome&file=0bff598aa8716da5cada589c2dfcbf5372f9b239"},
{"title":"The Portonaccio Sarcophagus (190-195 CE)",
"img":"https://heurist.huma-num.fr/heurist/?db=judaism_and_rome&file=30978cab2499206d66c132659e4c7a986ccd1eb5"}
];
window.hWin.HEURIST4.ui.initGalleryContainer(gallery, {content:images, maxWidth:1220, maxHeight:250, showTitle:true});
}
Exporting geo.X and geo.Y
How do I export geo.x and geo.y rather than a WKT for the locations
X, Y {$r.f134.f28_geojson['coordinates'][0]}, {$r.f134.f28_geojson['coordinates'][1]}
Video
Video can be embedded by specifying the URL as a remote file in a File field
webpage: 3D objects id 782
3D objects
Heurist now provides support for 3D objects (2 Dec 2022) using 3DHOP and ???
![][image13]
Preliminary documentation
Obj file should be converted to nxs and compressed to nxz with Nexus utilities. Then nxz can be uploaded and registered.
Note: need to add nxz extension to the database usinf Admin > Manage Files and link at top right.
This is not yet added to all databases.
3dhop viewer requires direct access to the 3d object file. Add the following .htaccess to the upload directory containing the file (normally file_upload).
order allow,deny
<Files ~ "\.(nxz|nxs|ply)$">
allow from all
</Files>
Further documentation to be provided soon - please bug us if not updated within a month (2 Dec 2022)
3D Viewer embedding
1) To redirect to 3d viewer need to specify parameter mode=page
2) In Smarty the standard wrap function {wrap var=$r.f38_originalvalue dt="file" height="640" width="800"}
should generate
<a href=" ./?db=MBH_Manuscripta_Bibliae_Hebraicae&file=6435acd4e132673956e0962ab2dcafe0ed0ef429&mode=page " target="_blank" rel="noreferrer noopener"><img src="/?db=MBH_Manuscripta_Bibliae_Hebraicae&thumb=6435acd4e132673956e0962ab2dcafe0ed0ef429"></a>
I've modified Template 3d-models-page.tpl for FBX:
version 1 :{wrap var=$r.f1128\_originalvalue dt="file"}\<br\>
version 2:
\<a
href="{HEURIST\_BASE\_URL}?db={HEURIST\_DBNAME}\&mode=page\&file={$3dObject.f1128\_originalvalue\[0\].ulf\_ObfuscatedFileID}"
target="\_blank"\>3d viewer\</a\>\<br\>
version 3:
\<a
href="{$3dViewer}{$3dObject.f1128\_originalvalue\[0\].ulf\_ObfuscatedFileID}"
target="\_blank"\>Handling 3D objects.
Heurist now provides the O3DV and 3DHOP viewers. 3DHOP is useful for nxz - since this format can be produced from obj and is ten times smaller - and will be shown for this format. For oteh formats o#DV will be used. O3DV supports nearly all known formats: 'obj', '3ds', 'stl', 'ply', 'gltf', 'glb', 'off', '3dm', 'fbx', 'dae', 'wrl', '3mf', 'ifc', 'brep', 'step', 'iges', 'fcstd', 'bim'
Preliminary documentation
Obj file should be converted to nxs and compressed to nxz with Nexus utilities. Then nxz can be uploaded and registered. nxs files can be up to 10 times smaller than obj files.
Nexus can be downloaded from
https://www.3dhop.net/download.php or from github
http://vcg.isti.cnr.it/nexus/
nxsbuild 40microns.obj -o 40microns.nxs
nxsedit 40microns.nxs -z --compress
Note: need to add nxz extension to the database using Admin > Manage Files and link at top right. This is not yet added to all databases bugt should be in all new databases in 2023.
3dhop viewer requires direct access to the 3d object file. Add the following .htaccess to the upload directory containing the file (normally file_upload).
order allow,deny
<Files ~ "\.(nxz|nxs|ply)$">
allow from all
</Files>
PDFs
To open PDFs inline in a custom report :
- Database must be in js_in_database_authorised.txt
- Need to use wrap function {wrap var=$r.f38_originalvalue dt="file" width="300" height="auto" mode="link" fancybox="1"} Mode can be “link” or “thumbnail”
- It adds all required scripts and style into <head> automatically
Date rendering
est-il possible de les afficher autrement que sous la forme "11 Apr 1916" ?
- En Record View et par defaut en Custom reports nous avons choisi ce rendement pour faire plus lisible.
- En Data entry nous préférons ISO date.
- En Custom Reports (qui utilise Smarty) on peut avoir ce qu'on veut,
pe. {$r.f10|date_format:"%D"} --> 04/12/55
voir: https://www.smarty.net/docs/en/language.modifier.date.format.tpl
Changing date language (discussion)
Le 21/09/2022 à 10:53, Régis Witz a écrit :
Rebonjour,
Effectivement, d'après ce que je vois des résultats de votre facet "Doctorants", vous utilisez bien un format du type "JJ MMM AAAA" français ; cependant, le nom des mois est anglais (par exemple "Feb" au lieu de "Fév").
De ce que j'en sais, Smarty (le langage dédié servant en grande partie au formattage des custom reports) ne permet pas ce genre de configuration, ce qui semble normal : en général, les noms de mois sont déterminés en fonction de la locale (~le langage) du système, qui est actuellement en anglais.
Hors Heurist, je vous dirais "utilisez une directive PHP" (voir cette discussion ; en résumé rajouter quelque chose du genre setlocale(LC_TIME, fr_FR.utf8); ), mais je ne suis pas sûr si Heurist vous laisse la main là-dessus. À tester ou attendre une réponse de quelqu'un de plus éclairé que moi ... :/ ;)
Une alternative à votre disposition (pour "cacher la poussière sous le tapis") peut être d'utiliser un pur format numérique, genre JJ/MM/AAAA, comme ça votre "18 Feb 1780" deviendrait "18/02/1780" et hop, ni vu ni connu 🤫 ...
Cordialement, Régis
Le 9/21/22 à 10:13, Sébastien Clément a écrit :
Bonjour Régis,
Merci pour cette réponse rapide !
On utilise déjà les reports : https://eslettres.bis-sorbonne.fr/?db=eslettres&website&id=18050&pageid=36122 mais ça ne fonctionne pas...
J'ai raté une étape ou c'est plus compliqué qu'il n'y parait ?
Bien cordialement,
Sébastien
Le 21/09/2022 à 10:08, Régis Witz a écrit :
Bonjour Sébastien,
Une possibilité est d'utiliser un custom report, que vous pouvez configurer dans l'onglet report de la vue détaillée correspondant à votre recherche (zone toute à droite).
Ça vous permettra ainsi de configurer non seulement la manière dont vous affichez vos dates, mais aussi la manière dont vous affichez ... ben, tout ce qui concerne un type de donnée particulier.
Cordialement,
Régis
Le 9/21/22 à 07:19, Sébastien Clément a écrit :
Bonjour,
Je n'ai pas trouvé à quel endroit paramétrer l'affichage des dates ?
Elles s'affichent sous la forme 1 May 1900, nous aimerions les afficher en français...
Merci et bonne journée à tous,
Sébastien
Publishing: report (re)generation
The Smarty report formatter can be quite slow for large and complex reports. However, where these reports are generated repeatedly one has the option to generate the result and save it so that it can simply be loaded from html.
First set up the report you want, the click on the globe icon above the report:

Then click on Set up publishing schedule:

Finally, add a new report schedule:

and set the values (file name is provided automatically)
1440 minutes corresponds to a daily update

Note: as of 19/5/2022 this function, developed many years ago and relatively little used, works well but the automatic triggering of the file refresh is not operational. If you require this, please send us an email (support at heuristnetwork dot org).
What is the methodology on creating saved custom report output?
Michael thinks the custom report output is cached, so it can take 2 or 3 minutes to generate (for some reports on Libraries database on Huma-Num) the first time it is called but then will load from the saved version.But my memory is you have to manually generate a saved version and then reference that version, and it is only updated on a manual request like the one below.I am assuming you cannot run the update of a saved report from the command line, so it cannot be called from a cron job. Am I correct? For example this will update one of the reports for the Libraries database, but if I understand rightly must be run by a logged in user on the Libraries database:https://heurist.huma-num.fr/h6-alpha/viewers/smarty/updateReportOutput.php?db=Libraries_Readers_Culture_18C_Atlantic&publish=1&id=1
/viewers/smarty/updateReportOutput.php has the following parameters
ID - rps_ID from usrReportSchedule (i.e. explore tab -> report tab -> globe icon -> schedule publishing reports), if “id” is 0 it triggers sequential refreshing of all the reports
/viewers/smarty/updateReportOutput.php has the following parameters
ID - rps_ID from usrReportSchedule, if “id” is 0 it triggers sequential refreshing of all the reports
PUBLISH accepts the following values
3 - it takes the existing report from generated-reports/ folder. There is rps_FilePath, although it is not defined via UI. If report does not exist it regenerates report with value “1”
2 - regenerates report without output
1 - generates report and outputs it (DEFAULT)
0 - generates report and outputs message with links
MODE
Html - default
Js - html is wrapped into js document.write
I just read Artem’s summary – there is actually a detail that I think he may have overlooked. If you call the updateReportOutput script with publish=3, there is a little section that appears to regenerate the report in the background if the interval has elapsed:
if($row['rps_IntervalMinutes']>0){
$dt1 = new DateTime("now");
$dt2 = new DateTime();
$dt2->setTimestamp(filemtime($outputfile));
$interval = $dt1->diff( $dt2 );
if($interval->i > $row['rps_IntervalMinutes']){
$publish = 2;
}
You see it changes the $publish parameter to 2, which should in principle cause it to regenerate the report – though I think it may serve the user the old version and simply save the regenerated version for the next visitor. That’s actually not a bad approach as it maintains the download speed.
Functions available from $heurist
- baseURL: Get the URL base for the current server
- getRecords: Perform a standard record search
- Parameters:
- Query => Heurist query [Required]
- Current Records => Record id or Recordset [Optional]
- Returns:
- Array of record IDs from query results
- NULL on error
- getRecord: Retrieve record metadata and field values
- Parameter:
- Record ID [Required]
- Returns:
- Array of record details
- An empty array
- NULL on error
- getLinkedRecords: Retrieve records linked to the provided record, whether by record pointer or relationship marker field(s)
- Parameter:
- Record ID [Required]
- Record Type ID: to filter by a specific entity/record type [Optional]
- Direction: retrieve only those linked from or to the provided record {‘linkedfrom’, ‘linkedto’, null} [Optional]
- Returns:
- 2D array of linked records array(‘linkedfrom’ => array(), ‘linkedto’ => array()), these returned records will only contain metadata values; e.g. ID, type ID, last modified, etc…
- getRelatedRecords: Retrieve record relationship details for the provided record (specifically the Record relationship #2-1 records)
- Parameter:
- Record ID [Required]
- Returns:
- Array of relationship details including; relation type, notes, start and end dates
- An empty array
- getRecordsAggr: performs an aggregation of record values
- Parameters:
- Functions: 2D array of field IDs and function labels, e.g. array(array(10, ‘sum’), array(21, ‘count’), …); available functions are avg, sum, and count [Required]
- Query or Record ID: Either a Heurist query or an array of record IDs [Required]
- Current Records => Record id or Recordset [Optional]
- Returns:
- Array of aggregated values
- NULL on no aggregation
- getTranslation: Get translated text values for terms, record types, and base fields
- Parameters:
- Entity: Which entity to retrieve a translation for {trm, rty, dty} [Required]
- Entity ID: Array of record type, base field, or term IDs [Required]
- Field: Which translated value would you like, e.g. for terms would you like the translated label (label or trm_Label) or description (desc or trm_Description) [Required]
- Language Code: The 3 letter ISO code identifying the desired language [Required]
- Returns:
- The translated text, or an array of translated text
- getFileField: For files, get a specific field value
- Parameters:
- File details: Array of Obfuscated File IDs (the value typically returned for File fields) [Required]
- Field: Which field to return, defaults to name {name, description, caption, copyright, owner, type} [Optional]
- Returns:
- The requested field’s value, or an array of field values
On providing a field not handled, the original provided details will be returned
Loading searches in a new web page
Heurist includes the query as a parameter at the end of the URL to allow bookmarking a page + the query carried out on that page.
If an interger number is specified as the URL, Heurist will navigate to the page identified
<a=”q=f:1085:{$keyword.internalid}”>It executes the specified query</a>
To execute this query on a different page you need to specify “Info directs to page” in the widget property
from public-record.tpl in https://heurist.huma-num.fr/h6-alpha/?db=judaism_and_rome
{$all_records_page = "{HEURIST_BASE_URL}?db={HEURIST_DBNAME}&website&id=7&pageid=5943"}
<p><strong>Keywords in the Original Language:</strong></p>
{foreach $r.f1118s as $keyword name=kwLoop}
<button>
<a href="{$all_records_page}&q=f:1118:{$keyword.internalid}"
data-query="f:1118:{$keyword.internalid}" data-search-page="5943"
data-search-realm="search_group_1">
{$keyword.label}</a>
</button>
{/foreach}
<p><strong>Thematic Keywords:</strong></p>
{foreach $r.f1085s as $keyword name=kwLoop}
<button>
<a href="{$all_records_page}&q=f:1085:{$keyword.internalid}"
data-query="f:1085:{$keyword.internalid}" data-search-page="5943"
data-search-realm="search_group_1">
{$keyword.label}</a>
</button>
{/foreach}
List of allowed php functions for Smarty (Custom reports)
is in viewers/smarty.smartyInit.php
// disable PHP functions except listed, set to null to disable ALL
public $php_functions = array('isset', 'empty', 'constant', 'count', 'escape',
'sizeof', 'in_array', 'is_array', 'intval', 'implode', 'explode', ......
Custom report display size
- JS for avoiding multiple scroll bars (resizing of the iframe for reports) -
<11/5/23: Maël to supply, or Michael's version, but Maël specifying the issue for Artem to look at, so may have been centrally fixed>
To automatically resize iframes (especially custom reports, which are rendered in an iframe) rather that having a fixed height, here are two options :
1) The one developed by Michael
Add the following script to “customization javascript” of the CMS_Home record AND add the css class “auto-resize-custom-report” in the site editor to each of the custom report widgets you want ot resize
// RESIZE EMBEDDED CUSTOM REPORTS BASED ON CONTENT
const mainContentNode = document.querySelector("#main-content");
const observerOptions = {
childList: true
};
function resizeIframe(elem) {
$(elem).css("height", elem.contentWindow.document.body.scrollHeight+100);
}
function attachCustomReportListeners() {
// Find embedded custom reports in new page
let customReportContainers = $(".auto-resize-custom-report");
// Attach onload and resize listeners to each one to resize
if (customReportContainers.length > 0) {
customReportContainers.children("iframe").each((idx, elem) => {
$(elem).on("load", () => {
resizeIframe(elem);
});
$(elem).on("resize", () => {
resizeIframe(elem);
})
});
}
}
function refreshIframeResize(mutationList, observer) {
mutationList.forEach((mutation) => {
switch (mutation.type) {
case 'childList':
attachCustomReportListeners();
}
});
}
// reapply custom report resizer each time new page is loaded
const customReportObserver = new MutationObserver(refreshIframeResize);
customReportObserver.observe(mainContentNode, observerOptions);
attachCustomReportListeners();
2) the one I’ve used
Add the following script to “customization javascript” of the CMS_Home record
function ajdustIframeH() {
setTimeout(() => {
$('.autoiframe iframe').height( $('.autoiframe iframe').contents().find("body div").height()+50);
$('.autoiframe iframe').attr("scrolling", "no");
$(window).scrollTop(0);
}, 50);
};
$(document).on('iframeready', ajdustIframeH);
And add the following script in each of the custom report template you want to resize
<script>
window.onload = function() {
var w = window;
if (w.frameElement != null
&& w.frameElement.nodeName === "IFRAME"
&& w.parent.jQuery) {
w.parent.jQuery(w.parent.document).trigger('iframeready');
window.parent.scrollTo(0,0);
}
};
</script>
The report formatter in use = Examples
@todo: find some good examples
Developing a WYSIWYG version
We hope to introduce a (semi-) WYSIWYG report formatter in 2026. It will most likely be based on the current TPL report format to avoid migration difficulties, but will replace many of the obscure code snippets with a clickable widget marker which will pop up a form with all the settings currently embodied in a section of code.
This will not be entirely WYSIWYG due to the difficulty of rendering loops, conditionals, lists and so forth, but will make the editing much easier and more or less foolproof.
Watch this space (or at least, the interface!).
Media rendering
webpage: Adding Javascript id 664
When building these we will be able to select the fields in connected entities from a tree view, for example when building a filter for Persons one can make selections of fields in their Life Events, including fields of the Places linked to their Life Events (left).


Note: the simple filter builder (left), facets builder (right), calculated field and custom reports editor each use a slightly different form of tree, due to slight differences in requirements (eg. multiple selection in the facets builder), but the principle is the same.
Custom Reports Cookbook
On this page, we introduce a number of 'recipes' for commonly-requested features in Custom Reports, and also provide some 'recipes' for writing clearer, cleaner, easier-to-maintain reports.
- Create a 'detail' or 'single record' view
- Create a custom 'display' function
- Limit the number of reports
- Eliminate annoying whitespace
- Create an interactive table view
- Link multiple reports together
- Reuse code in a systematic way
Create a 'detail' or 'single record' view
There are two main ways you can display records: you can display many at once, or you can display one at a time. A Custom Report can be used for either purpose. In the website editor, you can control whether a custom report will display one or many records by setting the 'display selected record only' option in the custom report widget.
If you are designing a custom report to display a single record only, you can remove the {foreach} loop that is included by default in the custom report widget. This can make your code easier to understand, and can also ensure that the report doesn't accidentally show many records when it is only designed to show one at a time.
If you wish to do this, you can delete the {foreach} loop and repalce it with the following code:
{$r = $heurist->getRecord($results[0])}
Now the $r variable just contains the information about the first record in $results, and there is no need for the {foreach} loop.
Create a custom 'display' function
You may find as you build a report that you wish many fields to be displayed in the same way. Perhaps you would like each field to have a heading in bold. Perhaps when you display a dropdown field, you want to use the whole 'term' (e.g. 'Fiction.Detective Novel' or 'Poetry.Epic'), or you wish simply to use the 'label' ('Detective Novel', 'Epic') every time. Perhaps you want each field to be in its own paragraph (<p>), so that it appears on its own line, or by contrast you would like all the fields to appear stacked next to each other.
In such cases, it can be useful to define your own {display} function which you use to display fields each time. Below is an example you can work from:
{function display sep="," suffix="" lineBreak=False}
{if ($r.$field)}
<p><strong>{$label}:{if ($lineBreak)}<br>{/if}</strong>
{if ($r.$field|is_array)}
{if (array_key_exists("label", $r.$field))}
{$r.$field.label} {$suffix}
{else}
{foreach $r.$field as $item name="fieldLoop"}
{if (array_key_exists("label", $item))}
{$item.label}{else}{$item}{/if}{$suffix}{if (!$smarty.foreach.fieldLoop.last)}{$sep}
{/if}
{/foreach}
{/if}
{elseif ($r.$field)}
{$r.$field} {$suffix}
{/if}
{/if}
{/function}
Once you have defined a function like this, you can use it throughout your report like so:
{display field="f1" label="Name"}
Name: John
{display field="f4" label="Description" lineBreak=True}
Description:
A description of John contained in the field #4.
There are multiple ways of finding out the number of each field you wish to insert:
- you can insert the field into the report using the 'insert field' tool in the Custom Report builder, or
- in a seperate tab, open a record of the relevant type and enter 'Modify Structure' mode. When you hover over a field in the treeview to the left, the field's number will appear in a tooltip.
Limit the number of reports
Even if you follow best practices, custom reports can be difficult to read and maintain. It is often a good idea to limit the number of reports that you write for a particular database. In the most common case, you will be using a custom report with the 'custom report' widget to display a single record at a time. In this case, it is a good idea to write a single custom report, perhaps called 'public-view', which will be used to display all records in the database when you want to view them one-at-a-time. You may also have a report at displays multiple records at once. You might like to call this one 'public-list'.
When creating a new custom report, consider carefully whether it would be easier simply to extend an existing report. Of course, this relies on the idea that you have made your reports extensible. If reports are difficult to extend, then it will be difficult to limit the number of reports you need to maintain.
One advantage of the {display} function shown above is that it displays *nothing *if the relevant field does not apply to to the record. That is the purpose of the {if ($r.$field)} ... {/if} tags. This means that you can safely use {display} to try and display fields from many different record types, even if the record types have different fields. For example, imagine you had the following code in your Smarty report:
<p><strong>Name:</strong> {$r.f1}</p>
<p><strong>Age:</strong> {$r.f1000}</p>
If this code were used to display information about a Person, it might create generate the following html code:
<p><strong>Name:</strong> John</p>
<p><strong>Age:</strong> 22</p>
This html would look like this on the web:
Name: John
Age: 22
Now imagine the same code were used to display fields from a Film record. Films do not have any 'age' data in your database, so the report would output the following:
<p><strong>Name:</strong> Agnatuk</p>
<p><strong>Age:</strong> </p>
This html would look like this:
**Name: **Agnatuk
**Age: **
If you had instead used the above {display} function, it would look like this:
**Name: **Agnatuk
Using the {display} function means that you can mix and match fields from many different record types in a single report. Making the report work for a new record type can be as simple as adding a few more fields to display. If you would like the label to change based on the record type, then you can add some {if} tags as required using the handy 'if' feature in the 'insert field' menu to the left of screen. So, for example, let's say that for all your
***Date rendering ***
Date values are already in human readable format. To render BCXE and CE use the following example:
{$r.f10} {((strpos($r.f10,'BCE')>0)?'':'CE')}
Smarty: testing values
Term fields have five components which can be referenced - the ID (.id), the term label (.term), the standard code (.code), the description (? .description, but might be .info or .label TBV) and the semantic URI (? .URI or ? .semanticURI tbc) ). The last three are optional and most often blank. For example:
{if ($ref.f1002.id) == 9412} {* Type of publication.id *}
{if ($ref.f1002.id) != 9412} {* Type of publication.id *}
Detecting visibility of records
{if ($source.recIsVisible!==false)} …. {* record is visible to public *}
Getting records which link to current (linkedfrom)
This will get type 64 records which link to the current record:
{$linked\_ed\_events \= $heurist-\>getLinkedRecords($e\_id, 64, 'linkedfrom')}This will get and display titles of all records which point to current item (see also linkedto):
<b>Linked from:</b>
<br>
{$linked_items = $heurist->getLinkedRecords($rec_id, null, 'linkedfrom')}
{$linked_items = $linked_items['linkedfrom']}
{foreach $linked_items as $rec_id2}
{$r2 = $heurist->getRecord($rec_id2)}
<a href="{$r2.recID}" target=_blank>{$r2.recTitle}</a> <br>
{/foreach}
A more compact version
{* This is an example of getting records which point to the current record *}
{* Change to an approriate type. You can also use 'linkedto' *}
{* You can also use the record type ID, in this case 102, in place of Notices *}
{$recs = $heurist->getLinkedRecords({$r.recID}, 'Notices', 'linkedfrom')}
{$recs = $recs.linkedfrom}
{foreach $recs as $id}
{$rec = $heurist->getRecord($id)}
<a href="https://wherever you want this to go">{$rec.recTitle}</a><br>
{/foreach}
Getting linked records (linkedto)
Simply replace the linkedfrom keyword with linkedto
Displaying image credits
{$r.f38_originalvalue[0]['ulf_Description']}
See https://HeuristRef.net/ Heurist_Help_System/web/39/737
Eliminate annoying whitespace
If you find that whitespace is being created in your report, you can wrap the entire report in {strip} tags. The {strip} tag tells Heurist to delete whitespace from the code of the report when the report is 'compiled' (i.e. translated into a more basic computer language that Heurist can understand). Simply add {strip} to the very start of your report, above every other line of code, and then place the closing tag {/strip} at the very end:
{strip}
{* Entire report here *}
{/strip}
**NB: **If you do this, it will change the look of error messages when you save/compile the report. Since the entire report takes place inside a {strip} block, all error messages will say that the error took place within a 'strip'. This is not a problem, but may be confusing the first time you see it.
Create an interactive table view
You can create a basic tabular view of records in your database using the List View pane. The List View is quite powerful, and allows you to visualise records in a table, including data from linked records. For example, you can display a table of 'books', but include the first name and last name of the linked 'person' records for the authors.
Some users, however, wish to display a table that can aggregate data (e.g. show the number of books per author), or want to control the layout and formatting of the table. This requires a custom report.
To create a table in a custom report, you need to understand html table syntax. In your custom report, delete the 'records loop' and insert the following snippet. You will see that the 'foreach' loop occurs inside the <tbody> element, which is the body of the table. Each record in the 'foreach' loop will create a new <tr> or 'table row' element. Each piece of data about the record should sit within a <td> or 'table data' element. Generally speaking, you need to make sure that the number of <td>'s for each record is equal to the number of <th>'s in the <thead> element—that is, you need to keep track of how many columns your table has, and structure it accordingly.
The 'class="display"' code is only necessary if you are using the datatables package to create an interactive table. If you do not plan to use datatables, then 'class="display"' can be omitted.
<table class="display">
<thead>
<tr>
<th>{* Heading for first column *}</th>
<th>{* Heading for second column *}</th>
<th>{* etc. *}</th>
</tr>
</thead>
<tbody>
{foreach $results as $r}
{$r = $heurist->getRecord($r)}
<tr>
<td>{* Data for first column, e.g. $r.f1 for name *}</td>
<td>{* Data for second column, e.g. $r.f9 for start date *}</td>
<td>{* etc. *}</td>
</tr>
{/foreach}
</tbody>
</table>
Making the table interactive
![][image20]
If you would like to make the table interactive (e.g. allow searching/filtering/sorting), then we recommend you use the datatables package, which Heurist uses to generate its List View. To include datatables your custom report, you need to perform two steps:
- Include JQuery in your custom report. Go to the CDN page of the JQuery site, and click on the 'minified' version of JQuuery 3.x at the top of the page. This will show you a <script> tag that you can copy-and-paste into the top of your custom report.
- Once you have included JQuery, you can include the datatables package. On the datatables download builder, select the options you would like to use in your table, then copy-and-paste the <script> and <link> tags at the bottom of the page into the top of your custom report.
You should do both these steps to ensure that you have the most up-to-date versions of JQuery and datatables in your report. You may wish to periodically update the software in your report by repeating steps 1 and 2.
When you are finished, the top of your custom report should look something like the snippet below, though it will look different due to your selected options and the day when you generated the code:
<script type="text/javascript" src="https://code.jquery.com/jquery-3.6.0.min.js"></script>
<link rel="stylesheet" type="text/css" href="https://cdn.datatables.net/v/dt/jszip-2.5.0/dt-1.12.1/b-2.2.3/b-html5-2.2.3/date-1.1.2/fh-3.2.4/r-2.3.0/datatables.min.css"/>
<script type="text/javascript" src="https://cdnjs.cloudflare.com/ajax/libs/pdfmake/0.1.36/pdfmake.min.js"></script>
<script type="text/javascript" src="https://cdnjs.cloudflare.com/ajax/libs/pdfmake/0.1.36/vfs_fonts.js"></script>
<script type="text/javascript" src="https://cdn.datatables.net/v/dt/jszip-2.5.0/dt-1.12.1/b-2.2.3/b-html5-2.2.3/date-1.1.2/fh-3.2.4/r-2.3.0/datatables.min.js"></script>
Finally, you need to tell the datatables software to activate the table you have created. This will make the table searchable/sortable, and apply the datatables formatting if you have included 'class="display"'. To activate the table, include code such as the following after the <table> element:
<script>
{literal}
$("table.display").DataTable({
// Include options here
});
{/literal}
</script>
You need to include <script> tags to indicate that the text is JavaScript code. You need to include the {literal} tags so that SMARTY is not confused by the JavaScript. If you have not used 'class="display"', then this code won't work, and you will need to change $("table.display") to more accurately tell datatables where the table is that it should activate.
Datatables has many options you can set. You will need to investigate the option on the datatables site, and then ensure you have included the necessary plugins when you build the datatables download.
Aggregating data
Many users like to use a datatable to aggregate data, e.g. to show the number of people born in each place, or to show the average duration of films in different genres. When you aggregate data, you count records rather than displaying them individually.
There are two ways to include aggregate data in a table:
- Use a calculated field to store the aggregation information in the database. Then you can simply create a basic table (or even use the List View), and use the calculated field in the display. For example, you might add a caculated field to each Place in your database which adds up the number of Films that use that place as a location. Then if you create a table of Places, it will be easy to include the number of films as a column.
- Use the custom report to perform the calculations. This will oftem make the report slow to run, so if you are likely to be adding up many records, then you will probably want to set up a publication schedule to update the report periodically in the background, rather than regenerating it each time a visitor views it (the default).
Link multiple reports together
Reuse code in a systematic way
You can reuse the code from other reports by including a report inside another one using {include}.
eg:
{include file="./CommonScriptaJs.tpl"}
{include file="./CommonScripta.tpl"}
Note that it does not work properly if your template name contains a space character.
Using seclected facet in a connected widget
- When I select a theme from the Interview extracts facet search on the left I want it to trigger a search for the same theme in the Theme descriptions table to display as a header for the selected interview extracts, as below (at the moment it is doing a search on all theme descriptions and just rendering the first one, Christmas).
The problem is that there is no connection between interview extracts and the theme descriptions other than that they both use the Themes field (id 1137). Interview extracts can have multiple themes, but we only want to select the one theme value that has been selected in the facet search. https://heuristref.net/h6-alpha/parramatta_region_food_cultures/web/68/178
Do you have any (simple, reproducible) ideas how to do this? Javascript? If there isn't a reasonably simple way of doing it we will do without the heading and simply put links to the themes for each extract and have them pop up the appropriate theme description.
I believe we can run a query through the smarty template, which returns an array of record ids. Then we can get the record details for the first result.
{* This report ONLY renders the theme description record, type 109, which is to appear at the top of the page when a theme is selected. f1137 is the field for Theme in the Interview Extact *}
{* Construct the query for a theme description record (type 109) containing the same theme field value *)
{* PROBLEM: this will get the first theme from the first record in the resultset, which may not be the one you actually selected *}
{$term_id = (isset($selected_term)) ? $selected_term : $r.f1137.id}
{$query = array("t" => "109", "f:1137" => $term_id)}
{* Get an array of Theme description records with the indicated them value - should only return one record *}
{$rec_id = $heurist->getRecords(json_encode($query))}
{* Get the record to be output *}
{$record = $heurist->getRecord($rec_id[0])}
<b>{$record.f1}</b> {*Title*}
<p>
{$record.f4} {*Introduction/description of theme*}
{break}
$term_id just needs to be the term id or label. The header report should be getting the resulting interview extract record, and thus the necessary term id
Counting records of different types:
- From Vincent Paillusson:

Ce code est complet et fonctionne avec n’importe quelle base ou set de résultats (que ce soit sur l’ensemble des record type ou seulement un seul)
Et voici ce qu’on obtient lorsqu’on ouvre le custom report dans un navigateur (Attention le nombre de résultats étant limité dans les tests et dans la visualisation des custom report via le mode Explore il ne sera pas possible d’afficher la totalité des ressources autrement qu’en ouvrant le custom report dans un navigateur):
- Adding counts for entity types to a custom report
Ce code rendra le décompte (partie significative en gras).
<b>Total records:</b> {$heurist->getSysInfo('db_total_records')}
<br><br>
{$rty_Counts = $heurist->getSysInfo('db_rty_counts')}
<table>\<tr\> \<td\>\<b\>Entity type\</b\>\</td\> \<td\>\ \ \</td\> \<td\>\<b\>Count\</b\>\</td\> \</tr\> **{foreach $rty\_Counts as $rty\_ID=\>$rty\_Count}**
<tr>\<td\>**{$heurist-\>rty\_Name($rty\_ID)}** \</td\> \<td\>\</td\> \<td\>**{$rty\_Count}**\</td\> \</tr\> **{/foreach}**
</table>
Finer points of report formats for websites
Getting a data table loaded with JS to limit width of unimportant columns which may have a few really long meandering values …
I’ve added the following mods to this report
.dt-wrap {
white-space: normal !important;
word-break: break-word;
max-width: 300px;
}
And columnDefs for dataTable options:
$table.DataTable({
data: resultsData,
fixedHeader: true,
order: [[0, 'asc']],
dom: '<Q><"flex-spread"lrB>tip',
responsive: true,
deferRender: true,
columnDefs: [
{
targets: 2, // Attested Occupation
width: "200px",
className: "dt-wrap"
}
]
});
Explanation from Artem:
It is 2d for zero index based array of columns.
{$member_rows[] = [
"<a href=\"{$member_url}\" target=\"_blank\">{$member_name}</a>",
$member_data.f20.label,
$attested_occ,
$standard_occ,.....
and in table
<th data-priority="1">Borrower</th>
<th data-priority="1">Gender</th>
<th data-priority="3">Attested Occupation</th>
<th data-priority="2">Standard Occupation</th>
8c : Mapping & Visualisation
Documentation written on 13/11/2025 by Sylvain Besson (MSH Lyon Saint-Étienne / CNRS) Updated 12/05/2026 by Maxine Schoehuys--Kreiss
1. Spatio-temporal view
🚀 How to start
Explore → Search → Map
- To begin, click on [Explore] ①
- Perform a search or use a [Saved Filter] that returns the records you want to include in your map ②
- Click on [Map] ③

The Map view is divided into two parts: a map and a timeline. Both parts are interactive and interact with each other.
The map shows the current record set, if you want to display only some of your records, use a filter or make a specific search. The map will then show the results of your query. However, to be displayed on the map and the timeline the records should have at least one of:
- a field with geospatial data (to display on the map)
- a field with temporal data (to display on the timeline)
To get more information on field types, check Chap 4. Data entries @TODO.
1.1. The map
The records are clustered depending on their spatial closeness. It changes as the view is zoomed in or out. Clustering can be set in the layer description record.

The map will display pointers taken from the geodata in you records. There are two possible sources of geodata that can be drawn: current result sets (search results) and map layers. The displayed field from the result set is normally Location (a geospatial field).
A map document contains map layers, which define the appearance of the data in each layer.
Some tools are available in the header:
- [Legend] ① :
- [Result sets]: choose which set of records you want to display or hide
- [Map Documents]: choose or import a background map (borders, geo features, tiled image background)
- [Base map]: choose which base map you want to use (e.g. OpenStreetMap)
- [Zoom in] and [Zoom out]
 ②
② - [Zoom to full extent]③
- [Help]
 ④
④

On the map, several features are available:
- [Bookmarks] ① : add a landmark directly inside the map to retrieve later
- [Search] ② : explore the map using place names (ex: "New York"). The results are those indexed by OpenStreetMap.
- [Print] ③ : print a selected view of the map
- [Map publication] ④ : generate an iframe to display the map on another web page and choose which map features to implement. It is also possible to export the map in KML format to use on Google Earth.

1.1.1 Focus on map publication
① You can display the map on another web page. You can configure the features you want on the web page :
- [Include]: choose what queery can be seen on the published map
- current query
- opened map documents
- [Controls]: choose which controls can be used on the published map
- legend (shown on the right of the published map)
- bookmark
- geocoder / search feature
- selector
- [Visible in legends]: choose what can be seen in the legend
- basemap
- result set
- map documents
- [Other settings]: control general aspects of the presentation
- use current basemap
- allow modify symbology
- show map
- show timeline
- markerclusters
- [Popup template]: choose another popup template than the basic one
② Copy the HTML iframe code directly in your web page. If you use a CMS like Wordpress, you must enclose within <code></code>. You can choose between embed or web safe code, the later only modifies the special characters.
③ You can export a map in KML format for Google Earth.

1.1.2. Focus on the Heurist map document
You can change the background of your map using the map document feature. To create a new map document, select the [Add +] button in the legend of the map view. A map document contains one or more map layers, and can be accompanied by a date, a creator, a creative commons licence, copyright information and a description. A map layer needs a file or service which delivers the map data - Shapefile, KML, GeoTIF, Tiled image, MrSID service etc.
The Date field in the metadata of both map document and map layer will show on the timeline. You can choose to hide all dates from the timeline by unchecking the box, however this will also hide the results from your current query that also use a Date field.
First, create a map document, these are the mandatory fields:
- name of map document
- bounding box : using the tool on the left select a rectangle, that expresses the maximum extents of the two-dimensional object you want to map
- map layers (see below)
- map-zoom bookmarks: pre-defined zoom areas. The first bookmark will determine the initial map zoom. Specify as Name,Min Longitude,Max Longitude, Min Latitude, Max Latitude, Start date/time and End date/time (both optional).
- zoom on point selection (km): the area to which to zoom when you select a point object (by default: 5km)
Then, import one or more map layers by clicking [Map layers], these are the mandatory fields:
- layer name
- map layer data source: can be a KLM file or snipet, a map image file (non-tiled or tiled), a mappable query, a shapefile. Each of those will need another bounding box and a title.
- type of data source: Google maps, Heurist query, raster or vector
🛟 Tip: Use the symbology field and the style editor feature to create the presentation you like on each layer of your map. You can choose to show or hide each map document and each layer in the legend of the map.
1.2. The timeline
The records are distributed on the timeline under the map. ①
Any time field will be projected on the timeline. If several time fields are used on a record, they will all automatically show on the timeline. To hide a specific time field, uncheck the corresponding box on the left on the timeline under [Current query].
🛟 Tip: Invalid dates will not be displayed on the timeline. Dates should be written according to ISO norm: yyyy, yyyy-mm, yyyy-mm-dd. Use minus (-) for BCE dates (eg. -375 for 375 BCE).
The timeline has various navigation features:
- [Zoom in] and [Zoom out] ②
- [Zoom to all] ③
- [Zoom to selection] ④
- [Move to start] and [Move to end] of the records ⑤
- [Timeline options] ⑥ :
- choose the length of the labels: full length labels, truncate label to bar, fixed label width, or hide labels
- choose the label's position: within the bar, or above the bar
- choose the bar's position: stacked on the above the other, or wrapped to minimise height of timeline
- filter map with current timeline range

2. Network view
🚀 How to start: Explore → Search → Network :::
- To begin, click on [Explore] ①
- Perform a search or use a [Saved Filter] that returns the records you want to include in your network ②
- Click on [Network] ③

The Network view displays a records' network diagram. It provides an interactive visualisation of the current results set. Records are shown as nodes, and the connections (pointer fields and relationships) as the lines between nodes (edges).
🛟 Tip: To get it working, two conditions must be met:
- records or records types should be linked
- the current results set should gather all the records you want in your diagram
DON'T PANIC if the diagram is not understandable immediately !
@todo: The diagram below has been replaced with a new and much more capable 'ego-network' diagram (from March 2026) which allows you to start with one or a small number of records, see all the connections from those records, and then expand the diagram outwards either by double-clicking records marked as having connections or from all the displayed records. This diagram will be further expanded with the ability to colour code or symbolise different characteristics of the nodes.
Here's an example of a network diagram:

Each node displayed is a lab or a project. It shows how labs are interconnected through shared projects. Here you can see a record directly in the network viewer on the left.
Some features are available on the header to make your diagram more accessible:
- [Node Control]:
- Select mode ① : select and drag simple node or select and drag multiple node by a selecting box (click-right and drag)
- Gravity ② : determine to what degree entities are repositioned around the selected entity based on their relative weightings. Turn it on to choose the best presentation, and turn it off to lock down its position.

- [Link Control]:
- Links ① : show or hide empty links and expand links
- Node Size Formula ② : choose between linear or logarithmic formula
- Fixed ③ : fix the size of the links

- [Graph Control]:
- Refresh Data ① : go back to the original presentation of the nodes
- Open or close Fullscreen ②
- View Mode ③ : choose to show only the name of the record (big or small) or its name and its first field
- Set Zoom ④ : zoom in or out of the diagram and set the view back to show the complete diagram
- Export ⑤ : export the network data to a Gephi GEFX file

3. Crosstabs
🚀 How to start: Explore → Search → Crosstabs
- To begin, click on [Explore] ①.
- Perform a search or use a [Saved Filter] that returns the records you want to include in your network. ②
- Click on [Crosstabs] ③

The Crosstabs view provides a quantitative analysis of your data by calculating counts of aggregations sorted by category. A cross-tabulation is a way of calculating counts of aggregations sorted by category.
Imagine value (set to Var 1) is the value of a colour system that has the entire spectrum of colours encoded as numbers. Numbers that are close to each other represent colours that are close to each other. Imagine that the type field (set to Var 2) indicates what material the potsherd is made out of. We can use a cross-tabulation to generate instant categories by splitting up the entire range of entered values into 10 buckets, or deciles.
To run a simple cross-tabulation, search for the records you wish to analysis and select [Crosstabs]. The [Crosstabs] dialog displays. In the show fields for dropdown ①, select the record type you wish to analysis. Complete the variables:
- ② Var 1 (rows) choose your first variable (this will simulate a tabulation by that variable).
- ③ Var 2 (cols) choose the second variable (this splits the range of values into 10 'buckets' and counting how many values appear in each 'bucket' by type.
- ④ Var 3 is an optional variable that breaks the analysis further, into 'pages'.
Additionally, you can assign intervals by clicking on the pen ⑤.

3.1. Focus on intervals
It is possible to reassign intervals by merging, adding or deleting them.
First, select the available values. By default, all values are selected.
Then, add or remove intervals ② :
- Click on [Add Interval] ④ to add an interval.
- Click on left arrow to remove an interval, .
- If you want remove all intervals, click on the blue arrow.
- If you want to reset intervals, click on [Reset] ③.

It is also possible to merge values:
- click on [Add Interval] ④
- select the values you wish to merge
- click on the right arrow
- rename the new interval

Some other functionalities are available:
- Click on [Save] to save the current settings ①
- Show the values count, the total of each row and or column, and their percentage ②
- Counts aggregates values ③
- Display or hide null values and blank rows and columns ④

3.2. Results
You can see the results in table form or in a pie chart.
🚨 Warning: you must select at least one variable to see some results.
The table's metadata is available ①. The table title can be customized ②. You can export the table in CSV or PDF format ③. You can search for a value in the table ④. The field or record type used as base for the crosstable is mentioned on its top ⑤.

You can also display your data as a pie chart.

8d: Summary : Mapping and visualisation
Summary automatically generated on 11/25/2025 using the gpt-oss:120b model from the servers of Onyxia (INSEE) based on the complete document of the chapter.
1️⃣ Spatio‑temporal Map tab
Action | |
|---|---|
1 | Click [Explore] . |
2 | Run a search or use a [Saved Filter] to retrieve the records you want to map. |
3 | Select a record (any record that contains the required fields). |
4 | Click [Map] |
Result: The interface splits into two synchronized panels – a map (top) and a timeline (bottom).
1.1 Prerequisites for a spatio‑temporal view
- At least one spatial field (coordinates, WKT, GeoJSON, etc.).
- At least one temporal field (date, date‑range, etc.).
If one of these is missing either the map or the timeline will not be populated.
1.2 Map panel
Tool | Description |
|---|---|
Legend | • Result sets – show/hide points belonging to the current result set. • Map Documents – (see Publish section). • Base map – choose background (e.g., OpenStreetMap). |
Zoom/Dezoom | Standard zoom controls (🔍). |
[full screen] | Expand the map to full‑screen mode. |
Help | Opens the contextual help window. |
[Bookmark] | Add a temporary point you can later retrieve. |
[Search] | Geocode a place name (searches OSM index). |
[Print] | Print the current map view. |
[Publish map] | Generates an iframe snippet to embed the map on another page, optionally with controls (legend, bookmark, geocoder, selector, print). • You can also export the map as KML for Google Earth. |
Clusterisation | Points are automatically clustered; clusters recompute on zoom/dezoom. |
1.3 Publishing a map (iframe)
Setting | What it does |
|---|---|
Include – current query | The iframe displays the map built from the query you just ran. |
Include – opened map documents | (still under documentation – shows any additional map layers you have opened). |
Controls | Choose which UI elements appear inside the iframe (legend, bookmark, geocoder, selector, print). |
Visible in legends | Choose which legend items are shown (basemap, result set, map documents). |
Other settings | Use current basemap, Allow modify symbology, Show map, Show timeline, Marker clusters . |
Popup template | You can pick a custom HTML template for the pop‑ups (create a new template in the Templates section of Heurist). |
Copy code | Two formats are offered: embed (standard (escaped for direct insertion in CMSs). |
Export to KML | Generates a KML file that can be opened in Google Earth. |
1.4 Timeline (chronological strip)
- Synchronized with the map: moving the timeline brush filters the points shown on the map.
- Tools (bottom bar)
- Zoom / De‑zoom – change the temporal resolution.
- Reset – return to the full time span.
- Downloading – export the timeline data (CSV) – see Export section for details.
- Left / Right navigation – step forward or backward in time.
- Timeline options – label display (full, truncated, fixed width, hidden), label placement (inside / above bar), bar stacking, bar wrapping, and a “Filter map with current timeline range” checkbox.
2️⃣ Network tab
Step | Action |
|---|---|
1 | Click [Explorer]. |
2 | Run a search or use a [Saved Filter] to collect the records you want in the network. |
3 | Select a record that will be the entry point of the network. |
4 | Click [Map] (the same button as for the spatio‑temporal view; the Network view appears). |
2.1 What you need
- Linked records (relationship fields) or record types that are already defined as linked.
- A query that returns all records you want to appear in the graph.
2.2 Main controls (header)
Control | Function |
|---|---|
Node Control | • Select mode – click‑drag a single node or draw a selection rectangle (right‑click + drag). • Gravity – toggle node‑to‑node attraction; turn on to let the layout settle, then off for a static view. |
Link Control | • Links – show/hide empty links and expanded links (links that open to show nested relationships). • Node Size Formula – choose linear or logarithmic scaling of node size. • Fixed – set a fixed link thickness. |
Graph Control | • Refresh Data – re‑load the graph if new records were added. • Open/Close Fullscreen – toggle full‑screen mode. • View Mode – Icon view, Basic info box, Full info box with link view. • Set Zoom – manual zoom slider. • Export – download the graph as GEXF (Gephi format). |
2.3 Tips for a readable network
- Turn Gravity on, let the layout settle, then turn it off.
- If the graph still looks tangled, click Refresh Data under Graph Control.
- Use the Select mode to isolate a subset of nodes and move them manually.
3️⃣ Cross‑tabular (Pivot) View
Step | Action |
|---|---|
1 | Click [Explorer]. |
2 | Run a search or use a [Saved Filter] . |
3 | Select a record (any type). |
4 | Click [Cross‑tabs] (also called Tableaux croisés). |
3.1 Building the table
- Choose the record type you want to analyse (right‑hand panel).
- Pick Variable 1 (dropdown Var 1) – the first field to cross.
- Pick Variable 2 (dropdown Var 2) – the second field (optional).
- Optionally add a Variable 3 (click the “+” icon).
- Click “Update results”.
If only one variable is chosen, you obtain a simple frequency table; with two variables you get a cross‑tabulation.
3.2 Assign / edit intervals (value grouping)
- Click the pencil icon (✏️) to open the Assign intervals dialog.
- Add Interval – press [Add Interval], select the values to merge, click the right‑arrow, then give the new interval a name.
- Remove Interval – select an interval and click the left‑arrow (or the blue “←” button).
- Reset – press [🔄Reset] to revert to the original value list.
All changes are reflected instantly in the table.
3.3 Table options
Option | What it does |
|---|---|
[save] | Store the current table configuration for later reuse. |
Show – Values | Show raw counts. |
Show – Totals | Show row/column totals. |
Show – Row % / Column % | Show percentages per row or column. |
Aggregates Counts | Switch between sum, average, etc. |
Hide / Show – null values, empty rows/columns | Clean up the display. |
3.4 Export & visualisation
- Export – click the Export button (top‑right) to download CSV or PDF.
- Chart (pie) – when only one variable is selected, a pie chart button becomes active; it displays the distribution of that variable.
At least one variable must be selected before any result (table or chart) appears.
📊 Quick‑reference of Heurist visualisation tabs
Need | Map + Timeline | Network | Cross‑tabular (pivot) |
|---|---|---|---|
Geographic + temporal exploration | ✅ |
|
|
Relationship graph |
| ✅ |
|
Quantitative cross‑tabulation |
|
| ✅ |
Quick export (CSV / PDF) | ✅ (via Publish or Download timeline) | ✅ (GEXF) | ✅ |
Embedding in external site | ✅ (iframe) | ✅ (iframe) | – |
Custom pop‑ups / symbology | ✅ (Popup template) | – | – |
🔖 Key take‑aways
- Map + Timeline requires both a spatial and a temporal field; otherwise the view stays empty.
- Use the Publish button to generate an embeddable iframe; you can customise which controls appear and even export a KML for Google Earth.
- In the Network view, turning Gravity on, letting the layout settle, then turning it off yields the cleanest static graph.
- The Cross‑tabular view is ideal for quick quantitative overviews; remember to assign intervals when you need to group raw values.
- All export actions (CSV, PDF, GEXF, KML, iframe) are reachable from the respective tab’s header toolbar.
8e: Using IIIF - manifests, canvases and annotations
Note : This chapter supplement is in the Heurist gitHub /documentation/IIIF folder at 28 June 2026, but this version will becoem the authoritative source. Additonal documentation has been written since 28th June.
This guide describes the IIIF features provided by Heurist for creating, importing, viewing, editing and exporting IIIF Manifests, Canvases and Web Annotations.
Heurist supports two main workflows:
- Use Heurist as an annotation layer over existing IIIF Manifests (annotation overlay mode). The external provider keeps ownership of the source Manifest and Canvas identifiers. Heurist stores and publishes local annotations.
- Use Heurist to manage the Manifest (full management mode). Heurist stores Manifest, Canvas and Annotation records and generates a IIIF Presentation API v3 Manifest from those records.
Heurist also provides a dynamic IIIF server for ordinary record sets and registered media files, and can render external IIIF files and Manifests. In this sense it can act both as a IIIF client and as a IIIF server.
1. Preparation
1.1 Import the required definitions
Before using the IIIF annotation and Manifest tools in an existing database, import the new definitions from the Heurist_Core_Definitions database using Design > Browse templates. Heurist will prompt you to do this if you attempt to process Manifests without the required definitions.
The new record types are in the Documents group. It is enough to select IIIF Annotation. The related record types IIIF Manifest and IIIF Canvas are downloaded alongside it.
The important record types are:
- IIIF Annotation (
RT_IIIF_ANNOTATION, concept code2-109) - IIIF Manifest (
RT_IIIF_MANIFEST, concept code2-110) - IIIF Canvas (
RT_IIIF_CANVAS, concept code2-111)
These definitions include fields for IIIF identity, original/source IIIF identity, Manifest links, Canvas links, annotation state, selector type/value, annotation JSON and related metadata.
1.2 Remove obsolete duplicate fields in old databases
Some older databases may contain a duplicated field named IIIF Anotation 2 with:
- local ID:
1106 - concept code:
2-1098
This field is not used by any current IIIF record type. Remove it before using the new IIIF workflow, especially if it causes confusion in forms or import checks.
1.3 Recommended checks before testing
After importing definitions, check that the database contains the three IIIF record types above and that Browse templates no longer shows missing IIIF definitions in the Core definitions database.
For testing, start with a small Manifest first. A large external Manifest may fail for reasons unrelated to Heurist logic, such as network timeouts, remote annotation-list delays, or unavailable image services.
2. Key concepts
2.1 Manifest
A Manifest is the IIIF object that describes a digital object, such as a manuscript, book, image set or media collection. In Heurist, a Manifest may be:
- a registered external Manifest file or URL;
- a managed IIIF Manifest record;
- a dynamic Manifest generated from a record set or a single registered media file.
Managed Heurist Manifest output is generated as IIIF Presentation API v3. A registered IIIF Manifest file becomes managed only when an IIIF Manifest record references that file. If no such record exists, Heurist treats the registered Manifest file as an external/source Manifest and can use it as an annotation overlay target.
2.2 Canvas
A Canvas represents one viewable unit in a Manifest, for example a page, image, video or audio item. In full management mode, Heurist stores each Canvas as an IIIF Canvas record. Each managed Canvas normally points to a registered file or registered external media URL.
In annotation overlay mode, Canvas records are not imported or managed by Heurist. Instead, annotations remain linked to the original Canvas URI from the source Manifest.
2.3 Annotation
Annotations are stored as IIIF Annotation records. They may be created or edited in Mirador, mainly for defining the annotation area and initial text, or in the Heurist record editor for annotation attributes, which can be extended to support searching and custom reporting within Heurist.
Annotations store:
- text body / summary;
- motivation, such as commenting;
- language;
- original Canvas target URL;
- managed Canvas reference when applicable;
- selector type and selector value;
- raw IIIF/Web Annotation JSON;
- state, such as imported, Mirador-created, Heurist-created, modified, obsolete or removed.
3. Manual creation of a managed Manifest
Manual creation is used when you want Heurist to own and generate the Manifest rather than only overlay annotations on an external Manifest.
3.1 Create the Manifest record
Create a new IIIF Manifest record. Fill in Manifest-level metadata such as title, description and copyright/rights. These fields are used when Heurist generates the v3 Manifest output.
A managed Manifest can be empty. An empty managed Manifest still returns valid IIIF Presentation API v3 JSON with items: [], so viewers should not normally show a technical error.
3.2 Add Canvases one by one
Create IIIF Canvas records and link them to the Manifest. Each Canvas may reference:
- a locally uploaded registered file;
- a registered external media URL;
- an image served by a IIIF Image API;
- other supported media such as audio or video where configured.
The order of Canvas references on the Manifest record defines the order in the generated Manifest. The order can be changed within Heurist data entry by dragging the Canvas references up and down.
3.3 Add or edit annotations in Mirador
Open the managed Manifest in the Mirador Viewer. Use Mirador's annotation tools to add annotations to the selected Canvas. Heurist stores the annotation as an IIIF Annotation record and links it back to the relevant Canvas and Manifest context.
The internal Mirador viewer uses the default annotation lookup scope canvas, which reads annotations from /api/{db}/annotations. A Manifest-scoped endpoint is also available as /api/{db}/annotations/{manifestRecID} when annotation_scope=manifest is requested.
3.4 Edit annotations in the Heurist record editor
Annotations can also be edited directly as Heurist records. This is useful for correcting text, language, motivation or metadata.
Be careful when editing selector information manually:
- Selector type and selector value must remain consistent.
- A rectangular fragment selector and an SVG selector are not interchangeable.
- If the selected area is edited incorrectly, Mirador may display the annotation in the wrong place or fail to display the region.
In general, use Mirador for changing the selected area and use Heurist record editing for textual and descriptive metadata.
3.5 Open the Manifest, Canvases and Annotations from the Record View panel
From the IIIF Manifest record view, open the Manifest either as raw/generated IIIF content or in the Mirador Viewer.
- IIIF Canvas records may include a link to open the referenced Manifest in which the Canvas is used.
- IIIF Annotation records may include a link to open the referenced Manifest, so the annotation can be viewed in its wider Manifest context rather than as an isolated record.
- IIIF Canvas records can also be opened independently, in the same way as any Heurist record with a file field. This is useful when checking a single page/image/media item before opening the full Manifest.
For internal Mirador viewing, Heurist passes omit_annotation_pages=1 to the generated Manifest URL where needed. This prevents the same database annotations from being loaded twice: once from embedded Manifest annotation-page links and once from Mirador's annotation endpoint.
3.6 Add Canvases in a batch — planned feature
A planned batch action will allow users to select one or several ordinary records that already have file fields and create Canvas records from those files. This is intended to make managed Manifest creation faster for large image sets.
Until this is implemented, add Canvas records manually or import/process an existing Manifest in full management mode.
4. Import or process an existing IIIF Manifest
Use Process IIIF Manifest to work with a registered or uploaded IIIF Presentation Manifest. A Manifest can be registered as:
- an external IIIF Presentation Manifest referenced by a File field;
- a JSON Manifest uploaded to Heurist as a File field.
The default mode is Full manifest management, which creates or updates an IIIF Manifest record, imports IIIF Canvas records and imports available IIIF Annotation records.
Annotation overlay is different: it imports annotations only. It does not create an IIIF Manifest record. The registered Manifest file remains the source Manifest and Heurist stores local annotations against the original Canvas URIs.
4.1 Annotation overlay mode
Use Annotation overlay when the external Manifest remains the authoritative source for Canvas structure.
In this mode:
- only IIIF Presentation API v3 Manifests are supported;
- the source Manifest and its Canvas list remain owned by the external provider;
- Heurist does not create an IIIF Manifest record;
- Canvas identifiers are preserved from the source Manifest;
- annotations are imported into Heurist and linked to the original Canvas URIs;
- when
/api/{db}/iiif/manifest/{obfuscatedFileID}is requested, Heurist can output a v3 overlay Manifest by replacing sourceCanvas.annotationswith Heurist AnnotationPage links; - local Heurist annotations are preserved on re-import/re-processing when they have been edited locally.
Do not use this mode for IIIF Presentation API v2 Manifests. For v2 source Manifests, use full management mode. If a managed IIIF Manifest record already references the selected registered Manifest file, annotation overlay mode is not available because the file is already under Heurist management.
4.2 Full manifest management mode
Use Full manifest management when Heurist should manage the Manifest structure.
In this mode:
- Heurist creates or updates Manifest, Canvas and Annotation records;
- the existence of the IIIF Manifest record is what marks the registered Manifest file as managed;
- Heurist owns the generated Manifest output, Canvas order and Canvas metadata;
- media may still be external registered resources or local uploads;
- media should be stored in Heurist where referenced resources are not held by a stable long-term repository or institutional service;
- Manifest-level metadata can be edited in Heurist;
- Canvas order comes from the Canvas references stored on the Manifest record;
- annotations are linked to managed Canvas records;
- generated IIIF output uses Heurist Canvas API URLs.
This is the preferred mode for IIIF v2 source Manifests, because the overlay workflow is v3-only.
4.3 Re-import / re-processing behaviour
On re-import, Heurist attempts to update imported records while preserving local work. Records that have been changed in Heurist or Mirador are preserved by default and reported separately as preserved local records.
The report includes:
- managed Manifest record ID, or
not createdfor annotation overlay; - total Canvases found;
- Canvas records added, updated, unchanged or preserved;
- total annotations found;
- annotation records added, updated, unchanged or preserved;
- issues encountered during import/processing.
4.4 Thumbnails
The import tool can create thumbnails for annotation records. This is useful for browsing annotations in Heurist, but it is slower because it may need to access remote images or render selected regions.
5. Add annotations for an arbitrary registered file or URL
You do not need a managed Manifest before annotating media.
You can open the Mirador Viewer for any registered media file or supported registered URL. Heurist dynamically creates a single-canvas Manifest for the media and lets you add annotations. These annotations are stored in Heurist against the Canvas URL used for that file.
If you later add the same file to a managed Manifest, the annotation can be preserved because the Canvas identity is based on the registered file's obfuscated ID. This allows annotation work to start before the final Manifest structure is prepared.
Typical uses:
- annotate a single image before adding it to a larger Manifest;
- annotate a registered external IIIF image;
- test annotation behaviour on one file before importing, processing or building a large Manifest.
6. Viewing in Mirador
Heurist provides a Mirador Viewer for:
- a managed IIIF Manifest record;
- a registered external Manifest file;
- a single registered media file;
- a dynamic Manifest generated from a query or selected record set.
Registered Manifest files are opened through /api/{db}/iiif/manifest/{obfuscatedFileID}. If an IIIF Manifest record references the file, the API returns the managed Manifest generated from Heurist records. Otherwise it returns the source Manifest: v2 sources are returned as-is, while v3 sources can be returned with Heurist annotation-page links overlaid.
The viewer supports two annotation lookup scopes:
annotation_scope=canvas— default. Shows all annotations that target the same Canvas URL.annotation_scope=manifest— shows only annotations linked to the current Manifest record.
For internal Mirador viewing, Heurist avoids duplicate annotations by passing omit_annotation_pages=1 to generated Manifest URLs where needed. External IIIF consumers can receive normal Canvas.annotations links when this parameter is not used.
7. Dynamic Manifests via Export IIIF
Heurist can generate IIIF output dynamically from ordinary record searches and file selections. This is useful when you want to view or share a record set without creating a permanent managed Manifest record.
7.1 Single registered media file
A single media file can be opened in Mirador or exported as a IIIF Manifest by using its registered file obfuscated ID. Heurist wraps the media in a single-canvas IIIF Presentation API v3 Manifest.
Useful for:
- quick viewing of one image, audio or video item;
- adding annotations to one registered file;
- testing IIIF output for one file.
7.2 One ordinary record with media files
When a record contains one or more suitable file fields, Export IIIF can generate a Manifest whose Canvases correspond to the media files linked to that record.
Useful for:
- records that represent objects with several images;
- quick Mirador viewing without creating explicit Canvas records;
- public sharing of record media as IIIF.
7.3 Several ordinary records with media files
When the current record set contains multiple records with suitable media, Export IIIF can generate a Manifest with one or more Canvases from those records, subject to the export limit.
Useful for:
- search results containing image records;
- temporary collections;
- comparing several media records in Mirador.
7.4 One registered IIIF Manifest in the record set
If a record set contains one registered IIIF Manifest and no generated media Canvases, Heurist can return that Manifest directly through the IIIF API.
Useful for:
- opening a registered external Manifest through Heurist;
- keeping a registered Manifest discoverable as a file in a record;
- testing external Manifest access.
7.5 Several registered IIIF Manifests in the record set
If a record set contains several registered IIIF Manifests, Heurist can generate a IIIF Collection that references those Manifests.
Useful for:
- publishing a set of related Manifests;
- opening several Manifests together in Mirador;
- grouping imported, processed or external Manifests without merging their Canvas structures.
7.6 Mixed record set: registered Manifests and media files
If a v3 dynamic export contains both registered Manifests and ordinary media Canvases, Heurist can generate a Collection. Registered Manifests become Manifest items in the Collection; generated media Canvases are grouped into a generated Manifest item.
Useful for mixed search results where some records already contain IIIF Manifests and others contain image/audio/video files.
7.7 IIIF v2 output policy
Heurist no longer generates IIIF Presentation API v2 output. Dynamic export and managed Manifest output are v3-only. Heurist can still import v2 and hybrid v2 source Manifests in Full manifest management mode and then publish them as generated v3 Manifests.
8. Recommended workflow examples
8.1 Annotate an external v3 Manifest without taking over its structure
- Register or upload the v3 Manifest JSON.
- Open Process IIIF Manifest.
- Select Annotation overlay.
- Import/process annotations.
- Open the registered Manifest file in Mirador. The viewer uses
/api/{db}/iiif/manifest/{obfuscatedFileID}and the annotation endpoint. - Add or edit annotations.
- Use the same API URL when external viewers need the v3 source Manifest with Heurist AnnotationPage links.
8.2 Import a v2 Manifest with many Canvases and annotations
- Register or upload the v2 Manifest JSON.
- Open Process IIIF Manifest.
- Select Full manifest management.
- Import/process Canvases and annotations.
- Inspect the report for failed remote annotation lists or unavailable image resources.
- Open the managed Manifest in Mirador.
If the v2 Manifest is very large, test first with a trimmed Manifest containing a few Canvases.
8.3 Start with one image and later build a Manifest
- Register or upload an image.
- Open the image in Mirador.
- Add annotations.
- Later create a managed Manifest and add that file as a Canvas.
- The annotation can be preserved because it targets the file-based Canvas identity.
9. Troubleshooting
The import widget says required definitions are missing
Import IIIF Annotation from Heurist_Core_Definitions. The related Manifest and Canvas record types should be imported with it.
The database contains an old field named “IIIF Anotation 2”
Remove the obsolete duplicate field with local ID 1106 and concept code 2-1098. It is not used by the current IIIF record types.
Overlay mode rejects a v2 Manifest
This is expected. Annotation overlay mode is v3-only because it stores annotations against original v3 Canvas URIs and can publish v3 Canvas.annotations AnnotationPage links. Import v2 Manifests in Full manifest management mode.
Overlay mode is disabled for a selected registered Manifest file
This means an IIIF Manifest record already references the selected registered Manifest file. That file is already managed by Heurist, so use Full manifest management mode.
Mirador shows duplicate annotations
Use the internal Heurist Mirador viewer, which passes omit_annotation_pages=1 for generated Manifest URLs where required. This avoids loading the same annotations both from Manifest Canvas.annotations and from Mirador's annotation endpoint.
Import fails on a very large Manifest
Try a small trimmed Manifest first. Failures may be caused by remote annotation-list access, timeouts, malformed source JSON, unavailable image services, or network interruptions.
10. Summary of ownership by mode
Feature | Annotation overlay | Full manifest management |
|---|---|---|
Supported source Manifest version | v3 only | v2 and v3 |
Source Manifest ownership | External provider / registered file | Imported into Heurist management |
Generated Manifest output | Source v3 Manifest with Heurist AnnotationPage links when requested through the IIIF API | Heurist managed v3 output |
Canvas list ownership | External provider | Heurist |
Canvas identifiers | Original source Canvas URIs | Heurist Canvas API URLs |
Canvas records created | No | Yes |
Annotation records created | Yes | Yes |
Manifest metadata editable in Heurist | No managed Manifest record is created | Yes, used in generated output |
Best use | Add Heurist annotations to an existing v3 Manifest without creating a Manifest record | Build or take over a Manifest in Heurist |
8a bis: Custom reports OLD VERSION
Custom Reports are optional but they allow you to customize data display in powerful ways.
By default, when a record is displayed on a Heurist website, the usual Record View template is used. If you would like to alter how records appear, then you will need to define a Custom Report.
Note: the content was copied via markdown export and lost much of its minor formatting. The images in particalr have been downgraded. The source is here: https://docs.google.com/document/d/1Jyytaln1-aCm3paZ4rBKho0puXBGaJ97/edit
Custom Reports work together with Saved Filters to publish content on a Heurist website or elsewhere on the web. The *filter *will retrieve records from the database, and hand the records to the *custom report *to format and display them. When you choose the Report tab in the View Pane, you will see the selected Custom Report attempt to display information about your current result set. This will only work correctly if the selected report has been configured to display records like those in the result set (e.g. a Custom Report designed to display information about Persons will probably fail to display information about Books or Places properly.)
Smarty Heurist reports are powered by the Smarty Template Engine. For an overview of the Smarty template language, visit Smarty Syntax. It allows you to embed data from the database into an HTML template which determines the form of the output. You can use CSS, Javascript and even PHP within custom reports. Smarty is an extremely powerful system and almost anything is possible, if you know how.
Simple templates can produce neatly formatted lists in text (e.g. CSV and HTML formats), including media (e.g. images and videos). For example, a report might extract and display the first and last names of all writers born before 1900 along with an alphabetical list of their works.
More complex reports can be configured to retrieve and display information from related records of different nature. For instance, in the case of a database documenting archeological dig sites, excavation campaigns, and objects retrieved, each defined as a different entity, a custom template can produce a nested list of all sites, with the details of each of their respective campaigns ordered chronologically, and display a gallery with a picture of each object for each campaign.
Such complex reports can use all the power of the Smarty template language, including PHP functions (standard or user-defined) directly within the template. They can display data using complex layouts, such as grid or flexbox, and may also include JavaScript to provide interactivity and CSS to customise their appearance.
Custom reports can be used in many different places. You can use custom reports, for example, to:
Display search results on your website
Customise the popups on a Heurist map
Embed Heurist content in another page
Create periodically updated custom data feeds to be used in another platform (for instance, in csv, json, or xml format).
Report View Toolbar

The dropdown and buttons allow you to perform the following tasks:
Select dropdown. Select an existing report from the drop down. This is immediately run against the current list of queried records. This lets you test run the report against a set of records and view the report on-screen.
 Edit button. Edit the selected report template.
Create. Create a new custom report template using Smarty syntax. (Note that you can also create a new report from an existing one by duplicating it. This can be achieved using the “Save as” button at the bottom of the Edit report pane)
Delete. Deletes the current report template
Import. Import a template exported from another database (as a .gpl file). The .gpl file format is a special file format that allows templates to be interpreted by multiple databases, even if their structure differs.
Export. Export a template as a .gpl file (this can then be imported to another database). Export converts field IDs to concept IDs.
Publish. If you wish to embed the report in another website (e.g. your Wordpress site), then click the globe icon to receive some html code that you can copy-and-paste directly into the relevant page, or a URL link with your data feed.
Print. Print the report output or save as pdf.
Refresh. Use this to refresh the data used by the report template, if your database has been updated.
Create a custom report template
Tip : Before creating a new report template or editing an existing one, ensure you have run a search in order to have a data subset to test your template.
Go to Report View and from the Report toolbar, click New.

The screen that opens is divided in three panels.
The Actions Pane on the right lets you quickly enter some basic actions (conditional functions, variable and loops) based on the fields and terms available for your record query. (See Actions Pane below [@link]).
The middle pane is the Editor pane, where you can enter code manually, using HTML and the Smarty syntax. Upon creation it contains some a basic example template by default, which you can then use as a starting point or remove and start from scratch. The basic template consists of:
- Some guidance as comments, enclosed in {* *}. Remove or add comments as you wish.
- A records loop which should enclose everything you want reproduced for each record.
- Some example fields within the loop (to create a simple report wich lists the record ID and the record title).
The left pane is the Preview pane. When you click the “test” button, it will run your code on the data subset currently selected and display the output of your custom template on the white space below. Note that nothing gets saved when you click “test”.
When complete, click Save to save your report structure. If it is the first time you save this template, you will be prompted to enter a name for your template. It will now be made available for selection when you choose to print or publish the report. Click Close Editor when finished.
Actions Pane
The Actions Pane provides a records/fields tree of your database structure that assists you in creating a simple template (with loops, fields & functions) to produce neatly formatted lists in text (e.g. CSV, and HTML formats, including images, video and so forth).
More complex formats can use all the power of the Smarty template language, including PHP functions (standard or user-defined) directly in the template.
To use the Actions pane, insert the cursor in the code where you wish to insert the syntax. Press Enter to add extra lines if required. Select the appropriate record type. For each code string, first position the cursor in the appropriate location in the report, then select the appropriate function from the actions pane. In the following example, the user has created an If statement wrapper, and can now enter variable code between the If statements as required
Note. Untyped pointers do not appear on this list; instead a dialog will assist you.
To enter field variable details, for an IF Statement or Repeat Loop, click on the insert option for the relevant field. This displays the Insert dialog:
Note. You can output the leaf term alone or the leaf term with its hierarchy (where terms are hierarchical).
These have the following elements which you can insert into the code:
Insert Fields Value | Inserts the value of the selected field. From the dropdown you can specify how the field information is displayed. Field Only. Normally use Field Only. This inserts the field specification to render the content of the field as-is. Field + Function Wrapper. This inserts the field with the wrap function, which is useful for special types such as URLs, images and videos, as it inserts required html code, for example: {wrap var=$r.recURL dt="url"} inserts a hyperlink. {wrap var=$r.thumbnail_image_originalvalue dt="file" width="300" height="auto"} inserts an image. |
|---|---|
Test Value (IF) | Click this button to insert a test value for the loop. |
Preview Results
To preview the results of your template, click TEST. The report output is shown in the bottom Pane (only a subset of the data is shown, for efficiency).
The two dropdowns let you set the the scope of the query (for the test only, not the published report), and to troubleshoot the code (show warnings, show errors etc.):
The test results are updated immediately.
Edit, Copy & Delete Template
To edit a template, go to Report View, select a report from the Select Template dropdown. Click Edit . The Template screen Displays. Edit the template as required (see above). When complete, click Save, or Save as to create (copy) a new report from an existing report. Click Close Editor when finished.
To delete a template, select a report from the Select Template dropdown and click Delete .
Warning. If you delete the report template at the next step you cannot retrieve the report again.
Click OK at the prompt to delete the report.
Report Basics
To get started with a custom report, you need to understand the basics of html and the Smarty syntax.
https://heurist.huma-num.fr/heurist/
Topics to be covered
@todo: these links go to the old pages
Editing a Report Template: How to create a basic report to show data about your records in a customised format
Publish Report: How to embed a report in an external website, or how to schedule large/complex reports to be regenerated and cached in the background
Advanced Usage: How to use all the features of the Smarty templating language and Heurist's report editor
Custom Reports Cookbook: Some recipes for commonly-requested features of custom reports, e.g. linking reports together or displaying records in an interactive table. The cookbook also has some tips for making the code of your reports more readable and easier to maintain
The basics are explained below. For more detail, see the help pages on Editing a Report Template, Report Publishing Options and Advanced Usage.
Publish Report
The publish option allows you to embed a custom report in an external website (e.g. a Wordpress blog). It also allows you to schedule reports to be regenerated periodically and then cached. Scheduling reports is a good option when you are generating large or complex reports, e.g. tabular displays of lots of data, or reports that perform complex computation or statistical analysis.
You can access the 'Publish Report' dialog by clicking the globe icon in the Report View:

In this view, you will see some code that you can copy-and-paste into your website to make the report appear. This code will generate the report with whatever records you are currently viewing in the Explore Menu. You should using a filter to ensure that the correct records are selected for the published version of the report. For example, if you would like the report to show every 'Film' in your database, then you should filter the database just to show the 'Films' before opening the 'Publish Report' dialog.

If you find that the 'embed' code does not work in your website, you can try the 'javascript wrap' option. You can test out the generated report by clicking 'open in new window'.
Scheduled Reports
Use the Set up up publishing schedule button to periodically regenerate the report according to a defined schedule. This is a good option for complex reports that are slow to generate. By generating the report in advance, you will provide a better experience for visitors to your site: a cached version of the report will be waiting on Heurist's servers to be downloaded instantly by the visitor. The drawback of this approach is that visitors may not see the most up-to-date information. They will instead see a snapshot of the database at the time the report was generated.
When you click on Set up publishing schedule, you will see a list of scheduled reports. This list will of course be empty if you have set up a publishing schedule before.

Click the icon in the 'edit' column to change the settings of the publication schedule, the icon in the 'exec' column to regenerate the report, or the icons in the 'html' or 'js' columns to obtain a copy of the code to embed into your external website. You can delete the publishing schedule by clicking the icon in the 'Del' column.
NB: This screen only edits or deletes publishing schedules. If you want to edit or the delete the actual report, then you need to go back to the 'Report View' and click the relevant icon.
When you click the edit icon, or the 'Add New Report Schedule' button, then the 'Edit report schedule' dialog will appear. If you are creating a new publication schedule, then the 'query' and 'template' fields will automatically be filled in for you. You will simply need to provide a title for the publication schedule, which is purely for your reference.

ID | This identifies the published report and will be generated when the report is published. |
|---|---|
Title | The title of the generated report. |
Type | Select the type of report (i.e. the report syntax used). Note. Currently only Smarty reports are supported. See . |
File Path | The file path where the report is generated to. Leave blank to use the default path which is: datbasename/generated-reports |
File Name | The base name of the report files. This will be completed with file types. |
Query | The Heurist query you used as a base for the report. This is required since the reports are generated dynamically, using the current set of records. |
Template | The name of the template used to generate this report (defaults to current template). |
Interval | To schedule a report to be run regularly, specify the interval in minutes between regenerations of the report output. The default is zero (only run on demand). Leave blank for no schedule. |
When complete, click Save. Your report schedule will be added to the list of scheduled reports.
Editing a Report Template
You can create custom reports templates using the Smarty Report Engine. These templates then become available in the Report toolbar to be run against any result-set.
About Smarty
Note. Smarty is open source software, developed by the developers of the PHP programming language. Heurist uses the latest release of its software. This version is optimized for web servers that use PHP5. Any templates you create via the Report View adhere to the same syntax and structure of Smarty templates; all standard Smarty template plugins and modifiers can be used, and your templates are parsed, cached, and displayed by the latest release of Smarty.
Smarty works by allowing you to incorporate various variables and plugins into the HTML syntax of your reports. This gives you complete control over what is displayed to the end user. Smarty files are basic HTML files that can be edited in any text editor; you do not need to install anything extra to use Smarty. You therefore have complete control over the HTML displayed to the end user. You can link Smarty files to JavaScript, CSS stylesheets, and other files.
Note. Reports work with record type and fields codes rather than names; this prevents formats being broken if field names are edited.
You can get started developing Smarty-based templates with a modicum of Smarty knowledge. As you learn more about Smarty you can develop more sophisticated templates. For example, the following snippet of code is used to display a list of the five latest news headlines on a news site:
<ul>
{content type="headlines" var="headline" limit="5" sort="date" sort_dir="desc"}
<li>
<a href="{$headline.link}">{$headline.headline}</a> ({$headline.date|date_format: "%m %d, %Y"})
</li>
{/content}
</ul>(See the Smarty Syntax section (next) for an overview of the smarty syntax, including worked examples. For complete Smarty Documentation go to the Smarty Site itself.)
Ch 09: Publishing, websites, URLS, PIDs and archiving
09a: Publishing websites and database archiving
The Publish menu

- Safeguard file - download - a fully internally documented archive package of all the data in the database
- Safeguard file - to repository - as above, but uploads the file to a chosen repository (2026 - only Nakala)
- Website > Create - sets up a new CMS website. A database can have multiple websites for different audiences
- Website > Edit - edit an existing CMS website stored in the database
- Website >View - view an existing CMS website in a separate window - use to check results and to obtain the URL
Note : You can also access the website record in the Explore Menu, just like any other record. To find the website record, type 'website' in the searchbox, or filter by Entities in the Explore Tray, and choose 'CMS_Home' as the Record Type. Any websites you have created will appear as records in the Results Pane. - Standalone web page - create or edit a CMS-generated web page for embedding in a third-party website
- Statistics - displays access statistics usign the eidely used Matomo Open Source web tracklign system
The CMS : creating a website
Why use the Heurist CMS?
Heurist provides a powerful CMS capability tightly integrated with the database. There are several advantages to this approach:
- Functionality: Database search and visualisation widgets can be embedded directly in web pages and have full access to the content of the database, including saved searches;
- Sustainability: The CMS pages are stored as standard record types in the database. That means that there is no need to have a separate server and cross-server integration (high sustainability risks); as long as the database is accessible through Heurist, the CMS will remain operational, potentially long after the completion of the project which built it, and at practically no cost.
- Stability
- Flexibility
- Multiple websites from one database
- Embedded in the database and thus saved as an integral part of the database
- No dependency on connections between servers, avoids multiple points of failure
- Backed up in archive track package and in normal backups
- Has access to the most functions directly available as widgets ( reuses the widgets of the main interface)
- Has direct access to data in the database and respects permissions and visibility down to the individual value level
- Flexible configuration of widgets using parameters which can be set via forms in the interface
- Widgets provide powerful functions without any programming - mapping, facet searches etc
- All images or files in the database are accessible for embedding without creating special web image directories (eg. WordPress) and are resampled automatically for web resolution allowing high resolution images to be stored in the database without bogging down the website <check this has been enabled>
- Allows embedding of remote images and streaming EG or videos and sound audio
- Instant editing of text elements in the website and change of parameters including styling of widgets and other components
- Creates embeddable pages independent of the Heurist menu structure as well as complete websites with a couple of clicks
- Easy linking of pages and records within text, generation of bread crumbs and page headings
- Hierarchical menus and the possibility of multiple menus
Configuring website layout
The initial web page may look somewhat different depending on what template has been set as the default.
The default website is created with a set of commonly used menu entries and web pages with dummy content.
Note: If you are not logged in you will first need to login with the login link at top right of the screen, or in the backend interface.

The website editor can be displayed by clicking on the website editor link on the top left of the screen
At the top of the screen you have some general controls:
The << chevrons can be used to temporarily close up the website editor panel, without exiting the website editor. This may be useful to have extra screen space when editing text blocks on the page (which open in a WYSIWYG editor when yu click on them).

The website URL is the recommended compact URL for the website. Click on it to copy it to your clipboard.
The Website Layout / Properties button
Changes the title, logo, background, languages and other settings of the website as a whole

Opens a standard record edit form for the CMS_Home record which defines the website:
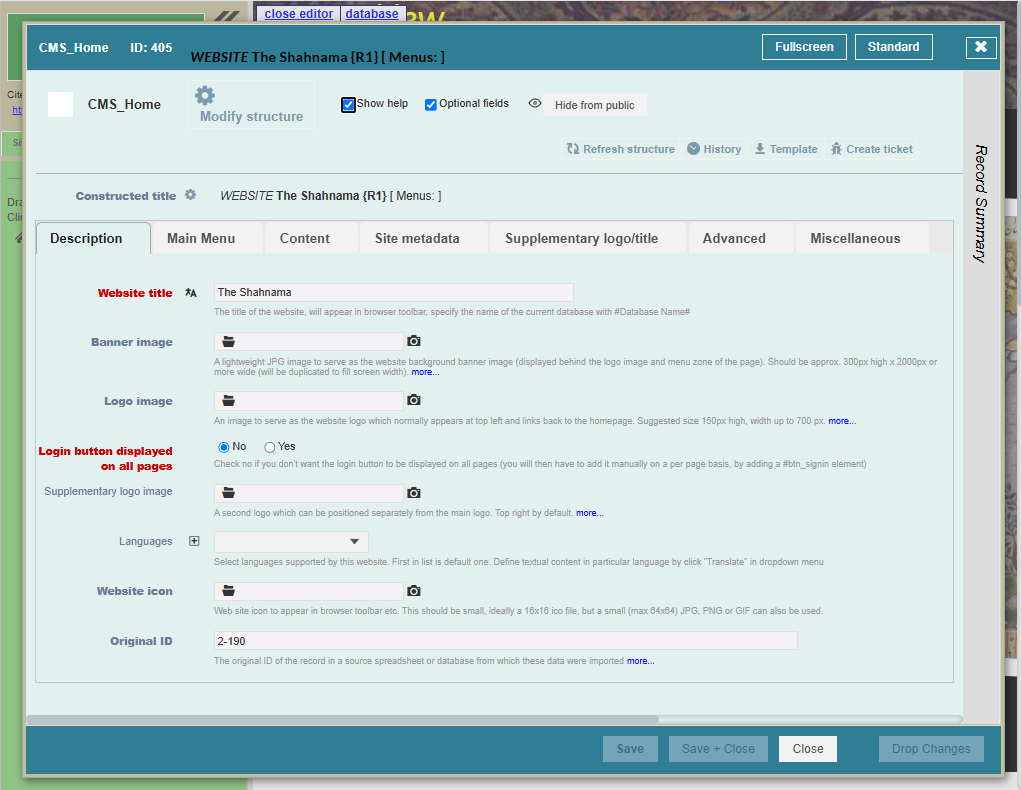
The “Advanced” tab allows you to provide some custom CSS and/or Javascript : see below.
DT_THUMBNAIL (base field 2-39) is used as favicon for the website.
The Site tab (menu management)
Allows you to add, reorder, rename and delete menu entries
The Page tab (widgets)
Edits the currently selected page structure and modify the component styles and widget properties.
The widgets making up the page are shown on the left.
Creating and editing components in a page
The element you are currently working on is highlighted by an animated blue border. If you change the element in any way, the changes are immediately visible in the preview. You can therefore use Heurist’s web editor to experiment and learn by doing.
You don’t need to know very much in advance about what these different settings do — just change them, and see the effect. You can actually learn a lot about web development just by playing with Heurist’s website builder. Anything you learn about your Heurist site will apply to most website development.
Advanced users can apply custom CSS classes to the element, or write inline CSS as they desire (see below).
After inserting the component, you can edit its content in the usual way. You can also add further elements to change the component.
Using widgets
If you insert a widget you will first see a list of possible widgets.

What is a widget?
To add interactive content to your Heurist site, you need to use Heurist widgets. A widget is an interactive component which either retrieves or displays information about records in your database. The Map and Timeline widget, for example, plots records on a map and displays them in chronological order on a timeline below. The Saved Filters widget allows you to embed filters that you have defined in the Explore menu on a webpage, enabling visitors to your site to search the database.
Many of the widgets replicate tools that you are already familiar with from the Explore Menu (you are in fact using the same widgets that we use to build the backend interface). However, when you embed a widget on a Heurist site, you will have more ability to customise its look and behaviour, so you can control the user's experience.
The available widgets are:
- Filter: This widget gives visitors access to the standard Heurist search bar, such as you see at the top of the Filtered Results Pane of the Explore Menu.
- Saved Filters: This widget allows you to embed Saved Filters on a Heurist webpage. In most cases, we recommend that you use Faceted Searches with this widget, as they provide the best user experience.
- Standard Filter Result: This widget displays records in a similar manner to the Filtered Results Pane of the Explore Menu.
- Custom Report: This widget displays information using a Custom Report that you have built in the Explore Menu. Custom Reports can also be embedded within other widgets, for instance to configure the popups on the Map and Timeline, or to provide a different view of records in the Standard Filter Result.
- Table Format: This widget displays records in a tabular format, the same as the List View in the Explore Menu
- Map and Timeline: This widget plots records on a map with embedded timeline, just like the Map View in the Explore Menu. You can utilise Map Documents defined in your Heurist database to provide additional advanced functionality.
- Story Map: This widget plots a set of records on the map as a connected series, with an accompanying 'slideshow' of information about each record. This is ideal for 10-20 records.
- Network Graph: This widget displays records as nodes in a network, much like the Network View in the Explore Menu.
- Menu: This widget allows you to add a navigation menu to your site, like the one that is automatically generated in your website header.
- Add Record: This widget allows you to add an 'Add Record' button to your page. Visitors can click the button to open the standard data entry form for a given record type.
- Email Us Form: This widget allows you to add a contact form to your page, so that visitors can email you without you revealing your email address publicly on the internet.
How do I configure a widget?
Once you have inserted a widget into a page, it will appear in the treeview to the left. If you click on it, this will open all the settings for the widget, where you can alter its functionality. Note that there are several tabs with different fucntions - nasic setup, onscreen controls, image handling, messages (when data is missing etc.) and Connect (which sets connections between
See the specific page for each widget for information on the specific settings.
How do I format a widget?
Most widgets will expand to fill up whatever space you provide them on your webpage. If you need to adjust the positioning or external appearance of a widget (e.g. by adding margins around it or a border), then you can do this using the Style tool, as you would for a static component such as some text or a heading.
How do widgets talk to each other?
You are very likely to add more that one widget to a webpage. When you do, you will probably want them to interact. For example, you might use the Saved Filters Widget to allow visitors to search the database, the Standard Filter Result to list the results of a search, and the Network Graph to display the results visually. When widgets are inserted into a page Heurist links the widgets together so that they interact correctly. You do not need to configure anything for this to happen—it is automatic.
More advanced users might wish to know how this works. Behind the scenes, Heurist divides the page into one or more search realms. All the widgets in a given search realm share data with one another. By default, the entire page is a single search realm, so that all widgets on the page will search, filter or display the same set of records at any given time. But it is also possible to divide a page into multiple search realms if required. It is even possible to have search realms which run across pages.
When you configure a widget, you have the option to specify which search realm it belongs to. You simply tell Heurist what search realms you would like to exist, and it will take care of creating and utilising them. If your 'Saved Filters' and 'Network Graph' are both in a search realm called 'Bob', then they will be linked. If you instead write 'Jane' in the search realm box for both widgets, then they will be linked together in a search realm called 'Jane'.
Types of widgets
Simple text box
The simplest of all components, the simple text box contains static WYSIYYG text (Simple text boxes can also be loaded in two and three column modes as a shortcut to individual positioning or flexboxes).
Simple text can be edited in WYSIWYG mode simply by clicking on the text in website edit mode:

Apart from the usual formatting options, one can create a link which inserts a new record in the database (Add Rec), one can insert images and other files from those previously uploaded or by uploading from your local drive or providing a remote URL (Add Media - see data entry of file fields for detailex explanation), or standard web hyperlinks (URL).
To insert a link which skips to an another page in the website, use the URL button and simply enter the ID of the web page you wish to load.
(find the ID either by a search for CMS Web Pages - open another browser tab to carry out the search - or by editing the site structure - button at top left in website edit more - and looking at hte menu pages which are connected to the CMS Home page)
Filter
The Filter widget create a search box (as in the Explore menu) which can be used :
- To perform a simple search in the database (for example from a keyword)
- To write a query using the Heurist JSON Query Langage (see documentation chapter 7)
- To display a Filter builder button to allow your visitors to build their own queries.
This widget has to be completed with the Standard filter results widget.
Filters Tab
The Saved filters allows you to display a selection of filters previously created and saved using the Facets Builder function described in chapter 7 (Explore menu), to enable your visitors to search your database by facet. This widget has to be completed with the Standard filter results widget.

Connect Tab

Search group: Name the search realm that the widget belongs to. By default, all widgets belong to 'search_group_1'. If you choose to use this feature, do ensure that you type the names of each different search realm exactly. Any typo will prevent the feature from working.
Info directs to page: Use this feature if you wish to direct visitors to a different page on the site when they select a record on the map.
Unique widget id: A name for the map widget on this page. This feature is only useful if you are using custom Javascript or CSS in your website.
-------------------------------------------------------------------------------------------------------------------------
Standard filter results
This widget allows you to display a Filtered Results pane, displaying the records in your current 'result set'.
The current 'result set' is the set of records retrieved by the filter you have most recently applied. (see chapter 7).
Setup Tab [to be described]
Controls tab [to be described]
Images/blog tab [to be described]

Messages Tab [to be described]
The messages accept fairly basic html such as <b> <i> <u>
They can also use simple styles such as:
<p style="text-align:center;width:98%;border:2px solid green">
Please make a selection on the left</p>
We recommend spacing the messages down from the top and in from the left using simple inline CSS for a more attractive appearance. They should only be left in teh default position when space is at a premium.
Connect Tab [to be described]

Custom report
The Custom Report widget lets you display the record selected in the results list in the form of a a custom template that allows you to display the results of a search in the desired format (see chapter 8a : the custom report template must first be built using the editor available in the Record view pane, via the “Report” tab.)
Setup Tab [to be described]

Tools Tab [to be described]

Messages Tab [to be described]

Connect Tab [to be described]
Table format
The Table format widget lets you display the results of a query in a table format.
The Table Tab [to be described]

Messages Tab [to be described]
Connect Tab [to be described]
----------------------------------------------------------------------------------------------------
Map and Timeline
There are many options for controlling the appearance and functionality of the map widget.

Controls Tab
General behaviours:
- Show timeline: Choose whether to include the timeline at the bottom of the map
- Markerclusters: Choose whether records clump together when the map is zoomed out (recommended)
- Show rollover: Should tooltips appear when users hover over buttons on the map?
- Allow modify symbology: Enable custom symbology (only relevant if using a Map Document)
- Controls to show:
- Legend: Allow visitors to change the base map, and turn on or off any result sets or map documents currently affecting the map. The legend appears in the top right corner of the map. Other controls appear down the left hand side.
- Bookmark: Allow visitors to drop pins on the map
- Geocoder: Allow visitors to search for places on the map
- Print: Allow visitors to print an image of the map
- Visible in Legend: If you have enabled the legend under Controls to Show, then you can choose which controls are available in the legend here.
- Expand at start
- Zoom limits: Prevent users from zooming too far in or out on the map.
Layers Tab

Default global base map: Choose the 'basemap' that is used to create the image of the earth's surface. Heurist comes with many base maps. Advanced users can apply 'filters' to the base map to e.g. invert the colours or make the map sepia.
Superimpose map document: Select a Map Document from the database to govern the appearance of the map.
Infobox Tab

Click map item for info: You have three options for how record data will be displayed when a record is clicked on the map.
Map info popup format: If you don't wish to use the default format, you can define an alternative format using Heurist's Custom Report builder. If you do this, you will probably wish to change the Map popup size using.
Cluster tab
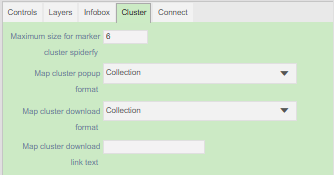
Connect Tab

Link to custom style: If you wish to inject custom CSS into the map, provide the <link> element here.
Search group: Name the search realm that the widget belongs to. By default, all widgets belong to 'search_group_1'. If you choose to use this feature, do ensure that you type the names of each different search realm exactly. Any typo will prevent the feature from working.
Info directs to page: Use this feature if you wish to direct visitors to a different page on the site when they select a record on the map.
Unique widget id: A name for the map widget on this page. This feature is only useful if you are using custom Javascript or CSS in your website.
-----------------------------------------------------------------------------------------------------------------------------
Story Map [TO DO]
-----------------------------------------------------------------------------------------------------------------------------
Network Graph [TO DO]
-----------------------------------------------------------------------------------------------------------------------------
Menu [TO DO]
Add record
This widget display a button to add contributions to the database : it open a form to fill in, in the same way as in the populate menu.
The administrator has to define the Record Type in which the data will be created :

Email Us Form
The "email us form" widget allows you to add a contact form to your page, so that visitors can email you without you revealing your email address publicly on the internet. The form will send emails to the owner of the database.
====13/05/2025 - reprendre ici=====
2.2.4. Using CSS (=== Styling)
Adding CSS to your Heurist website
Cascading Style Sheets (CSS) is a programming language used to format webpages on the internet. If you arrange the appropriate authorisation with your server administrator, then you will be able to write CSS code to adjust the appearance of your website. If you are willing learn some basic CSS, then you will be able to powerfully customise your Heurist site, changing its appearance significantly. If you choose to go further with CSS, you can even introduce animations and mobile-friendly layouts to your site.
It can be daunting when you get started with CSS, but the best approach is trial-and-error. Edit the CSS, see how the website looks, then keep tinkering until you get the appearance you want. You can use the developer tools in Chrome or Firefox to explore the structure of your website, and to see exactly how the CSS is applying to it.
For a brief introduction to the fundamental concepts of CSS, and links to some useful resources, see our Publish Menu Tutorial.
There are five main ways you can incorporate custom CSS into your website. You can:
- Add a global stylesheet to the website
- Add individual stylesheets to particular webpages
- Add custom CSS into a Custom Report (see the Custom Reports Advanced Usage page).
- Add CSS to individual page elements (not recommended)
- Import CSS from elsewhere
Before we cover these topics, however, you need to know how the custom CSS you write will link up with your website.
Controlling how CSS affects your website
A CSS file is made up of a series of selectors and declaration blocks . The selector says which elements of a page you would like to format, and the declaration block says what formatting you would like to apply to the selected element. For example, let's say you wanted all paragraphs on your website to have blue text and two lines of space above and below them. You could write the following code:
p {
color: blue;
margin-block-start: 2em;
margin-block-end: 2em;
}
In this example, the selector is p . It will apply to all p tags – i.e. it will apply to all paragraphs.
But what if you only want to apply your formatting to some elements? For example, perhaps you are writing an internet novel with two narrators. You want all the paragraphs spoken by Narrator One to be in blue, and all paragraphs spoken by Narrator Two to be in red. To achieve this, you can use CSS classes . Take a look at the code below:
p.narrator-one {
color: blue;
}
p.narrator-two {
color: red;
}
In this example, we use a period "." to select only paragraphs that have a certain class. "p.narrator-one" selects all paragraphs with the class "narrator-one", and "p.narrator-two" selects all paragraphs with the class "narrator-two". You can actually use a class selector on its own. In this case, it will have a slightly different meaning:
.narrator-one {
color: blue;
}
This example will select all elements with the class .narrator-two, whether they are paragraphs or divisions or headings or any other element. Though this particular example will only have an effect if the element contains some text, since the 'color' declaration only affect the colour of text. There are different CSS declaration for the colour of the element's border or background.
If you just want to style one particular element on a page, you can select it by id using the hash "#" symbol. For example:
#my-special-element {
border: solid green 5px;
}
This will select the element on the page with the id 'my-special-element', and give it a green border 5 pixels thick. If you want to be more specific, you could also write something like h1#my-special-element, which would select just the heading level 1 that has the id 'my-special-element.'
We could go into much more depth about CSS selectors and declaration blocks, but if you really want to learn all the details, then you should do one of the many excellent CSS Tutorials available on the internet. The key question here is:
How do I assign a class or id to an element on my Heurist website?
Assign classes
To assign one or more classes to an element on a Heurist page, click on the element in the treeview and open the 'Classes' section. You can add as many classes as you like, seperated by spaces.
NB: Obviously this means that class names cannot have spaces in them. The convention in CSS is to replace spaces with hyphens. Hence in the example image, the classes are narrator-one, highlighted-element and blue-background.

Assign an id or add element CSS (right image)
Every element you insert in the Heurist treeview is given an ID automatically. If you click 'Edit source', you will see the automatically assigned id in the ID field. You can change this as you wish. You will also see a box for applying CSS directly to this particular element. This box is only for special cases – as much as possible, you should use stylesheets that apply to entire pages or entire websites, as described below.
Editing the source (advanced; right image)
If you wish to apply CSS to particular elements inside one of the element in the treeview, then you will need to click 'Edit HTML source' under the 'Edit source' heading, and assign classes or an id to the relevant elements directly. There are good explanations about how to assign a class or give an id to an HTML element on W3Schools.

Some useful selectors (advanced)
If you are ambitious, and wish to develop a CSS template that thoroughly formats your whole website, it can be useful to know some of Heurist's key selectors. Click below to expand the list.
Useful selectors for Heurist websites
#main-content: All Heurist sites by default are packaged into three main div elements. The #main-content element occupies most of the screen, and is where the content of the webpage is loaded. To apply formatting to elements inside #main-content, you can use a child or sibling selector . For example, the selector #main-content p {/* some formatting */} will apply formatting to all paragraphs inside the #main-content division.
#main-header: The #main-header element appears at the top of the screen. NB: If you wish to change the appearance of the #main-header using CSS, then you are strongly advised to define your own custom header in the 'custom header' field of the website record. Make sure to include all the named elements below (#main-title etc.), if you want Heurist to automatically generate the website's title, menu and so on.
#main-logo: The #main-logo is a div element in the left of the #main-header, which contains the site logo.
#alt-logo: The #alt-logo is a div to the right of the #main-header, which contains the site's second logo, if there is one.
#main-title: The #main-title div contains an <h1> element with the main title of the site
.smarty-report: This class is assigned to the main-content of any custom reports embedded in your site. Any styles that you apply to your website will automatically be applied to custom reports as well. If you would like to define special styles that only apply to items inside a custom report, then you can use the .smarty-report selector. E.g. .smarty-report p { some styles } would apply to any paragraphs inside a custom report, but would not affect paragraphs in the rest of your site.
heurist-searchFaceted-header. define it in custom css. This is the header which appears above the facet searches
Where do I put my CSS?
As mentioned above, there are five main ways you can incorporate CSS into your website.
As a global stylesheet in the website record
The best place to put your CSS is in the database record for your website. Any CSS that you place here will be loaded when visitors first visit your site, and will be applied to every page of your website. This allows you to create a consistent look and feel for the entire website, with a coherent colour scheme, fonts, and layout.
To add CSS to your entire website, click 'Menu' in the top left of the treeview in the web editor, and then click 'configure website layout'. Go to the 'Advanced' tab, and you will see the textbox where you can type in your custom CSS.

You can also access the website record in the Explore Menu, just like any other record. To find the website record, type 'website' in the searchbox, or filter by Entities in the Explore Tray, and choose 'CMS_Home' as the Record Type. Any websites you have created will appear as records in the Results Pane.

As a page stylesheet in a webpage record
You can also create page-specific CSS. This is a good idea when one particular page of your site has a special layout or functionality. That particular page may need a special set of CSS classes, and may have many special elements with particular ids.
To add CSS to a particular webpage, click 'Menu' in the treeview of the web editor, and find the relevant page in the treeview. Click the pencil icon to open the database record for that webpage. Under the 'Advanced Customisation' tab, you will find the text field for 'Page CSS'.

As with the website record, you can also locate page records through the Explore Menu. Simply look for the 'CMS Menu Entry' record type, or search for the name of the page you wish to add CSS to.

Add CSS to a Custom Report
If you wish to style a Custom Report, then you can add CSS at the top of the report, as described in the Custom Report Advanced Usage page.
Add CSS to a particular element
Your final option for writing your own CSS is to use 'inline styles'. There are two ways to do this. As depicted above, when you edit an element of a webpage in the Treeview, you can find a box for 'CSS' in the 'Edit Source' section. Any CSS you insert here will be applied to that element of the page. If you wish to provide inline CSS for elements within the page element (e.g. paragraphs in a textbox), then you can click 'Edit HTML Source', and type the inline styles into the screen.
Generally we do not advise this use of CSS. It should only be used when you encounter problems with specificity, and cannot override a global style any other way.
External CSS/JS
You can also import CSS from an external source, using the 'External Scripts and Styles' field in either the Website record or the record for a particular Webpage. The most likely use case is if you wish to use Bootstrap in your website. If you wish to use this feature, you should certainly get in touch with the Heurist team for more detailed advice.
To link to an external CSS or JS to your site, you need to write the relevant html tag in the 'External Scripts and Styles' field. For a CSS file you need to use a link tag. For JS, you need to use a script tag. So, for example, if you wish to use the Bootstrap on your site, you would need to insert something like the following into the 'External Scripts and Styles' field:
<link href="https://cdn.jsdelivr.net/npm/bootstrap@5.1.3/dist/css/bootstrap.min.css" rel="stylesheet" integrity="sha384-1BmE4kWBq78iYhFldvKuhfTAU6auU8tT94WrHftjDbrCEXSU1oBoqyl2QvZ6jIW3" crossorigin="anonymous">
<script src="https://cdn.jsdelivr.net/npm/bootstrap@5.1.3/dist/js/bootstrap.bundle.min.js" integrity="sha384-ka7Sk0Gln4gmtz2MlQnikT1wXgYsOg+OMhuP+IlRH9sENBO0LRn5q+8nbTov4+1p" crossorigin="anonymous"></script>
If you have written CSS on your own machine, and wish to upload the stylesheet, then you can choose to do this as an 'External Stylesheet' using Heurist's 'Manage Files' tool. You may find this more convenient than copying-and-pasting the CSS into the 'Custom CSS' field, particularly if you have mulitple websites using the same CSS in your database.
If you wish to take this option, upload the CSS file using 'Manage Files', and then copy-and-paste the URL for the file using the built-in URL-copying tool. Then paste the URL using the below template into 'External Scripts and Styles':
<link href=<copied url> rel="stylesheet">
=== A REPRENDRE A PARTIR D’ICI !===
Changing header styles
<to be written, please contact Heurist team for instructions / assistance>
Loading record view or custom format in a panel
The aim is to carry out a search, click on a record in the results panel, and display the data for the selected record in a separate panel. This is achieved in two steps:
- Add the panel in which you want to display the record view as a custom report widget. This is automatically tied (by default) to the search results on the same page;
- Set the results panel widget parameters to Click to view record = disable and choosing an appropriate record view template in the Record view template dropdown (record view format can be either the default format used in the standard interface or any of the custom report formats defined in the Custim format tab of the Explore pages).


To popup a new record form in a large window rather than a new tab (note that this also makes the record owned by the current user)
<a href="#" onclick="{window.hWin.HEURIST4.ui.openRecordEdit(-1, null, {new_record_params:{rt:54,ro:'current_user',rv:'public'}}); return false;}"
Running Javascript
To avoid the risks of out-of-control websites, this requires authorisation by the system adminstrator. Contact the system adminstrator / Heurist team to have your website added.
Editing pages in standard edit form
Although it is possible to edit the content of a web page directly in the standard Heurist record edit form, we recommend editing it within the CMS editor, as this provides additional capabilites including the insertion of images and database widgets (filters, visualisations and layouts).

However direct editing in the standard data entry form can be useful if you are only dealing with entering text or fixing up text in existing records.
FAQ
[Custom style for Standard Record view ?]
This issue can be resolved by setting custom styles for desired elements. I've added the following styles for your page:
.heurist-widget{
font-size:18px !important;
}
.recordTitle{
font-size:20px !important;
}
All font-size are relative to body font size
Font-size is being taken from CSS for custom report widget

 20px
20px  10px
10px
If it is not defined it takes font-size from user preferences
If both values above not defined it takes body.popup.font-size from h4styles.css 11px
Examples of how to lay out a web page using DIVs
Heurist blog page (with widgets removed)
Defines lefthand panel for saved filters or search widget and rfull height righthand panel for blog entries (a resutkls list in full content mode)
<div style="position:absolute;left:5px;width:315px;height:100%">
<p style="padding:0 5px;"></p>
<div … style="position: absolute;top:70px; bottom:5px; width: 315px;"… > </div>
</div>
<div … style="position: absolute; border: none; left:322; right:0;top:0;bottom:5px"… >
</div>
Cardinal view layout
<div id="cardinal1" style="background: white; position: relative; border: 1px solid gray; height: 100%; width: 100%;">
<div id="westpane">WEST</div>
<div id="centerpane">CENTER</div>
<div id="eastpane">EAST</div>
</div>
<div id="mywidget_2203" class="mceNonEditable" data-heurist-app-id="heurist_Cardinals">
{"container":"cardinal1", "tabs": {"west":{"id":"westpane","size":"300","minSize":"150"},"center":{"id":"centerpane"},"east":
{"id":"eastpane","initClosed":true}}}
</div>
Strategy
- Create the widgets you need without worrying too much where they are located
- Open the page in source edit and copy the source to a text editor such as notepad
- Return to WYSIWYG and add Cardinal layout widget
- Open source editor again and add the widgets within the cardinal layout divs, for example:
<div id="mywidget_6801" class="mceNonEditable" style="width:100;heigth:100;border: 1px solid gray;" data-heurist-app-id="heurist_Cardinals">{"container":"cont","tabs":{"west":{"id":"west","initClosed":true},"center":{"id":"center"},"east":{"id":"east","size":300,"minSize":200}}}</div>
Parameters for each panel can be found here https://plugins.jquery.com/layout/
Most important are: size, minSize, maxSize, resizable, closable, initClosed
- Any link on the page with parameters "id" (for the website) and "pageid "(for a menu-page) will navigate to the desired page without reloading.
<a href="?db=abc&website&id=123&pageid=456">Open page 456 of website 123</a>
- Website URL with &pageid=xx will init this page on load
- Loaded page reflects in URL
Table View widget
- There is global variable datatable_custom_render
- In custom js filed assign render function to this variable
datatable_custom_render = function(data, type)
{ if (type === 'display')
{ return '<span style="color: red; font-style: italic;">'+ data + '</span>'; }
return data;
};
- In widget properties assign this variable for desired column
{"columns": [{ "data":"rec_ID","title":"ID"},{"data":"1","title":"Title","render":datatable_custom_render}]}
It is possible to define a particular function for every column. In this case define this variable as array of function datatable_custom_render=[foo1{}, foo2{}, foo3{}] and refer them on “column” by index: "render":datatable_custom_render[2]
Load arbitrary style files
To enable bootstrap styles
- Define 3 external files to be added to page (in field 2-939)
<link rel="stylesheet" type="text/css" href="https://cdnjs.cloudflare.com/ajax/libs/twitter-bootstrap/4.1.3/css/bootstrap.css"/>
<link rel="stylesheet" type="text/css" href="https://cdn.datatables.net/1.10.21/css/dataTables.bootstrap4.min.css"/>
- Define “classes” parameter for widget options
{"classes":"table table-striped table-bordered","columns": [{ …...
==== à relire ====
Treeview Navigation widget
This is an extension of the Navigation widget. Now it has 3 modes: horizontal, vertical and treeview. It loads a page depending on “target” field
- “Inline” with usage of target field from menu/page record. By default this is #main-content - page will be overloaded
- “Inline into #page-content div” (target field from menu/page record will be ignored). You have to add <div id=”page-content”></div> next to widget div. In order they will be next to each other either use table or
- Float:left for menu widget and display:inline-block for page-content. Or display:inline-block for both
<div id="mywidget_879" class="mceNonEditable" style="background: none; position: relative; border: 1px solid green; height: 500px; width: 200px; float: left;" data-heurist-app-id="heurist_Navigation">{"menu_recIDs":"1092,1091,1090","use_next_level":false,"orientation":"treeview","target":"inline_page_content","init_at_once":true,"search_realm":"sr1"}</div>
<div id="page-content" style="display: inline-block; width: 400px; height: 500px; border: 1px solid red;"> </div>
- “Popup” (target field from menu/page record will be ignored).
- Heurist sanitises content to remove javascript which users migth have inserted in html, for security reasons. You can disable this by listing the name of the database in ..../HEURIST/js_in_database_authorised.txt
Example:
// Sep 2019: This file lists databases on this server which may include JS code in the CMS Home Page or CMS Menu records
// All other databases are excluded from executing such code. Order is unimportant.
balipaintings
ExpertNation
etc.
- The register dataset link on the Discover page is still doing nothing (Chrome, logged in)
TinyMCE erases all javascript from elements. So the only opportunity to assign event listeners is in custom js field. The same issue for Login on mapspaces.
We need to document the way to do this based on the JS in TLCMap_Clearinghosue website - Make a link (or button) popup a new record form in a large window rather than a new tab. Note that this also makes the record owned by the current user.
<a href="#" onclick="{window.hWin.HEURIST4.ui.openRecordEdit(-1, null,
{new_record_params:{rt:54,ro:'current_user',rv:'public'}}); return false;}"
rel="noopener">
- Besides storing page content in database fields, we have an opportunity to load content for site and pages either from uploaded html files or as smarty output.
CSS is responsible for colors and positions only. All other properties are set via widget options, although we define some color/appearance styles per every widget (border, background). I believe it would be better to apply our color scheme dialog for CMS website. I’ve added DT_SYMBOLOGY field to CMS_HOME in Heurist_Core_Definitions - need to synchronise CMS_HOME structure for existing databases (prior to ~21 Nov) using Structure > Browse templates. So user can set these colors via color scheme dialog.
In summary, the style of the website is defined through:
- Color scheme per CMS website - defined in color scheme dialog;
- Widget options - defined in widget properties dialog;
- Widget css - position styles (and optionally special color scheme) - defined in widget properties dialog;
- Header elements (#main-xxxx) position/visibility and optional colors - defined in “website css” field in “CMS home record”. Use “heurist-header” class for CMS header.
Parameter “style” for map widget layout_param. For example: "style":{"color":"#00ff00","fillOpacity":0}. It takes precedence over style defined in 1) top most mapspace 2) user preferences
Further documentation is in the header of websiteRecord.php
#main_header.ent_header is hardcoded in websiteRecord.php. It has the following elements
#main-logo - content defined via field "Site logo" (99-51.2-38). On click it reloads main page
#main-logo-alt - content defined via field "Supplementary logo image" (99-51.2-926)
#main-title>h2 - field "Website title" (99-51.2-1)
#main-host - information about host and heurist. Content defined in Heurist settings
#main-menu - generated based on linked Menu/Page records (99-52)
#main-pagetitle>.webpageheading - loaded Page title "Menu label" (99-52.2-1)
#main-header{
background:rgb(112,146,190);
}
- Getting a logo on the top right of a generated web page using CSS:
#main-logo-alt {float:right; display:block !important; min-height: 73px; min-width: 130px;
background:url('./?db=johns_hamburg&file=0b7475713789fb09e30334c7ae8e094b32e6bd71');
margin: 7px 4px 0 0; background-size: contain; }
- Default layout for Heurist CMS web site consists of 3 divs with absolute positions
main_header.ent_wrapper
main_header.ent_header #main_header
main_header.ent_content_full #main-content-container
Main setting for these elements is height of header. To change it set:
main_header.ent_header{height:180px} .ent_content_full{top:190px}
HEADER:
#main_header.ent_header is hardcoded in websiteRecord.php. It has the following elements
#main-logo - content defined via field "Site logo" (99-51.2-38). On click it reloads main page
#main-logo-alt - content defined via field "Supplementary logo image" (99-51.2-926)
#main-title>h2 - field "Website title" (99-51.2-1)
#main-host - information about host and heurist. Content defined in Heurist settings
#main-pagetitle>.webpageheading - loaded page title "Menu label" (99-52.2-1)
You may overwrite default styles for these elements in field "Website CSS" (99-51.99-46).
Background image for #main_header is defined in field "Banner image" (99-51.99-951).
CONTENT:
#main-content-container.ent_content_full cosist of one element #main-content
This element is emptied and reloaded for every page of website. Its content is arbitrary and defined via CMS editor or direcееly via record editor in field
"Website home page content"/"HTML content". (2-4)
After load, Heurist invokes
window.hWin.HAPI4.LayoutMgr.appInitFromContainer( document, "#main-content" )
This method replaces all div elements with attribute data-heurist-app-id to appropriate Heurist widgets (search, map, result list etc)
There are 2 fields per menu/page record "target css" and "target element". They are reserved for future use. At the moment page content is always loaded into #main-content and applied general Heurist color scheme unless the style is overdefined for particular widget.
Content of website can be defined as custom smarty template in field 99-51.2-922.
In this case designer has to define at least one element with id #main-content.
Element with this name will be used as layout container for widget initialization.
All other elements (#main-xxx) are optional.
INITIALIZATION workflow:
On server side:
- It loads Home page record
- If there is DT_POPUP_TEMPLATE field, it executes smarty template, otherwise page html structure and cotent of #main-header is generated in websiteRecord.php
On client side
- HAPI initialization, DB defintions load -> onHapiInit -> onPageInit
- onPageInit: init LayoutMgr, init main menu in #main-menu element
- loadHomePageContent(pageid): Loads content of page into #main-content and calls widget initialization width LayoutMgr.appInitFromContainer
- If database configuration permits only:
After widgets initialization it loads javascript (field 2-927) and incapsulate this code into afterPageLoad function. The purpose of this script is additional configuration of widgets on page (that can not be set via cms editor) - mainly addition of event listeners.
ToDo: This will need an explanation of how to set styles of target element - please could you give me a couple of examples here that I can expand upon:
For popup use can specify jquery dialog options:
width:400px;height:200px;title:"Kuku";resizable:true;position:{ "my": "left top", "at": "left+100 top+200"},modal draggable
Position is relative to window. User can define “of” param { "my": "left top", "at": "left+100 top+200", of:”#id-of-element”}
css for content: background:red;font-size:4em and others
For non-pop this is usual css. After loading the different content to the same container, the original style will be restored.
Target style and popup option are applied on publishing only. In CMS editor it is difficult to cope with popups.
-----------
Open websiteRecord.php. If main page is not generated via smarty template the structure of page is defined in this php script:
main-header with elements: main-logo, main-title, main-host, main-menu, main-pagetitle
And container for current page main-content.
All other style selectors (such as .hie-result-list) are defined in tinymce editor and can vary from page to page.
If using a custom report (Smarty report), none of these selectors is applicable since user can define their own custom website with arbitrary html elements.
=== à relire (fin)===
For detailed instructions and tips on configuring a website, please refer to the top level CMS websites menu entry.
Heurist is tailored to publish data in the form of a website, using its core functions to present and organise data for the public.
The website editor screen consists of a Website editor panel on the left, and the current page being edited ("This page") on the right.
Editing this page
Applying CSS
The website can be styled through CSS files which may be stored in Heurist uploaded files, accessed through records containing uploaded files <check>, placed within custom reports or entered in the custom CSS fields of the website definition record (CMS_Home)
Location of CSS files
<where to put CSS ? >
Making custom header scroll with the page
- I’ve added this CSS for this site to make the (custom) header scroll with the rest of the page.
Ian: it resulted in a large gap between the header and the content, to be investigated
div.heurist-website{
overflow-x: hidden;
overflow-y: auto;
}
#main-content-container{
position:relative !important;
top:0px !important;
}
#main-header{
position: relative !important;
}
Positioning elements
The main thing I can recall that was useful was to divide the site mentally into two kinds of page: “static” pages with project information, team members etc, and “dynamic” pages with facetted searches or other exploratory tools. The CMS generally speaking is set up to make the dynamic pages work without much trouble. It was funnily enough the “static” pages that required more fiddling, so they would scroll correctly and fill the screen properly.
As a concrete example, on a static page you often want the width to be capped. It can be difficult to read text if it stretches right across the screen. By contrast, you often want the dynamic pages to fill the screen. Heurist sites often look their best on a big wide screen, where you can have the facetted search and a nice big map fully visible.
This division between ‘static’ and ‘dynamic’ is really about the layout of the page, rather than its hydration with data. For example, I would often use a custom report for the ‘Project Team’ page, so that new team members could simply be added to the Heurist database. Thus the page is ‘dynamic’ in data terms, but ‘static’ in layout.
Another point was – I often found it difficult to position elements, because they had the wrong “position” attribute in the CSS. Basically there is a tricky set of rules about how ‘static’, ‘relative’ and ‘absolute’-positioned elements interact with each other. From memory, there were too many elements with position:absolute in the CMS template, and as a result I would often find it impossible to make parts of the page behave properly. You would set something as having “height:100%” in the web editor, and it would have no effect because it was a child of an absolutely positioned element, for example. As much as possible, absolute and relative positioning should be eliminated from the public websites, if you would like the editing panel to do what it is supposed to. The most common workaround was for people to give a fixed size in pixels to elements on the screen (e.g. width:500px). This has the obvious downside that the element will no longer scale with different devices.
Responsive design
Javascript
Domains and Redirects, Apache
Custom reports
- I want to use the title (or the family name) of the Person who was interviewed to insert in the Interview extract (Extract is child of interview is child of person). Interview has a pointer to Person that has a title (Family Name = field #1), so you first need to load the person record, then you can access the family name or other fields in Person.
{$person=$heurist->getRecord($f247.f15)} {* Person *}
{$person.f1} {*Family name *}
- How do you retrieve fields from the relationship record (as well as the related record). getRelatedRecords returns an array of related records with additional header fields: recRelationType*, recRelationNotes, recRelationStartDate, recRelationEndDate.
{$rel_record = $heurist->getRecord($Relationship.recRelationID)}
{$src_info = $heurist->getRecord($rel_record.f1160)}
Source de l'Information: {$src_info.recTitle}
Getting info from relationship records
{* Get infromation from the relationship record *}
{$rel_record = $heurist->getRecord($Relationship.recRelationID)}
{$src_info = $heurist->getRecord($rel_record.f1160)}
Source de l'Information: {$src_info.recTitle}
Start Date: {$rel_record.f10}
End Date: {$rel_record.f11}
Embedding IIIF in reports
I've tested the method for displaying a viewer in a report and it works for an IIIF image. However, I couldn't get it to work for an IIIF manifest. I imagine there are some small changes to be made, could you tell me what they are? I need to display a manifest in the registry.tpl template.
There are 3 ways
- Via wrap function (preferred)
{wrap var=$r.f1200_originalvalue dt="file" width="1200" height="800"}<br/> - Via direct manifest URL :
<iframe width=1200 height=800 src="https://heurist.huma-num.fr/heurist/hclient/widgets/viewers/miradorViewer.php?
db=pret19_test&recID=&url={urldecode($r.f1200)}"></iframe> - Via file obfuscation ID {$r.f1200_originalvalue[0].ulf_ObfuscatedFileID}
<iframe width=1200 height=800 src="https://heurist.huma-num.fr/h6-alpha/hclient/widgets/viewers/miradorViewer.php?
db=pret19_test&iiif={$r.f1200_originalvalue[0].ulf_ObfuscatedFileID}"></iframe>
Displaying images, PDFs, Carousels
We need PDFs to open inline. In Beyond1914 they are handled by a fancybox gallery plugin. There is quite a bit of custom code written by artem to get fancybox to accept and display pdfs with heurist url obfuscation. The code doesn’t seem to be in a custom report (in fact I don’t even see the page as a custom report) so I don’t really know how he did it.
PDFs in heurist are served with a http response header that indicates they should be downloaded (probably somewhere in a php file) : Content-Type: application/pdf
Content-Disposition: attachment; filename="filename.pdf"
In order to be opened, the http response header should be
Content-Type: application/pdf
Content-Disposition: inline; filename="filename.pdf"
- Database must be in js_in_database_authorised.txt
- Need to use wrap function {wrap var=$r.f38_originalvalue dt="file" width="300" height="auto" mode="link" fancybox="1"} Mode can be “link” or “thumbnail”
- It adds all required scripts and style into <head> automatically
Making websites public
Pour rendre son site web consultable sans avoir besoin d'un login utilisateur, il suffit de marquer les enregistrements CMS_Home et CMS_Menu-Page visble au publique,

ainsi que tout les enregistrements qu'on veut qu'il/elles puissent voir (pour ce dernier il suffit de faire une recherche des enregistrements à rendre publique et choisir la fonction sous Share):

et ensuite choisir Public (Record is editable by peut-être n'importe quel personne ou groupe):

Links and listeners
You can add link via “Insert Link” and specify page record id as URL. Or https://heurist…./h6-ao/588
Or directly in code <a href=”588”>Project Aims</a>
Concerning links between pages, specify the target page and search_group for widget that will listen for source events.
For example:
- for search widget search_group=sr3 search_page=”Discover”
- On discover page make sure that result List widget belongs to sr3 search group.
At the moment it triggers/listens fortwo event types ON_REC_SEARCHSTART and ON_REC_SELECT
Client side functions
A client-side function to get the databaseID:
window.hWin.HAPI4.sysinfo.db_registeredid
Besides there are helpers to convert concept codes back and forth to/from local ids
$Db.getConceptID and $Db.getLocalID (hclient/core/utils_dbs.js)
There are two parameters: [rty | dty | trm] and [ID]
$Db.getConceptID('rty', 10) returns 2-10 concept code for Person record type
$Db. getLocalID ('rty', '2-10') returns 2 local id for Person record type
Multilingual websites
We specify the language with a parameter such as &weblang=es ; if this is omitted the website uses the first or only (default) language, whatever that is. If a data value has no version for the specified language, it uses the first (default) value.
This capability can be use to define alternative site title and menu entries / rollover labels (in fields Menu label/page name, and Menu rollover descriptions).
The first vlue is the default, additional values should start with a 2 character language code (standard international list) and a version in this language. If you switch to the non-default language and the requested language is missing from the menu entries, the default language is used.

- The same system can be applied to Saved search/filter names and filter fields and facets in facet searches
- Language-specific values can be inserted (with the aid of Deepl translate) by clicking on the language button
 left of the field. This button pops up a formlet to enter alternative language versions and store them separately (translated fields must be set to be repeating value fields; within the definitions forms the fields are automatically set this way).
 - Use single line or memo as appropriate.


Website programming
Common class to init layout - HLayoutMgr
- Separate widgets/page configurations (json) and html content.
- Store json in the separate field and it is common for all lang versions of page
- Separate html content allows:
- Avoid issues with escaping/encoding
- More human friendly/readable format - can be edited directly
- Ability translate entire page
Web publication:
- While editing, Cms content can be accessed as usual via url [server]/heurist?db=[db-name]&website=[rec-id]&page=[rec-id]
- Published website: [server]/[db-name]/web/[rec-id]/[pagename].html
Pagename is unique per website, human friendly name of page.
On publishing, heurist generates html pages in generated-website folder. These html are crawler enabled (have full page header, can be loaded independently)
Smarty reports…
Cms localization:
- Widgets - dialog (via configuration widget dialog) with list of strings and html snippets that can be translated semi-auto
- Html content -auto translation with web service
Custom PHP plugins for Smarty
Custom plugins can be located in vendor/smarty/smarty/libs/plugins/ (from Nov 2024). The system adminstrator can place any number of php files into this folder (the ability to do so is not part of the Heurist web interface for security reasons). Sample code :
<?php
use Smarty\Smarty;
array_push($heurist_security_policy->allowed_modifiers, 'date_format_fr');
$smarty->registerPlugin(Smarty::PLUGIN_MODIFIER, 'date_format_fr', 'smarty_modifier_date_format_fr');
function smarty_modifier_date_format_fr($value, $date_format_fr=null){
$datetime = new \DateTime($value);
if(!$datetime){ return $value; }
if(!$date_format_fr){ $date_format_fr = "d-m-Y";}
$newdatestring = $datetime->format($date_format_fr);
return $newdatestring;
}
?>
Adding custom styles in memo fields
- Heurist allows the addition of styles in the WYSIWYG editor, in addition to Headings 1-6, preformatted and quotation.
This is done through a file HEURIST_FILESTORE/<dbname>/settings/text_styles.json,as shown below. Make sure all the keys and string values are enclosed in double quotes, otherwise PHP considers it invalid. Make sure it is owned by apache:heurist.
"formats": {
"Beleg": {"inline":"span", "classes": "Beleg", "styles": {"font-weight": "bold", "background-color": "#F2E3F9"}},
"Ergaenzung": {"inline":"span", "classes": "Ergaenzung", "styles": {"font-style": "italic", "color": "#808080"}},
"Glosse": {"inline":"span", "classes": "Glosse", "styles": {"text-decoration": "underline"}},
"BelegGlosse": {"inline":"span", "classes": "BelegGlosse", "styles": {"font-weight": "bold", "background-color": "#F2E3F9", "text-decoration": "underline"}}
},
"style_formats": [
{"title": "Beleg", "format": "Beleg"},
{"title": "Ergaenzung", "format": "Ergaenzung"},
{"title": "Glosse", "format": "Glosse"},
{"title": "Beleg Glosse", "format": "BelegGlosse"}
],
"block_formats": [
]
}
Debugging browser behaviour
Sometimes the application appears not to have changed something you know you have changed.
The first step is simply to delete browsing data (downloaded files only, NOT the cookies) and reload the page.
If this does not work, try the following.
1) First prove what Chrome is actually executing
- DevTools → Network
- Tick Disable cache (works only while DevTools is open)
- Reload
- Click the request for editCMS_SelectElement.js
Look at:
- Status / Size: if it says (from disk cache) or (from ServiceWorker) you’ve found the culprit.
- Response tab: search for your edited lines and confirm whether the response contains them

If the response still shows old code, it’s caching upstream (CloudFlare Service Worker)
2) If it’s a Service Worker (very common)
In DevTools:

Application → Service Workers: tick Update on reload
Application → Storage: click Clear site data (or “Clear storage”)
Then reload again with Network tab open.
09b: Domains, URLs, PIDs and custom website templates
Integrating a website or individual pages
with your existing domain
Heurist can generate a complete self-contained website - typically consisting of a header, footer, menu and web pages embedded in this structure - or it can create individual web pages which can be displayed as standalone pages or embedded in another webiste. How do you make these part of your existing domain and/or website?
The website and/or individual web pages will normally include content (including data and images) and functionality (including searches, reports and visualisations) dependant on Heurist's database engine, and must therefpre be generated by an instance of Heurist - they cannot live independently on a web server as they are generally far more than simply static html. The server can be one of the public services (eg. heuristref.net or Heurist.Huma-Num.fr) or your own private Heurist server.
The database you wish to publish must be on the corresponding server - for security and sustainability reasons, each instance of Heurist only has access to databases on its own server (or stack of servers).
Simplified/clean URLs
The standard Heurist URLs use parameters at the end such as ?db=my_database&tpl=xyz. These are not particularly 'friendly' for web indexing and interoperability. They can therefore be replaced on the servers managed by the Heurist team (HeuristRef.net and Heurist.Huma-Num.fr) as shown below. The system adminstrators on other servers can configure their servers appropriately to use these URLs (se later).
web - website Hml - xml output View - record view Tpl - smarty output
- direct access to a web site → https://heuristref.net/Rebekah_ARBookReviews/web/
- Show an individual record with a smarty template (.tpl file): → https://heurist.huma-num.fr/judaism_and_rome/tpl/public-record/75
- Show a query using a smarty template (.tpl file): → https://heurist.huma-num.fr/judaism_and_rome/tpl/public-record/q/t:10
- Show an individual record in html recordview: → https://heurist.huma-num.fr/judaism_and_rome/view/75
- Show an individual record in XML: → https://heurist.huma-num.fr/judaism_and_rome/rec-hml/75/d2
Generate XML in hml format for a given query: https://heurist.huma-num.fr/judaism_and_rome/hml/t:5
Add /d2, /d3 etc. if needed: default to …/d1 = depth 1 if the depth parameter is omitted
For tpl and hml besides record id, it is possible to specify comma separated list of ids or heurist query (without the q=)
For server administrators
The URLs above use Apache rewrite rules. See the program code under Server scripts for the full set of rewrites.
RewriteRule ^/([A-Za-z0-9_]+)/(web|tpl|hml|view)/(.*)$ /h7-alpha/redirects/resolver.php
RewriteRule ^/h6-alpha/([A-Za-z0-9_]+)/(web|tpl|hml|view)/(.*)$ /h7-alpha/redirects/resolver.php
- If the DBName is followed by number(s) directly (no alphabetic keyword), "web" is assumed or inserted:
heurist.huma-num.fr/IDENK/3/37471 should be equiv. of heurist.huma-num.fr/IDENK/web/3/37471
https://heuristau.net/h7-alpha/ART/web/147 = https://heuristau.net/h7-alpha/ART/147
If the DBname is followed by a word listed in the URLSubstitutions.txt file (see below) replace the words with the corresponding numbers and process the result:
Examples:
Contacts 157/150
Tentang 174/175?lang=fre
MED/{d+} /tpl/TEST1/[{"t":"5"},{"f:203":"{1}"},{"sortby":"t"}]
IND/{d+} /tpl/TEST1/{1}
test2/{d+} ?w=a&template=test2.tpl&mode=html&q=[{"t":"5"},{"f:203":"{1}"}]
As a keys we can use patterns with simplified tokens:
"{d+}" or "{\d+}" => "([0-9]+)" One or more digits
"{d*}" or "{\d*}" => "([0-9]*)" Zero or more digits
"{w+}" or "{\w+}" => "([A-Za-z0-9_]+)" One or more word characters
"{s+}" or "{segment}" => "([^/]+)" One URL/path segment
"{any}" => "(.+)" One or more of any character
Or standard regex
~^orders/([0-9]+)$~u
Examples:
"orders/{d+}" => "~^orders/([0-9]+)$~u"
"users/{w+}" => "~^users/([A-Za-z0-9_]+)$~u"
"pages/{segment}" => "~^pages/([^/]+)$~u"
"files/{any}" => "~^files/(.+)$~u"
"~^orders/([0-9]+)$~u" is returned unchanged.
In values use {nnn} to replace regex matching values
Here is a typical example of the substitutions file allowing the use of textual URLs for the user in place of the numeric URLs which the system recognises:

Self-contained website
Whatever the server which serves the database and website, you can make this appear as part of your domain. You can use an existing domain or purchase one quite cheaply if you don't already have one (typically $10 - 40 per year for .net and .org domains, but depends on the 'desirability' of the name - do a search for Cheap domains and shop around). Then ask the domain to point to your database.
There are two ways of pointing to the database; with or without masking.
With masking you will not see the URL change as you navigate within the website. These are good examples: http://digitalharlem.org/ and https://c18librariesonline.org/?db=Libraries_Readers_Culture_18C_Atlantic&website. The disadvantages are that you can't bookmark or address a specific page in the website or easily obtain page use statistics.
Without masking the domain will get you to the website, but then you will see the full Heurist URL. There are some advantages in this, notably that you can bookmark or point people directly to the URL of a specific page in the website and monitor its use, rather always getting the home page. The developers of website often think it is important to show simplified domain-specific URLs, but we think that concern is probably overdone, once users arrive on a website they are mostly looking at the page, not the URL.
Existing website
If you already have a website with a domain, there are a number of options for integrating Heurist web pages.
First, migrate your existing website to Heurist. In the long term this can save you a lot of trouble and probably money, as well as increase the chances of longer-term sustainability, because you don't have to maintain a separate web service or keep upgrading the website as the underlying CMS changes (since 2020 we have worked on migrating a number of CMS websites for researchers who do not have the technical support or can see the ongoing cost of migration). Heurist can, with a bit of work, reproduce most websites, although you may need to stick with your existing CMS if you have developed a complex and graphically rich site with specialised interactions, or use a lot of special functions such as ecommerce components.
Secondly, set up a link, or one of the menu items in your existing website, to switch the user over to your Heurist website, or to a single page, in order to display interactive searches and visualisations from the database. Within the Heurist website or page, provide a link to switch back to your existing website (which presumably contains higher level description of the project, and perhaps other databases). This can be made fairly seamless eg. by reproducing a narrow header bar (to maximise real estate) in the style of the main website and putting a Home icon or Back to website link in that header bar. You can also make several menu links to separate standalone Heurist web pages, each of which will navigate back to a specific location. You could also generate these as popups. If you use a domain with masking you can also just use a Back instruction to go back to the point you came from in the main website. You could also reproduce the menu structure of the main website and have the menu entries jump back to the appropriate place in the main website.
The third method - not our preference - is to create one or more standalone Heurist web pages and embed them directly in the existing website using iframes. The problem lies in maximising the space available for the interactive Heurist page and avoiding double scrollbars. It can be done, but will require an understanding of divs, CSS and Javascript if you don't want it popping up in a too-small fixed size box.
Assistance
We (the Heurist development team / Heurist Network) are generally happy to help set up websites, but as this tends to be project-specific rather than general development of benefit to the whole community, we can only really afford to do this, beyond simple advice, for projects which help sponsor Heurist development.
Custom default website layouts
Custom website layouts
Heurist defines a default style for websites it generates, which can be overriden to some degree with stylesheets within each website. However the owner of a Heurist server may want to define standard headers, footers and styles for websites run on their server to conform, for example, to corporate branding.
A server can be set up with one or more custom website layouts which determine the layout of the header and footer section of the website, and potentially of behaviours and styling within the content.
One layout may (optionally) be selected as the default which is used every time a new site is created, but the creator of the website can also specify a different layout among those defined.

Website layout is controlled by files in hclient/widgets/cms. This contains a default template cmsTemplate.php which contains instructions on how to develop further templates.
Default layout
To set the default layout of new websites created on the server, place this file or an edited version of this file in the parent directory of the Heurist codebase, normally /var/www/html/HEURIST.
The location of the template files can also be set in heuristConfig.php, defined by $default_CMS_Template_Path
Selecting a custom layout
If there are additional template files available, you can apply one of them to an individual website by setting the name in the Website template field of the CMS Homepage record (accessed through Publish > Website header / layout)

The template name can be specified without a path, in which case Heurist looks for it in the parent directory of the Heurist codebase (normally /var/www/html/HEURIST) or the directory specified by $default_CMS_Template_Path, or it can be specified with a path relative to the codebase as shown above.
The template file is a .php file but the extension can be ommitted.
Creating a template
To create a Heurist CMS template, first look at the example in hclient/widgets/cms/templates/cmsTemplate.php
This is the standard template for Heurist websites, as used in this help system. It can be modified by addition and replacement to create the template you require.
The template requires certain elements:
1. a php include in the <head> section: include $websiteScriptAndStyles_php;
2. Definition of html elements with the following ids: main-title, main-logo, main-logo-alt.
The content of these elements can be replaced with values defined in the CMS Homepage record.
3. Definition of an html element with id: main-content. It will be populated with content based on the menu item selected.
4. For Heurist widget menu
<div id="main-menu" class="mceNonEditable header-element" style="position:absolute;
top:110px;width:100%;min-height:40px;border:2px none yellow;color:black;font-size:1.1em;"
data-heurist-app-id="heurist_Navigation" data-generated="1">
<?php print $page_header_menu; ?>
</div>
5. Optional: if using bootstrap as part eg. of a corporate website style, you may need to add the following for the bootstrap menu:
3) Upload files for records to the different than HEURIST_FILESTORE folder.
To define other that HEURIST_FILESTORE folder, system admin has to define
$defaultRootFileUploadPath and $defaultRootFileUploadURL parameters in heuristConfigIni.php
1) website template that uses UHH code of style (using insert.js)
There is cmsTemplate_HamburgUniversity.php. It uses https://www.uni-hamburg.de/onTEAM/inc/dom/v43/insert.js
User has to define the name of this template in “Custom website template file” field of main menu record.
Ch 10: Adminstration of databases
Admin menu
Functions for creating and managing a database, export and archiving.


- Database
- Open – browse databases on the server and select a database to open
- New – create a new database with a default set of useful structure and optional test data
- Clone – makes an identical copy of an existing database with exactly the same structure, data and access rights
- Rename – rename the current database
- Clear – delete all data records in the database but leave the users, workgroups and structure intact. Uploaded files are not deleted
- Delete – delete the entire database
- Restore – restore the database.
- Manage Users
- Workgroups – create and edit workgroups, add users to workgroups and assign roles
- Users – create new users and edit existing user information
- Import user – import user credentials from another database on the same server
- Utilities
- Verify integrity – run a range of checks, report errors and allow ficing of errors
- Manage files – view and edit metadata and delete files (images, documents etc.) uploaded to the database
- Rebuild record titles – rebuild the constructed titles used to represent records in lists of results
- Rebuild calculation fields –
- Find duplicate records – find records with similar constructed titles and allow merging as required
- Interaction log –
- Server manager
- Manage databases – functions to help the system administrator manage databases on the server. Requires special password.
DATABASE
Open
Use this to select a database among all the databases on the server. You will be able to look for a database by its name (any string). You can only open databases to which you have access.
You can filter for the database you are after (often identified by your 'prefix', being the 5 first letters of your family name, unless you changed it or the database was created for a specific project). Clicking on its name will open a new tab and prompt your user name and password before accessing it.
New
Creates a new database, owned by you, populating it with a set of frequently used and key record types, fields and vocabularies.
The creator of the database is its owner and can manage it, its structure and users.
Some record types and fields are protected against deletion as they are required by the system, e.g. for mapping or bibliography synchronization, but some may be freely modified or deleted.
Naming the database : avoid not specific enough names. It is important to choose a short but informative name, since there may be thousands of databases on the server. Names are case sensitive ; punctuation is not allowed except underscore. Avoid using "test" in your database name, the word adds nothing, your database is a test until it is not a test ...
Managing users : you can define who, apart from yourself, has access to the database : see @todo link to “Manage users : Workgroups / users / import users”.
The properties of the new database are managed in “General information”: menu Design > Setup > Properties. The creation process only fills in a few fields of information : it is recommended to complete this set. See below @todo link to “General information”
Clone
Makes an identical copy of the current database. That means all structure, all data (attachments included) and all workgroups/users/permissions are copied over. You can copy the structure definitions into a clone database without copying the data. For this, please select “No data (copy structure definitions only)”.
If you want to make a backup, prefer @todo link to Publish > Archive Package.
You can clone a database on which you have limited rights, but you will only have the same rights on the clone.
To clone the database, it should be “registered” (see below @todo link to, menu Design > Register). This action requires an administrator password.
WARNING : Beware of making copies of databases containing many large files, as all uploaded files are copied. Please avoid making clones, particularly of large databases, as they use up lots of disk space and can annoy the IT centers hosting the service. If you need a copy for an experiment, please delete the original or the extra copy once finished.
This function simply copies the current database to a new one with no changes. The new database is identical to the old in all respects including users, access and attachments (beware of making copies of databases containing many large files, as all uploaded files are copied).
Rename
Rename the current database. The new name follows the same rules as the name of the database (see above @todo link to New).
The process will perform the clone and delete functions back to back in order to rename the current database, so please ensure all edits/changes have been saved before proceeding. Archiving file for the database to be renamed is optional.
After successful completion you will be required to login into the newly cloned database.
If Javascript has been enabled for this database you will need to ask your sysadmin to re-enable it for the new name, otherwise your website(s) will not work properly.
Clear
This clears all data records (included bookmarks and tags on specific records) from the current database but database definitions (record types, fields, terms, tags, users) are not affected, uploaded files not deleted and users, workgroups and structure left intact. The record ID counter is reset to zero so new records will have an ID starting at 1.
If the database has been registered, its database ID will not be affected.
Delete
Delete the current database.
WARNING : Be careful, the deletion is permanent, irrevocable!
This deletes the database completely, including all uploaded files and other work. Although deletion makes a temporary archive copy which can be restored for a period, this is not guaranteed and makes significant work for the server manager, so please be sure you want to delete the database.
Archiving all database files is optional.
Restore
#to be documented, asks for an System Administrator password
This allows to restore an archived database. A system administrator password is required.
Properties of your database (id 599??)
You can define the properties of your database in Design > Properties.
General information
The registration number is created when you Register @todo-link (to register chap 3) the database, if not it displays 0. The database format version number indicates the underlying Heurist database version.
The other details were entered when you created (and optionally registered) the database, and can be edited here. You can determine the name of your database, a photograph associated with the database, the rights to the database and its data, the name of the owner of the database and a description of the database.

Behaviours
### TO BE CONTINUED

Set specific behaviours, as follows:
Synchronisation and Indexing

These sections will be described in this help where they are relevant. If you do not understand them then we recommend leave as is or contact the Heurist Team for further details.
MANAGE USERS
See @todo link to Getting started > 4. Collaborative work > 4.1. Workgroups and Users
The conditions of access, management and dissemination of the content (data) are based on the combination of users and workgroups. A user is assigned to one or more workgroups ; a record or a field is managed, displayed according to workgroups.
fin de l’étape de révision
Workgroups

This function manages workgroups, which can be added, edited and deleted. The Database Managers workgroup (= workgroup 1) can’t be deleted. New users can be added.
It allows users to be allocated to workgroups and the setting of access roles (administrator or member) in each workgroup.
Option “Membership” allows to select the displayed information : All Groups / My Groups / Admin Only / Member Only.
When a user logs in to Heurist, he is identified as a Member or Administrator of one or more Groups.
By default, the following groups are created:
- Group 0: All Users (not visible)
- Group 1: Database Managers
- Group 2: (not visible) @todo: to be documented
- Group 3: Other users
Database structure can only be modified by administrators in the Database Managers workgroup, although other users can add terms to term fields (dropdowns) during data entry. Each record is owned by a workgroup, or by an individual user, and only the owner can edit the data within the record.
Other Workgroups can be created, with specific rights on specific parts of the database (eg., Record types etc.). User rights depend on the access control table referenced by the Heurist database into which they log (See Permissions by Role/Group below).
A central control table determines the group a user belongs to and what roles they have (Administrator or Member). By default, Heurist databases will use the central control table in hdb_HeuristSystem. Other Heurist databases may defer to the access control table in another Heurist database. For example, the students in a class might create databases that get their login information from the control table in a shared class database, in which case the rights will extend across all the databases created by other students (allowing students to log in to one-another's databases, although not necessarily to see any information, depending on how the data is locked to groups).
Heurist's security model for database access allows you to manage groups and users and their access permissions in a controlled and centralised manner.
The Workgroup “Database managers” contains the administrators of the database. The first user (user #2) has special status as the master user. They cannot be deleted.
Users
This function allows the editing of user's data such as name, password, email, interests etc. It also allows addition of a new user, deletion of users, or de/re-activating a user.
Modifications can only be made by the user themself or by the administrators in the Database Managers workgroup.
Users
List of users
The list of users is accessible through the Admin > Users menu.
The list can be searched.
Users’ credentials and information can be edited by an administrator of the workgroup “Database managers” (menu “Edit”) and their roles and membership in workgroups can be edited with “Edit membership”.

User creation


Import user
If a user is required who already has a profile in another database on this server, this function allows selection of the database and import of the user's profile.
The workgroup membership and access rights of the imported user are not assigned automatically, as they may be inappropriate. After import a dialogue allows the user to be assigned to workgroups as required, with a specified role in each (administrator or member).
Verify integrity
Databases are very complex entities, and while the software tries to avoid errors, some can creep in, notably during the import of data where we have preferred to relax data verification in favour of fix-up within Heurist, rather than requiring data to be made perfect before import.
A range of different structure and data integrity checks are run and errors are reported, along with buttons to fix certain structural errors and links which retrieve sets of records with a particular type of error, allowing the records to be corrected.
Errors reported include: structural errors, bad pointer fields, orphaned records, missing values and wrong number of values in a field, invalid characters, bad title masks, errors in dates and unrecognised term values etc. Green text indicates OK, orange indicates a problem.
Manage files
Displays a browser view of all files (images, documents, spreadsheets etc.)uploaded to the database. The files can be filtered by filename, path and file type, sorted by nmame, by size, or by date uploaded, the metadata on the file can be edited, and files can be deleted.
Files can be referenced in multiple records, but can also be orphaned (ie. not referenced by any record). Files can be referenced both as File field values, or as links or images within an html text eg. for CMS web pages or blog pages. Imported files will initially be orphaned, until Index media is run (which creates a Media item record for each file without such a record) or they are referenced manually within a record.
Manage files can also manage links to external files (files referenced via a URL to a stable repository on the internet) which are treated exactly like uploaded files for most purposes. External references to an external video streaming server are recommended for all videos, both to reduce server storage and load and because streaming services will do a better job of serving videos.
Rebuild record titles
Constructed record titles are short(ish) titles generated automatically for each record by combining data values stored in fields in the record. This allows the record to be easily identified in result lists.
Constructed record titles can become out-of-date where one record type references the constructed title of another in its constructed title. This does not in any way affect the operation of the database, it is purely cosmetic.
Running this funtion will rebuild all constructed titles from the data. If there are several levels of dependence you might need to run this function a couple of times to correct all titles.
Find duplicate records
Flexible data entry and repeating fields makes it hard to block the entry of duplicate records. This function compares the constructed titles of all records in the database and reports groups of records that appear to have similar titles. The sensitivity of the comparison can be varied, and the comparison can be restricted to records of the same type or applied across record types. Where duplication is incorrectly suggested, that cobination can be blocked from further reporting.
Controls against each group identified allow merging of records deemed to be duplicates. Fields which occur in more than one of the merged records can be added as repeats or one value can be chosen over the other before the merge is actually carried out.
All pointers to merged records are redirected to the merged result, as are PID references to one of the merged records. Tags and reminders are also attached to the merged result.
Manage databases
This section has a special password set by the server manager. It contains functions for reporting on the databases held on the server, checkign for integrity across all databases and so forth.
URL verification
Integrity checking of the whole database
Verify Integrity
As your Heurist database grows, its structure may change, team members may make mistakes, or you may import imperfectly structured data into the database. Unlike many databasing systems, Heurist is quite forgiving, and will allow you to bring imperfect data into the system. As this imperfect data may create problems, however, we provide you with the ‘verify integrity’ tool in the Admin menu, which will scan through your database and identify any problems in the structure of the data. You should use this tool from time to time, to make sure that all your filters work correctly and your data analysis is accurate. As soon as you click on the tool it will conduct the scan, looking for 16 common kinds of error:

If it detects a particular kind of error, simply click on the highlighted heading to open up the correction menu. In this case, some dates in the database are recorded in an ambiguous or inefficient format. Heurist has fixed some of the dates because they could be interpreted easily (e.g. 31-Aug-1945). Others are ambiguous (e.g. is 8/5/2011 the 8th of May 2011 or the 5th of August?). In these ambiguous cases, Heurist will ask you to confirm the date format for particular dates before you click ‘Correct’ and convert them into a standardised format. Like other databasing systems, Heurist prefers the ISO datetime format: YYYY-MM-DD HH:MM:SS.

The other error types will present you with a different correction screen, but the principle is the same: Heurist will try to fix errors automatically where possible, but you may need to provide some input to remove errors.
webpage: Verify Structure id 632

Finds errors in the database structure,
This option scans for errors and inconsistencies within the database and data (such as invalid record types, field codes and term codes, as well as records with a wrong or inconstant structure) allowing you to fix them, as follows:
record pointers which point to an invalid record (no record for that ID)
record pointers which point to the wrong record type
records which have unrecognisable term values (id does not exist)
records which have invalid terms (terms are not as specified for a field)
records with single value fields with more than one value
records with missing or empty required values
records with extraneous fields (fields not defined in record type structure)
invalid references within the Heurist database structure for Field Type Definitions (these should arise rarely)
A scan is run as soon as you select the option. Any inconsistencies are identified.
If inconstancies are found, you have the option of correcting the error(s) by:
Clicking the Edit Record option at the start of any record to edit that record.
Selecting one or more records and displaying these in the Search Results pane: click show results as search.
Selecting any option provided. For example, to remove faulty pointers, select the relevant check boxes, and click Delete All Faulty Pointers.
Or by otherwise following the instructions.
Once you apply any fixes it is best to select the Refresh option, then select the Verify option again, until all errors are removed.
Users and Groups
webpage: Manage Your User Info id 571
Access | My User Info
This option shows your user details (your profile) entered when you registered or were added as a Heurist user.
You can change the properties as required (a password change requires logging in again).
webpage: Users id 514
You can create an edit users in the database in the Admin menu.
(See Security Model for details of the various groups a user can belong to and their access privileges.)
The Manage Users dialog shows all users or for selected groups (based on your Filter settings).
Create User
Select Create New User. Complete the user details, including the Additional Details section if required, and click Save.
Note. By default, the Login Name field mirrors your email address, as this is something users will remember. You can enter an alternative Login Name if you wish.
The user is created and added to the Users list. A User ID is generated and added to the user's details.
If required, supply the new user with their login details (via their email) and request them to update their password.
Note. To add the user to an actual database, and give them a role, see My Workgroups.
Edit User
You can edit a user's registration details by selecting the Edit icon for that user.
Note. If you have changed the password, the user needs to log out and log back in with the new password.
webpage: Change database ownership id 709
Users and groups administration
Add a New User
When you create a database, you are the only user (other than Heurist designer Dr Ian Johsnon, who is added automatically to every database to provide support). To add more users, go to the ‘Users’ tool in the ‘Admin’ menu. It is good practice to give each user of the database their own account, rather than sharing a login. To add a new user, simply click ‘+ Add new user’ at the top right of the screen:

This will bring up the ‘Add User’ menu. For new users, do make sure to include a password. New users will recieve an email from Heurist providing them a link to the database and also their username and password.

Managing Workgroups
All users should be assigned to ‘workgroups’ in the database. Workgroups are an essential part of Heurist’s ‘permissions’ system. When you add or edit records in the database, you can choose which workgroups are able to view or edit records. Some sensitive or important records (e.g. the project website) may only be editable by Database Adminstrators. Other records may be editable by any user, or just by research assistants. To define such permissions, you first need to assign your users to different workgroups. In the ‘Users’ tool, you can change a particular user’s workgroup membership by clicking on the grey membership icon in the membership column:

While it is possible to add or edit workgroups from the previous screen, you can also gain an overview of all the workgroups in your database from the ‘Workgroups’ tool. You can create a new workgroup by clicking ‘+ Add new group’ in the top right. In the below example, I create a specific workgroup for ‘Research Assistants’.

Managing user permissions
We will cover this in more detail in a later tutorial. For now, I will just direct you to a few of the ways that you can manage users’ permissions in Heurist. In Heurist, user’s permissions are recorded seperately for each record in the database. Each particular record is ‘owned’ by a particular individual or workgroup, can be edited by a particuar individual or workgroup, and can be viewed by particular individuals, by particuar workgroups, or by the public. You can set the permissions for a new record by clicking ‘permission settings’ in the new record pane:

In the ‘Record addition settings’ popup, you can choose who is able to view or edit a particular record. Click ‘Add record’ to create one record with you chosen settings, or click ‘Save settings’ to make your chosen settings the default for all new records.

You can easily alter the permissions for existing records using the ‘Share’ tool in the ‘Explore’ menu. This allows you to change the permissions for selected records, or for all the records in the resultset for your current filter (see Tutorial 4).

Find duplicate records
If you are running a large project, or importing data into Heurist from other sources, it is likely that you will end up with duplicate records. While it is possible to manually merge records using the ‘merge’ tool in the Explore menu, you can also search through the whole database and look for duplicates using the ‘Find duplicate records’ tool in the Admin menu. Choose which record type to check, set how strictly the records should be compared, and choose which fields should be used to compare the records. In the video, I search for Political Parties, comparing them by their Name/Title and Location, and allow up to 5% difference between them. After you click ‘Find duplications’ Heurist will list any possible duplicates on the right of the screen. If you think they are in fact duplicates, you can click ‘merge this group’. If you are certain they are not duplicates, you can click ‘ignore in future’:

Once you click ‘merge’, you will be asked to select a ‘master record’, and then tick the ‘duplicate’ checkbox next to each other record that you think is a duplicate:

On the final screen, you will be asked to pick which data items should be preserved when the records are merged. For example, a Political Party can only have one Name/Title in this database. Which Name/Title should be used in the merged record?

webpage: Workgroups id 515
Access | My Workgroups
The My Workgroups dialog shows groups that you are a member of, sorted by Group Id (select a different Show checkbox to get different views).
Note. Owners and Administrators can manage workgroups and workgroup members (users). The person creating a workgroup becomes an Administrator of that workgroup and cannot be removed from it. You can, however, temporarily remove yourself, as Administrator or user, from any workgroup. As an Administrator, you can create and delete workgroup, add users (workgroup members) to any workgroup, and manage workgroup tags. (See Security Model for details of the various groups a user can belong to and their access privileges.)
Click on the Admins information icon to view the group Administrator(s) The number of members in any group is shown under the Edit Membership column.
About Changing Database Ownership
The creator of a database is automatically added to the Database Owners Group and made Owner of the group. As Owner, you can log into the new database with your existing name and password (the name and password you used to log into the database from which you created the new database).
Note. If you have created the new database when logged into another database with a guest password (e.g. guest + guest), this will be the Owner and password for the new database. Your first step should therefore be to change your user details to your own name (and password).
You can assign another user as Owner by updating your details to those of the new Owner.
Add a Workgroup
Click Add New Group. In the Create New Group dialog, enter details for the new group and click Save. The new workgroup ID is then generated.
Note. You can temporally disable a workgroup by deselecting the Enabled checkbox.
Edit Workgroup Properties
To edit the workgroup properties, click the Edit icon in the Edit column and make any changes.
Edit Workgroup Membership
To add/edit members of the workgroup, click the Edit icon in the Edit Membership column, to show the current members of this group.
To add an existing user, click Find and Add User. Use the Filter options to narrow the list of users. Select the checkbox for the user or users you wish to add and click Add Users to Group. If a user does not exist, you can create them by clicking Create New User (see Manage Users). Select a role for the user via the Role dropdown: Admin or Member.
Click Back to Groups to return to the Manage Groups page.
Note. To remove the member (this does not delete the actual user), click the Delete icon for the user.
Getting user from another database - credentials
webpage: Import Users id 638
Access | Import User
To import a user (from another database), select the database you wish to import from. Then, from the Choose User... dropdown, select the required user and click Insert User.
The user properties can then be edited, via Manage Users and can be added to a workgroup via My Workgroups.
webpage: Self-registration id 754
Self-registration
Heurist is being used in a number of institutions both as a research tool for graduate students and as a teaching platform to teach database principles.
There are two main ways you can use Heurist in teaching:
Students create their own databases. Students are free to create databases on our free hosted services just as their teachers are.
The teacher creates a database, and then adds students to it.
Adding students to an existing database
We will add some notes here on how best to use Heurist in a teaching context.
Creating logins
If you wish to give a class access to a shared database eg. to try out different searches, proceed as follows.
Allow Registration in Design > Properties.

This will allow them to request registration:

Their profile is automatically added to the database, but disabled. You only have to make them active by clicking on the pencil in the Edit column. It doesn't matter if they receive the email or not, their profile will be established.

You can then also add them to a students group (for example) by clicking on the pencil in the Membership column; it takes longer but gives you more control, for example adding saved searches under that group.
If all records are made visible to all logged in users, but owned by Database owners (or another group of which they are not members), the students can use them but cannot change them.
Change database ownership
Often the creator of a database, and by extension the owner of it, will need to transfer the database to someone else. They may be a research engineer or assistant who has set up the database for a researcher, and once this task is finished the person may leave the project and/or the researcher may wish to become the owner.
The owner of a database (user #2) can make someone else the owner of the database. This is simply a 'swap places', so any resources owned by or accessible to the original owner become the property of and accessible to the new owner, and vice versa.
- Edit the user profile of the person hwo is to become the database owner (Admin > Manage Users > Users)
- Click the Transfer Ownership button at bottom left, indicated below.
The new owner will become user #2 and will have the same rights as the original owner, and vice versa.

SAML authentication
webpage: External authentication (SAML) id 796
In order to add SAML authentication (one or multiple authority servers) to a Heurist server, proceed as follows.
A) Install and configure simplesamlphp
https://simplesamlphp.org/docs/stable/simplesamlphp-install.html
https://simplesamlphp.org/docs/stable/simplesamlphp-sp.html
In short:
1. Unzip simplesamlphp to /var/simplesamlphp
2. Add Alias to /etc/httpd/conf.d/vhost_heurist.conf
<VirtualHost *:443>
SetEnv SIMPLESAMLPHP_CONFIG_DIR "/var/simplesamlphp/config"
Alias /simplesaml "/var/simplesamlphp/public"
<Directory "/var/simplesamlphp/public">
Require all granted
</Directory>
3. In /var/simplesamlphp/config/config.php
$config = [
'baseurlpath' => 'https://heurist.huma-num.fr/simplesaml/',
...
'auth.adminpassword' => 'some_pwd',
4. Create a self-signed certificate in the cert/ directory.
5. In /var/simplesamlphp/config/authsources.php define one or several sources:
// An authentication source which can authenticate against SAML 2.0 IdPs.
'BnF-sp' => [
'saml:SP',
'privatekey' => 'saml.pem',
'certificate' => 'saml.crt',
// The entity ID of this SP.
'entityID' => 'https://heurist.huma-num.fr/',
// The entity ID of the IdP this SP should contact.
// Can be NULL/unset, in which case the user will be shown a list of available IdPs.
'idp' => 'https://pfvidppro.bnf.fr/idp/shibboleth',
.....
5. To check installation https://heurist.huma-num.fr/simplesaml/module.php/admin/
6. In order to complete the connection between your SP and an IdP, you must exchange the metadata of your SP with the IdP. The metadata of your SP can be found in the Federation tab of the web interface. Copy the SAML 2.0 XML Metadata document automatically generated by SimpleSAMLphp and send it to the administrator of the IdP. You can also send them the dedicated URL of your metadata, so that they can fetch it periodically and obtain automatically any changes that you may perform to your SP.
You will also need to add the metadata of the IdP. Ask them to provide you with their metadata, and parse it using the XML to SimpleSAMLphp metadata converter tool available also in the Federation tab of the web interface. Copy the resulting parsed metadata and paste it with a text editor into the metadata/saml20-idp-remote.php file in your SimpleSAMLphp directory.
B) Configuration in Heurist
1. in heuristConfigIni.php
$saml_service_provides = array("BnF-sp"=>"BnF Authentication"); You may add more than one service to this array (separated with commas)
2. In user edit form
Select "Service Provider". Define "User ID" in external service or "Check by User email" or both. These values will be validate against UID and email that will be obtained from IDP after external authentication.
It is possible to define authentication for several Services per user (if they are listed in $saml_service_provides in heuristConfigIni.php)

C) Login
Login with the authentication section on the right of the login form:

Broken URLs
No content
Database functions - open, create, clone, clear, delete
webpage: Open a Database id 577
You have permission to open the following types of database:
Database that you have created and are therefore the owner of.
Database that you have been made a member of (i.e. a member of at least one of the database's workgroups) and to which you have been given login credentials.
Publicly-accessible databases. The Heurist Index makes available to all users all Heurist core databases as well as all registered end-user generated databases.
To open an existing database
If you have just created a new database, you can click the database link in the Confirmation page.
If you are not logged into any database, navigate to the Heurist Project Page and click Browse Databases or navigate directly to the Heurist server address (e.g. http://heurist.sydney.edu.au/heurist/). From the displayed list of registered databases, select the database. You may need to press Login to display the Login page.
Alternatively, if you know the specific URL of the database (e.g. http://heurist.sydney.edu.au/heurist/?db=dbname, where dbname is the name of your database) you can open it directly by entering the URL in your browser (you can bookmark the URL in your browser for convenience.)
If you are logged into a database, select Database | Open Database from the Main Menu (top-right of the Home screen). A list of databases (sorted alphabetically) on the server is displayed:

Databases are sorted alphabetically. To find a database in a long list, press Ctrl-F to search for part of the name.
This list can be filtered as follows:
User (the default). Shows only databases that you have access to (i.e. databases available to all users, or databases that you are either the owner of or belong to as a workgroup member).
All. Shows (registered) databases created by everyone, and therefore may include databases that are restricted to you.
Administrator. Shows only databases that you are an administrator of.
Click the database you wish to open.
Note. If your login details have been stored within the browser, you will be logged in automatically. The database opens in a new browser tab; it does not close the original database if one is open. You can therefore have several databases open in separate browser tabs.
If the Login page displays, enter your Username and Password (those you supplied when you registered and which are also contained in your registration confirmation email):

Note. For some publicly-accessible databases you may be able to login as a guest user using the guest credentials (e.g. Guest/Guest).
The default Remember me option is recommended when you are on a secure computer. Your login details are remembered for each database you create (for 30 days), allowing you to open the database without having to re-enter your login details each time.
Note. If you forget your current password, you can apply to get a new password by selecting Click here to reset it. The new (randomly generated) password is mailed to your email address (as registered within your User Profile settings). You may edit the password once it has been reset (see Profile | Preferences). If you do not receive an email within 30 seconds or so after clicking this link, Heurist may not be set up properly to function with your server's email system, in which case you should contact the database owner, or system owner (if you are the database owner), and ask them to change your password.
Click Login. The database opens in a new browser window, showing the Home Screen.
To Log Out Of or Log Into a Database
You can explicitly log out of or log into a Heurist database via the log out / log in button at the top right of the Home screen.

webpage: Ian's Top Ten Tips id 715
Searching for a database
To quickly find a database in the database list, simply use the browser find mechanism (Ctrl + F/Cmd + F) to find part of your database name.
webpage: Clear Database id 787
No content
webpage: Clone Database id 512
webpage: Clone Database id 626

This option allows you to copy (create a clone of) the current database to a new one. The new database is identical to the old one in all respects (other than database name) including access (but is not automatically registered).
A copy of the database is created, with the prefix hdb_ and the name you gave it.
Note. Creation may take a while, dependent on database size.
Upon successful creation, details of the new database are displayed (similar to when you create a new database), including:
- Database name.
- Location of the upload directory (Filestore).
- Database Main Page URL (you can use this to create a hyperlink in your browser).
- A link to the Administration Dashboard page.
Open the database by either:
- Going to the Administration page, by clicking the supplied administration page link in the message.
- Going to the Main Page, using the supplied URL.
When the database login page displays, log in using the login details of the source database. You can change these login details in the new database (if required) once you have logged in. You will remain logged into the source database.
Important. If the database fails to load (this might happen for very large databases of 5000+ records) contact the Heurist Team.
webpage: Making a partial clone of a database id 706
Sometimes one needs to copy some part of a database to a new database eg. to create a playpen for a new user or to publish some data with no risk of accidentally exposing other records.
First however consider whether the requirement can be handled using the permissions (Workgroups / Users / Visibility) settings on the source database rather than duplicating data.
You will generally need to register the database (Design > Setup > Register) before cloning - this is required to assign new Concept IDs to anything defined within the database so that they can be imported into your new database. Only the system administratror can bypass this step.
Method 1:
Clone entire database (Admin > Database > Clone) and delete unwanted records from the clone
Method 2:
Clone entire database but set the No data checkbox

Filter to obtain the set of records in your Results (central panel) and export as XML (Export tab in the righthand panel).
Import the XML file into the new database.
Method 3:
If the source database is registered, it is OK simply to create a new database rather than cloning the existing database,
You can then import the XML file exported from the source (see previous method).
Lookups
webpage: External Lookups id 663
The lookup function allows the record edit form to search one or more external data sources (for example GeoNames or a thesaurus), return a set of records with properties, choose a record and assign its properties to fields in the record from which this function is called.
Lookups to a specific data source need to be programmed (see template file information at the end of this help page), and added to the Heurist source code (make a PULL request), but once programmed the lookup can be used with any database.
- External Lookups: External lookups allow your database to automatically import data from public databases on the web at the click of a button. For example, when you are entering data about a person, you might want to automatically look up their VIAF or ISNI record and create a link to it.
Configuration
The choice of data source and the allocation of fields is handled through a configuration form accessible from Design > Properties.


Example: TLCMap Map Finder database
In this case the lookup is to the TLCMap Australian Gazetter of Historic Places (AGHP)
This shows the popup prior to configuration.

Example: Libraries_Readers_Culture_18C database (Simon Burrows, Western Sydney University)
The user is editing a Work and needs to set Parisian Keyword and Project Keywords, involving lookup of external resources (the ECCO collection, accessible as a Heurist database) and/or using previously used keyword to suggest options.

<need the MPCE popup here>
New lookup functions
Please see documentation in recordLookup.js for instructions on how to write a new lookup function.
webpage: Lookup Functions id 677
You may use the following methods to lookup (search) in different database.
window.hWin.HAPI4.RecordMgr.search(request, callback)
request is object with keys:
db: database name
q: query string
detail: ids|header|details| array of field ids
limit
offset
This returns a response object as argument in the callback function
Status of request is in response.status
response.status == window.hWin.ResponseStatus.OK
Data is in response.data. To facilitate access you may concert it to recordset
hRecordSet(response.data)
file and image management
import images koma import images from urls
Move images to repository, move images from a repository, look up and link to images in a repository
index images and create multimedia records from images and other files
To do: need to be able to index images without creating multimedia records
Export CSV of images for external manipulation in a spreadsheet and re import, as well as assigning images two records IE linking images with records
Access to remote images including triple IF I IF
Use of tiled maps images within mapping capability
webpage: Media Files id 647
Heurist offers three different ways to upload media files (sound, image, video) into your database. All files are held in a private filestore directory on the server unique to your database. The files are hidden from the public by an obfuscated URL, allowing you to control precisely who can see which files when.
When to upload files, and when not to
How to upload files
Your options for uploading files are:
You can upload files one at a time into database records. If you are performing manual data entry in the datbase, this is usually the best option. For instance, as you add Persons to your database, you can add photos of those people to the 'Representative Image or Thumbnail Field' as you go. This is the simplest way to upload or link files to your database.
You can upload files in bulk from your computer: . If you have a folder of media files on your computer, you can upload the entire folder (or selections thereof) into your database's filestore.
You can import files in bulk from other websites if you have URLs for the files: . This is especially useful if you are migrating a database from a different system into Heurist. If you can download a list of all the images in your Wordpress, Drupal or Omeka database, then you will be able to import them all at once into your Heurist database.
How to use uploaded files
If you use method 2 or 3 to upload your files, there are three different ways you can link uploaded files to records in your database.
Index media files. This tool will automatically create a record corresponding to each uploaded file in your database. These records will be of the 'Digital Media Item' type. This is a good solution when you are building a database of media files. For example, if you a building a database of electronic music, then you might use the 'Digital Media Item' type to store recordings of electronic songs. In this case, you might like to rename 'Digital Media Item' to 'Digital Music Recording' or similar.
Link the files to individual records. If you want to insert the uploaded files into individual records, you can choose the 'Choose previously uploaded file' option in the file field dialog. In the below example, we can choose a previously uploaded file to serve as the logo for an 'Organisation' record in the database:

Insert the media files as content on the project website or within records. This option is useful when you are writing blog posts or content that will appear on a public website. If a record has a field of the 'Memo text' type, e.g. the content field for a 'Blog Post' record, then you can click the 'Media' button to add a previously uploaded image into the text:

The same tool appears in the website editor:

When to upload files, and when not to
Heurist can handle most common file types: images (png, jpeg etc.), music (mp3, aac etc.) and video (mp4). If necessary it can also handle more exotic filetypes, such as css stylesheets (.css) or web fonts (.wof).
However, just because Heurist can handle all these filetypes doesn't mean it should. Heurist is always available if you have no alternative, but there are some situations where you may wish to store certain files elsehwere, and then simple store a link/URL to that file in Heurist. Some common situations include:
Video or audio files: Although Heurist can serve video and audio files, there are dedicated website such as YouTube and SoundCloud which are specifically optimised to do this. You may find that your database and project website perform much better if you rely on YouTube or SoundCloud's superior streaming services, and utilise Heurist for its superior data management and organisation capabilities.
Files in public archives/repositories: If your project relies on manuscripts, images or similar data from a public repository such as Gallica, you may prefer to link to the public version of the file, rather than copying the file into your own database. This can maintain the integrity of your data, by clearing showing where the media file comes from.
Research data that should be archived and provided with a doi: Your funding body or research council may require you to publish your research data in a certain format or in a certain repository. Heurist provides a tool for archiving your entire database for deposit in a research repository, but this would provide a URL and DOI only for the entire database. If you wish to ensure that each file in your database is also properly stored and publicly available, then you may wish to place all your media files in a public repository such as Nakala or your institutional repository, and then put links to those files into Heurist.
webpage: Harvest Emails id 555
This feature allows you to set up an email account to which users of the database can forward emails they receive or copy emails that they send, in order to have them archived in the Heurist database. It imports emails received from specific email addresses (set in each user's profile) via a specified email server supporting IMAP.
Heurist will connect to an email server using the login details stored in the database properties (sysIdentification table) and retrieve emails received from specific email addresses (set in each user's profile). The emails are dissected and used to create Heurist records owned by that user. The email server must support IMAP.
Note. You must be a member the Database Owners group for this database.
Set up the following configurations:
Configure connection to IMAP mail server (per-database). Enter details for an email account to which users of the database can forward emails they receive or copy emails that they send, in order to have them archived in the Heurist database. Click Save then Back to Import. See also Database | Properties | Locations.
Configure email addresses to be harvested. In the Optional information | Incoming email addresses section, enter one or more address (separated by commas). When ready, click Harvest Email from IMAP Server. See also Profile | My User Info.
webpage: IIIF images id 781
IIIF images
IIF (International Image Interoperability Format) provides a standard for image interchange widely used by museums, art galleries and others in the GLAM sector.
To enter an IIIF image in a File field, enter the path to the image with /info.json at the end (see arrow below).
This loads the manifest (stored or generated as a json file).

The manifest is then used to display the file (or files), which can be opened in the Mirador IIIF viewer:

The useful thing about manifests is that they can define multiple imges, such as the pages of a manuscript,
which can all be viewed together in the Mirador viewer

Server functions
webpage: Interaction Log id 767
The Interaction Log is an advanced feature aimed at project managers and server administrators. It allows you to download a spreadsheet of interactions with the database, with time and user information. There are two main logs you can download:
Entire log – all interactions with the database, including adminstrative actions such as password resets
Record usage – only interactions involving records in the database, such as adding, modifying or viewing records
Currently, you can filter interactions by date and workgroup.
One major use case for the tool is to view interactions with the project website and blog. You can use the 'record usage' blog to see which blog post records have been accessed when, for example.

webpage: Database Usage Statistics id 527
webpage: Fast text searching id 690
In order to support word searches on constructed record titles and in text/memo fields in large text databases, you can enable full text indexing as follows:
CREATE FULLTEXT INDEX rec_Title_FullText ON Records(rec_Title);
CREATE FULLTEXT INDEX dtl_Value_FullText ON recDetail(dtl_Value);
For a database approaching 1M records this can cut search times down from tens of seconds to a couple of seconds,
Heurist also has a Lucene index (based on ElasticSearch) which at time of writing - end 2020 - is not used for filters.
webpage: Installation on Windows id 707
Although Heurist is primarily intended for Linux servers, a number of people have installed it under Windows. However the installation scripts are configured for bash under Linux, althoguh the actions are so simple that they are easily replicated manually in Windows.
Systemik Solutions in Sydney have installed a Windows server for an archaeological consulting company. Their chief programmer, Yang Li, has kindly provided the following notes.
I referred to the install_heurist.sh and manually ran the steps which are relevant. Some commands like chown, chmod, and ln from the install script can be just ignored as they don't apply to Windows. Once the heurist code was in place I ran the following manual steps:
wget ./DISTRIBUTION/HEURIST_SUPPORT/external_h5.tar.bz2 Download this file and put it in the code root and rename it to external.
wget ./DISTRIBUTION/HEURIST_SUPPORT/vendor.tar.bz2 Download this file and put it in the code root. I omitted this as I just ran the composer install command.
wget ./DISTRIBUTION/HEURIST_SUPPORT/help.tar.bz2 Download this file and put it in the code root.
$2 mkdir /var/www/html/HEURIST/HEURIST_FILESTORE$2 cp /var/www/html/HEURIST/$1/admin/setup/.htaccess_for_filestore /var/www/html/HEURIST/HEURIST_FILESTORE/.htaccess
Create the file store directory and move the .htaccess file
$2 mv /var/www/html/HEURIST/$1/move_to_parent_as_heuristConfigIni.php /var/www/html/HEURIST/heuristConfigIni.php$2 mv /var/www/html/HEURIST/$1/move_to_parent_as_index.html /var/www/html/HEURIST/index.html
Move the config and index file.
You may find that vendor packages are missing. You could either download the vendor package or run the composer install yourself. Then probably edit php.ini to hide "Deprecated" warnings.
Slightly older notes, these issues may have been fixed by the time you use this:
1 The file store path is not quite friendly with the Windows style path. I've tried a number of styles and finally found one working. One suggestion is to use realpath() to normalise the path rather than do the manual modifications on the leading or trailing slashes. Because in Windows there's no leading slash at all.

2 The following code in file "heurist/external/jquery-file-upload/server/php/UploadHandler.php", as in my case the path is neither of them. I'm commenting out these lines on the server for the moment, as it's popping errors when uploading files.

webpage: Migrating between servers id 688
It is quite straighforward to migrate a database from one server to another via the XML file export/import
(this also transfers images and other files which it obtains from the source database through obfuscated URLs).

Notes:
This method can also be used to migrate subsets of records to any other database or to combine databases.
This method requires version 6.0.4 or later - install current version using the update script.
You can continue to run the old version in parallel, it will not be affected in any way by the update script.
Databases upgraded to version 6 will still work perfectly fine in version 5.
Procedure:
Register your database if not already registered ( Design > Register)
Select all records (Saved filters > All date order)
Export as XML (Publish > Export | XML). Default choice for pointer-following.
Right click and Save-as once the XML file finishes loading in the browser.
Create a new database (Admin > Database | New) or use any existing database as the target
Import the XML file (Populate > Upload files | XML). Select synch structure first, if this button shows, then import.
If you wish to check the results:
Check that a sample of images are rendering. The XML import depends on access to the images (and other files) in the original database via an obfuscated URL, so things can go wrong if there are problems of file ownership. As far as we know this isn't a problem on servers maintained by the Heurist project.
Check a small random sample of records of each type to see that they are rendering exactly the same information between the source and the target databases. It is best to do this by opening the records in edit view as it is slightly more sensitive to errors in term definitions than Record view. If the data is correct in Record view but does not show in the editor, edit the field definition.
Export each entity type in turn from the old and the new databases as CSV files selecting all fields including pointer fields, arrange the output side by side, sort as required, and check for differences in the data (pointer fields will have different values as the ID is local to each database, but if the pointers are there and a couple of records check out as having the right pointer targets, you can assume all is well).
What this workflow does not do is:
Transfer images which have been uploaded and used in wysiwyg text eg. as part of the CMS website, as the XML only transfers data records and these images are not directly associated with a record. If the images have first been imported as multimedia records and indexed, or were uploaded while editing a record, then they will be transferred.
Transfer saved filters. These will need to be re-created manually in the new database.
Transfer custom report formats. These can be exported from the Custom Reports tab and reimported in the same tab in the target database. Some editing of the imported report may be required.
Maintain the ownership, addition and modification dates of the records - they will all be set to the user who imports them and the date of the import. There is currently no way of maintaining ownership and modification dates except by using Publish > Archive package and loading the SQL dump and file structures in the backend. In a later version we plan to include the owner and update dates in the XML
Ch 11: Basic server management
This chapter outlines some useful procedures for managing Heurist servers, including the servers managed by the Heurist development team / Heurist Network.
General observations
Heurist is designed to run on any Linux server
Emergency Unix commands
These commands may depend on the Unix version and the way MySQL is configured, refer to system documentation or ask AI for instructions if these do not work
- To restart MySQL (commonest form of failure eg. if disk space exhausted or stuck query). Works on HeuristRef.Net (OVH Cloud), HeuristAU.net (Intersect server) and Heurist.Huma-Num.fr
sudo service mysqld restart
Note: Sometimes restart does nothing (no response). In that case first use stop, then use start - To restart Apache web server
sudo apachectl restart
Handy Unix commands & other useful things
- Disk usage of subdirectories, largest first :
sudo du -sh /var/log/*/ | sort -hr - Delete files older than 30 days :
/usr/bin/find /var/log -maxdepth 1 -type f -name '*.gz' -mtime +30 -delete
(maxdepth 1 will go down one level into immediate subdirectory) - The MySQL password (for the root and/or heurist user) is set in the user table of the mysql database,
and configured in the /var/www/html/HEURIST/heuristConfigIni.php file for all instances, which may be overridden for a specific instance by /var/www/html/HEURIST/hx-xxxxxx/configIni.php.
Protocol for full update of Heurist servers
On HeuristRef.net (Heurit development team)
These are commands to be run from the unix interface accessed through SSH
Update the version number as required in the hx-alpha code on the reference server (HeuristRef.net)
and commit to the gitHub repository
cd /var/www/html/HEURIST
cd h7-alpha Change to the current development version (or beta)
sudo nano configIni.php Update the version number (also update on gitHub)
sudo ./copy_distribution_files.sh h7-alpha Update the development version distribution tarfile
sudo ./copy_distribution_files.sh h7-test Update the test version distribution tarfile
cd .. Change back to HEURIST directory
sudo ./copy_h7-alpha-to-heurist.sh Update the ' production' version from h7-alpha
cd heurist Change to the ' production' /heurist/ directory
sudo ./copy_distribution_files.sh heurist Update the production version distribution tarfile
Contents of /var/www/html/HEURIST/DISTRIBUTION :
-rw-rwxr--. 1 apache heurist 15980782 Jun 5 06:57 heurist.tar.bz2
-rw-rwxr--. 1 apache heurist 2506 Jun 5 06:57 verifyInstallation.zip
-rw-rwxr--. 1 apache heurist 6472 Jun 5 06:57 copy_distribution_files.sh
-rw-rwxr--. 1 apache heurist 15947835 Jun 5 06:55 h7-alpha.tar.bz2
-rw-rwxr--. 1 apache heurist 15954804 Jun 5 06:05 h7-test.tar.bz2
-rw-rwxr--. 1 apache heurist 9324732 Jun 5 00:45 h8-alpha.tar.bz2
-rwxrwxr--. 1 apache heurist 6333 Jan 16 09:44 update_heurist.sh
drwxrwxr-x. 2 apache heurist 75 Nov 25 2025 HEURIST_SUPPORT
On other Heurist servers
This protocol is that used on the servers managed by the Heurist development team as of 2026 (Heurist.Huma-Num.fr, HeuristAU.Net and Greek NHRF server)
The same principles can be applied on any server, but this should be automated (at least for h7-alpha)
through a cron setting (typically edited with sudo crontab -e)
# Update heurist alpha version from reference server - build runs daily at 00:30
# Note: 'dummy' parameter replaces sudo param as some servers eg. Huma-Num do not accept sudo without a tty
# This does not update the support libraries, need to run manually without "codeonly" to do this
30 00 * * * curl -l https://heuristref.net/HEURIST/DISTRIBUTION/update_heurist.sh | bash -s h7-alpha dummy codeonly >> /var/www/html/HEURIST/h7-alpha_install.log 2>&1
# precautionary fix of group ownership and permissions
00 01 * * * chown -R apache:heurist /var/www/html/HEURIST
00 01 * * * chmod -R g+rwx /var/www/html/HEURIST
00 01 * * * chown -R apache:heurist /data/HEURIST_FILESTORE
00 01 * * * chmod -R g+rwx /data/HEURIST_FILESTORE
Omitting codeonly at the end causes the support files to be updated - this is generally unnecessary and is only needed once, as all versions share the same support files (we make sure that is always the case, even if there are copies of different versions of the same library)
Update the test version including the support files
curl -l https://HeuristRef.net/HEURIST/DISTRIBUTION/update_heurist.sh | bash -s h7-test sudo
Update the code only for h7-alpha:
curl -l https://HeuristRef.net/HEURIST/DISTRIBUTION/update_heurist.sh | bash -s h7-alpha sudo codeonly
Copy h7-alpha to heurist:|
cd /var/www/html/HEURIST
sudo ./copy_h7-alpha-to-heurist.sh
or alternatively:
cd /var/www/html/HEURIST
chown -R apache heurist
chgrp -R heurist heurist
rm -Rf heurist-temp
cp -R h7-alpha heurist-temp
rm -Rf heurist-prev
mv heurist heurist-prev
mv heurist-temp heurist
chown -R apache heurist
chgrp -R heurist heurist
rm -Rf heurist-temp
Remember to update the version number in configIni.php
and commit to gitHub with a title suh as "Version 7.?.? distribution"
Server Manager functions
Heurist's web interface includes a restricted menu (Admin > Server Manager) which is accessed through a special password set in the heuristConfigIni.php file. This allows the managers of a particular instance to carry out operations across all the databases on the server, including some general integrity checks and maintenance operations, obtaining lists of users and the databases they are attached to, statistics about usage and disk space, bulk mailing users etc.
Since this is only available to the server managers, and since the functions are relatively self obvious and include some explanation when selected, we will not bother with further documentation.

Log files and performance
There are often numerous timestamped tables such as:
import20260709033509.ibd
import20260710034725.ibd
import20260711005435.ibdThese are import-working tables and may collectively consume substantial space across thousands of databases (in practice on Huma-Num in July 2026 they only consume a few hundred MBytes). Investigate them with:
SELECT TABLE_SCHEMA, TABLE_NAME,
ROUND((DATA_LENGTH + INDEX_LENGTH) / 1024 / 1024, 1) AS size_mb
FROM information_schema.TABLES
WHERE TABLE_NAME REGEXP '^import[0-9]{14}$'
ORDER BY DATA_LENGTH + INDEX_LENGTH DESC;They should only be dropped after confirming that Heurist no longer needs them.
To see the largest tables across the server :
Note: on the Huma-Num server this times out. It's probably a good idea to focus on rec_Details which is generally the largest table i nteh database. Records could also be large.
SELECT TABLE_SCHEMA, TABLE_NAME,
ENGINE,
ROUND(DATA_LENGTH / 1024 / 1024, 1) AS data_mb,
ROUND(INDEX_LENGTH / 1024 / 1024, 1) AS index_mb,
ROUND(DATA_FREE / 1024 / 1024, 1) AS free_mb
FROM information_schema.TABLES
ORDER BY DATA_LENGTH + INDEX_LENGTH DESC
LIMIT 50;Performance
Nothing in the filenames suggests an obvious InnoDB performance fault. The useful checks are:
SELECT VERSION();
SHOW VARIABLES WHERE Variable_name IN
('innodb_buffer_pool_size',
'innodb_file_per_table',
'slow_query_log',
'long_query_time',
'innodb_temp_data_file_path');
SHOW GLOBAL STATUS WHERE Variable_name IN
('Innodb_buffer_pool_reads',
'Innodb_buffer_pool_read_requests',
'Created_tmp_disk_tables',
'Created_tmp_tables');The main performance consideration will usually be whether innodb_buffer_pool_size is suitably matched to the server’s RAM and workload—not reducing ibdata1. The slow-query log is valuable here: analyse it before discarding the old contents, because it can identify the queries and indexes responsible for poor performance.
Log rotation
Immediate cleanup: rotate the slow-query log
First check whether it is already managed:
sudo grep -R "slow.log\|slow_query" /etc/logrotate.d /etc/logrotate.confIf not, create /etc/logrotate.d/mysql-slow containing:
/var/lib/mysql/*-slow.log {
weekly
rotate 12
size 100M
compress
delaycompress
missingok
notifempty
create 640 mysql mysql
sharedscripts
postrotate
/usr/bin/mysqladmin flush-logs >/dev/null 2>&1 || true
endscript
}Do not simply delete the active slow log: MySQL may retain the open file handle, meaning the disk space is not actually released until the log is reopened.
Test the configuration with:
sudo logrotate -d /etc/logrotate.d/mysql-slowCh 07a : Recoding and verification
Introduction
In this chapter we will look at ways that data in the database can be verified for consistency and modified through batch processes.
Design > Verification
TODO
Recode menu
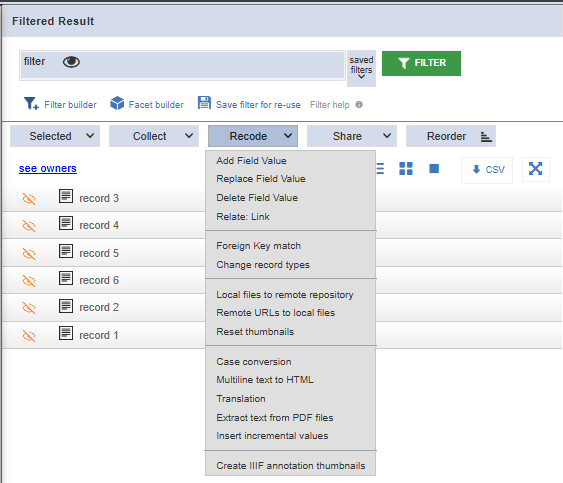
Add field value?
TODO
Replace field value
TODO
Delete field value
TODO
Relate : Link
TODO
Foreign key match
TODO
Change record types
TODO
Local files to remote repository
TODO
Remote URLs to local files
TODO
Reset thumbnails
TODO
Case conversion
TODO
Multiline text to HTML
TODO
Translation
TODO
Extract text from PDF files
TODO
Insert incremental values
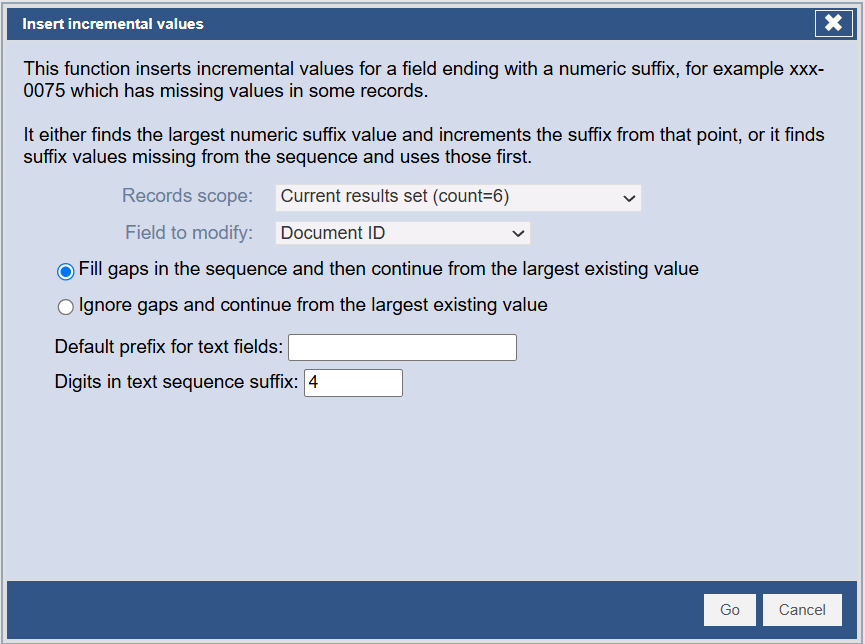
This function is designed to fill in or extend values which increment by 1. This can be applied to text fields as well as to numeric fields. It is typically used to create sequences of identifiers which are more appropriate to the users' needs than the simple sequential numbering of the Heurist identifiers (H-IDs), although the use of the latter are strongly recommended wherever possible as they are unique and an unequivocal identifier for every record (even across all registered databases provided they are prefixed with the database ID - see chapter ????).
The function will automatically pick up an existing prefix in a text field, so if there are values abcd-1, abcd-2, ... it will generate values with a prefix abcd- followed by the next available number. If multiple prefixes are used you should specify the prefix you want, otherwise the prefix is unpredictable (generally the last one used).
By default this function left pads numbers with zeroes (default 4 digits), so you will get values such as abcd-0008 etc. but this can be changed with Digits in numeric suffix (text fields only)
Create IIIF annotation thumbnails
TODO